Better Luggage Lighting
Joe Angell
Back when my luggage compartment light worked, I remember it being pretty pathetic, with one warm bulb trying to light the entire trunk. The bulb burned out a few years back, but I never got around to fixing it. I finally decided to do something about that.
Instead of just putting in a new LED bulb, I thought I’d add LED strips to the trunk. I’d bypass the original lighting and wire the existing switch into my strips.
Choosing LED Strips
I first tried an inexpensive LED strip from Amazon. A 5m long strip of cool white LEDs (I prefer cool lighting) was $12, so I decided to give them a try. The LEDs are spaced pretty far apart, but they work and are fairly bright. You have to carefully solder wires onto the tabs at the end of the strip.
More recently, Adafruit started selling 1 m LED strips for $12. They’re very bright with a much higher density of LEDs. This is pretty much the perfect length for my project, so I switched to them soon after. They also come pre-wired with pigtails on both ends.
Both kinds of LED strips can be cut at marks found every few inches along their length, making it easy to tailor them to a specific application, and thus only one strip was needed for this project. This was especially handy for the Adafruit strip, since once you cut it nearly in half you already have pigtails on both ends.
Both strips run on 12v, and can thus be wired directly to the car’s electrical system. They are available in warm and cool color temperatures, so if you don’t like cool lights like I do you can get warm ones instead. Finally, they have a 3M adhesive backing, and can easily be stuck to the trunk surface.
The Adafruit LED strip. 1m long, high density of LEDs.
The LED strip from Amazon. 5m, but a much lower density of LEDs, and I only needed one meter.
Mounting and Wiring
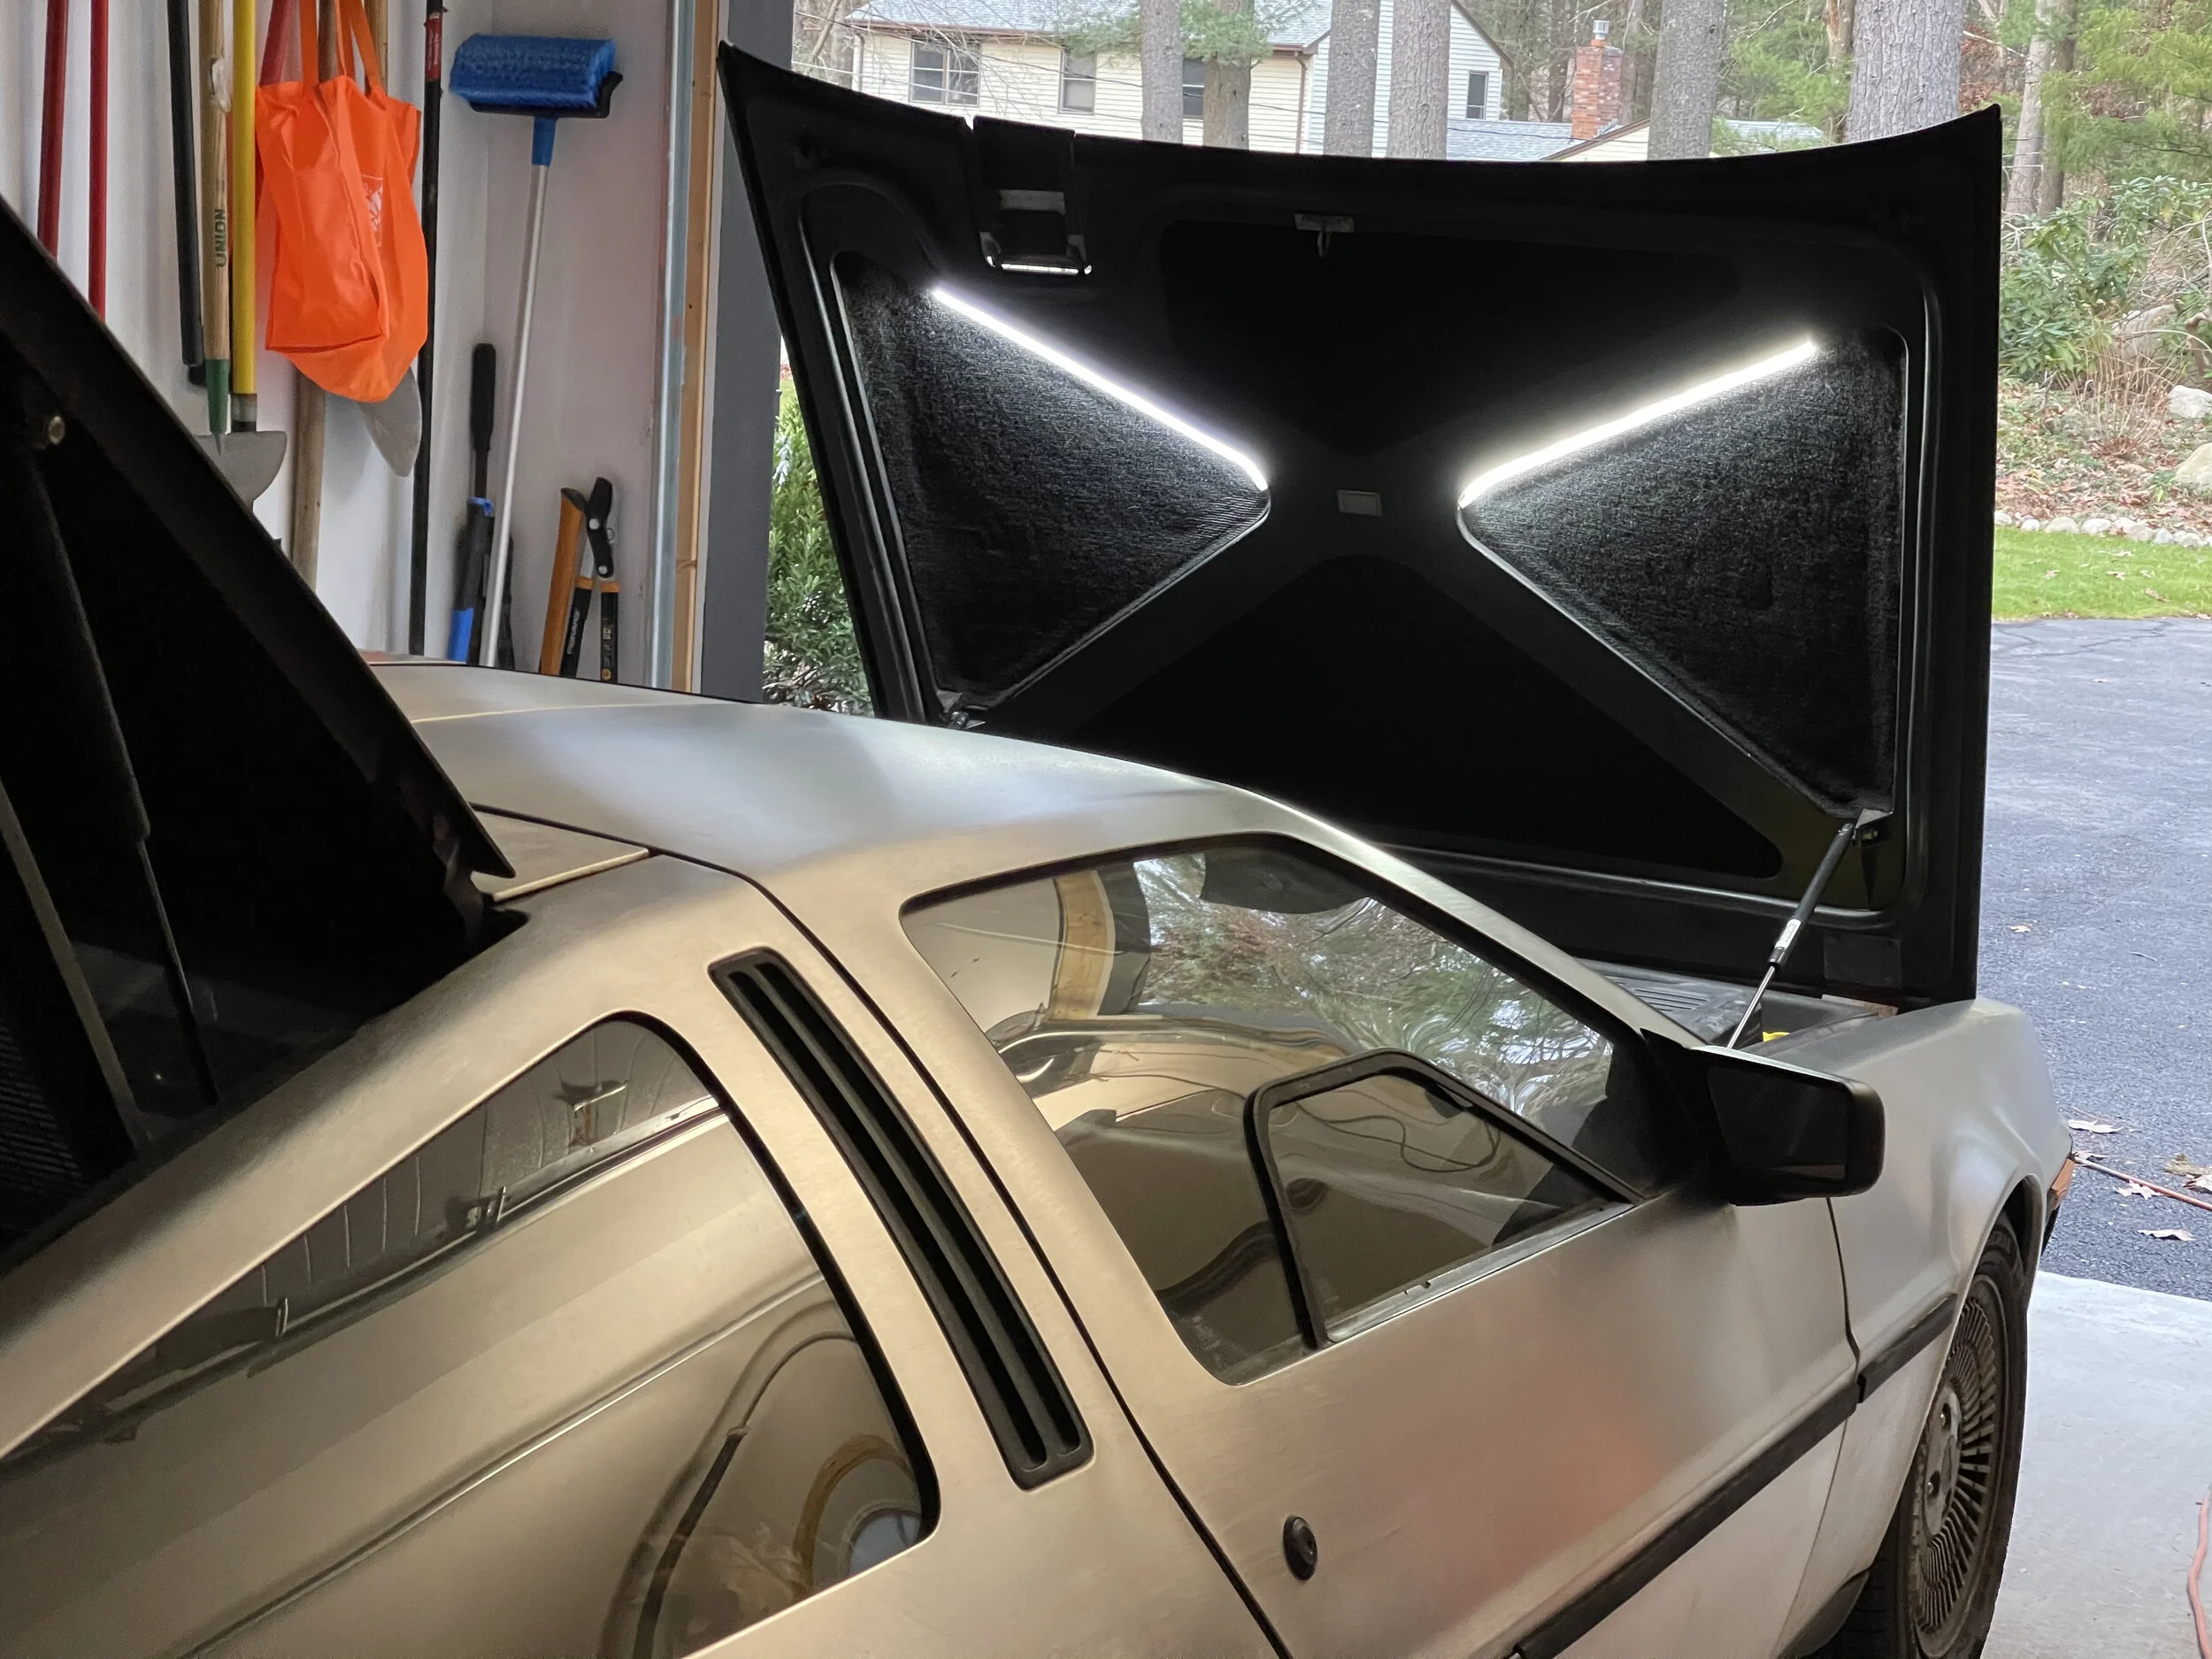
I decided to mount the strips along the upper edge of the “X” inside the trunk, aiming towards the front of the hood, which is downward when the hood is open.
For power, it was simplest to just reuse the original light’s connector. The old light pops out with a bit of effort, revealing the blade connectors to the electrical harness.
I could have designed a new cover to replace the original light, making it a bit thicker with “arms” that would conceal the wires to the LED light strips, but I decided to make a minor destructive alteration to the hood instead: I drilled two small holes towards the center of the “X”, and ran the wires through that, soldering each side together to a new wire with a new blade connector that plugged into the harness. I replaced the original light to cover the hole in the hood, although it isn’t powered anymore.
The strips themselves are just stuck to the hood with their included adhesive backing. It seems plenty strong and hasn’t failed on me yet.
The original light removed from the hood, with the harness connectors visible in the hole.
Carefully drilling the driver’s side hole through the “X”, though which I would run the wires from the light strip.
After soldering the two wires to the simpler LED strip. The Adafruit strip already has pigtails, and doesn’t require this step.
The Adafruit light when off, showing the density of the LEDs.
The Adafruit light when on.
Switch Problems
The lights were surprisingly dim when I powered them on. At first I thought it was the lights themselves, but connecting them directly to the battery showed they were quite bright indeed. I fiddled with the switch, and found that when I pulled on the plunger the lights got properly bright.
I removed the switch to inspect it. This was more difficult than I expected, and I had to pry it out with a screwdriver, then finally force it free. It was stuck in there pretty good. Note that the wires run to the right of the switch, not straight out the back, so be sure to pry it the right way when removing it.
With the switch out, I removed the back of its case. There are two small clips that can be released with a jeweler’s screwdriver while carefully prying up on the cases. Of course, when finally it comes loose the back flies off and the spring shoots out, never to be seen again. Luckily I had a spare spring from an assortment kit. A 9/32” by 1/2” compression spring fit perfectly.
The switch design is simple and effective. There are two flat posts that connect to the blade connectors in the harness. The far ends of the posts hook inwards. The plunger has a metal ring that contacts the hooked bits when full extended by the spring. I think the spring was failing in my switch, which resulted in a poor electrical connection when the spring was extended. I cleaned the contacts a bit before reassembling with the new spring. After reassembling it with a new spring, it seems to be working fine. A new switch is about $18 from a DeLorean vendor and a week’s wait for shipping, so being able to fix it in place was quite nice.
The location of the trunk light switch at the corner of the hood.
I got the switch out this far, then thought it was stuck. Turns out I just had to pull harder. Note that the wires run out the right side of the switch.
The disassembled switch, sans spring.
A view into the switch, showing the metal contacts. The ring on the plunger is rather dirty here.
The re-assembled switch and a spare spring.
Final Results Much Brighter!
The LED strip light is much brighter than the original lighting, and it is far easier to see what I have in the trunk, should I break down and need to repair the car on the side of the road or whatnot. I definitely recommend doing this if you aren’t happy with your trunk lighting and don’t mind drilling two little holes in your trunk.
The final installation (except for the hole in the middle; I didn’t put the old light back in yet). The lights are nice and bright.
The actual final installation.