Stuck in Park: Transmission Linkage Bracket
Joe Angell
A few days after my MegaSquirt cabling issue, I went to the grocery store again and found I was stuck in Park. I could move the shifter all I wanted, but the gear wouldn’t change.
I was sure it was a problem with the linkage. While I waited for a tow I pulled the shifter apart, but you can’t get to the linkage from above. It’s in a hole in the frame under the exact center of the car — you need to get it up and get under it to inspect it.
Getting It Home
Towing it was itself tricky. You can’t tow a DeLorean backwards without removing the louvers, but my rear wheels were effectively locked. The flatbed wrecker couldn’t easily get the car on, so an older-style tow truck came instead. He had dollies that he could put under the rear wheels to work around the parked transmission, allowing him to tow it forwards all the way home.
Getting the car’s wheels onto the dollies so it can be towed in Park.
All hooked up and ready to go.
Getting Into the Garage
The next step was getting the car into the garage so I could jack it up on a smooth surface. My garage is still under construction, and there’s a 4” lip between the floor and the ground until we can get the new driveway in.
The garage is 31’ deep, the odd number being mostly to get around a large boulder that would have been in the way of the foundation. My Subaru Outback is 16’ long, and the DeLorean is 14’ long — just enough room to fit both cars, especially if I push the DeLorean’s nose over the edge a little.
I hooked up a tow chain between the two vehicles, and put simple wheel dollies under the DeLorean’s rear wheels. To get over the 4” lip, I laid down some not-really-strong-enough 4’x8’ plywood and drove the Subaru up it. This worked great until the dollies under the DeLorean’s wheels hit the boards. The casters were too small and just pushed the plywood, rather than rolling on top of it. The solution was to raise the car, slide the plywood under the wheels, and lower the car back onto the dollies. I was then able to tow the DeLorean into the garage without incident.
The next trick was getting the Subaru out of the garage. I only had a few feet to work with. I pushed the DeLorean as close to the front of the garage as I dared, then did a 15 minute dance, of shimmying the Subaru forwards and backwards, turning the wheel as I went to slowly edge it further and further out from behind the DeLorean. Once I was clear I was able to simply back it down the plywood ramps and out the other door.
This trick wouldn’t have worked a few weeks later, when my automative lift would be installed — the lift post would be directly in the way of getting out through the second bay. Further in the future when the driveway is installed I can just push the car into the garage.
Towing the DeLorean in with the Subaru.
The dollies after on the plywood, which was done by jacking up the car and sliding the plywood under it.
A carabiner was used to shorten the chain, and then shorten it again once the cars were both inside.
Both cars in the garage, ready to be unhooked.
The car fully in the garage and ready to be worked on.
Tire tracks on my new garage floor showing all the shuffling necessary to get the Subaru out.
Getting To Work
I raised the car using a floor jack and rested the wheels on the pallets I’d previously built. Once under the car car the problem was clear: the bracket that holds the linkage to the frame had fallen off. Moving the shifter now simply bent the cable, rather than actuating the cable.
I believe this was starting go give for a few weeks. I had lost the ability to manually enter 1 or 2, with it just springing back to drive. The springiness was from the cable flexing. I had planned to look at this after the link was installed.
This specific problem is probably unique to my car. The nuts that hold the linkage bracket bolts to the frame are supposed to be welded in place, but they didn’t do that on the early cars. When I first did my engine swap I had this same problem, and worked around it by drilling and tapping holes that line up with those in the frame. This replaced the nuts and worked fine for over a year.
I think that when we resealed the transmission (which required removing the linkage bracket and reinstalling it again), the threads in the aluminum were damaged or stripped, which caused the linkage bolts to loosen and fall out.
Worse, the bracket and the spacer block were both missing. I found part of the spacer block inside the frame, but it was only about half the thickness of the full block. While the bracket is still available (part 101924), the block (part 101923) is not.
Since I didn’t know the exact height of the block, so I used my 3D printer to create a series of LEGO-like stackable blocks that I could combine to get the right size. I also designed and printed a new nut carrier, which would hold the two M6 nuts, which would replace the threaded aluminum piece from before. This was built so that the nuts had to be pressed in (by clamping it in a vice), and with a bit of backing behind it so that the nuts wouldn’t fall out as the bolts were screwed in. I ordered a replacement bracket from DeLorean Texas, and bought M6 new bolts from 40mm to 55mm from Home Depot and Lowes, and got to work installing everything when it arrived.
Actually lining everything up is a huge pain. You’re fiddling around with one hand in the frame cavity trying to hold the bolts in the holes and the stack of spacers, linkage and bracket, while the other tries to line up the nut carrier, all while lying on your back under the car. Even though I’d added some backing to hold the nuts on the carrier, I didn’t make it thick enough and the bolts pushed them out. I solved this by wrapping them them in electrical tape, which I think punched holes in for the bolts. Even then I couldn’t really get the top bolt through, just the bottom one.
After at least an hour under the car I decided that it was good enough for now and that I’d fix it properly once I could get the car on a lift in a few weeks. Even so, I’d used blue LockTite to ensure that the good bolt wouldn’t come out again, or at least would require more vibration before it did.
To make it easier to align the carrier in the future, I used a silver paint marker to outline the edge of it. It’s surprising just how much that helps.
Those holes in the frame are supposed to have a couple of bolts through them that hold a spacer block and a bracket that secures the linkage to the frame. Without those, the shifter cable flexes and the transmission can’t be shifted.
Part of the original block (right) and the LEGO-like stackable blocks I printed (left).
The original aluminum design (bottom), and the new plastic nut holder (top).
After the nuts pushed out while trying to line up the bolts, I wrapped them in electrical tape to keep them in place.
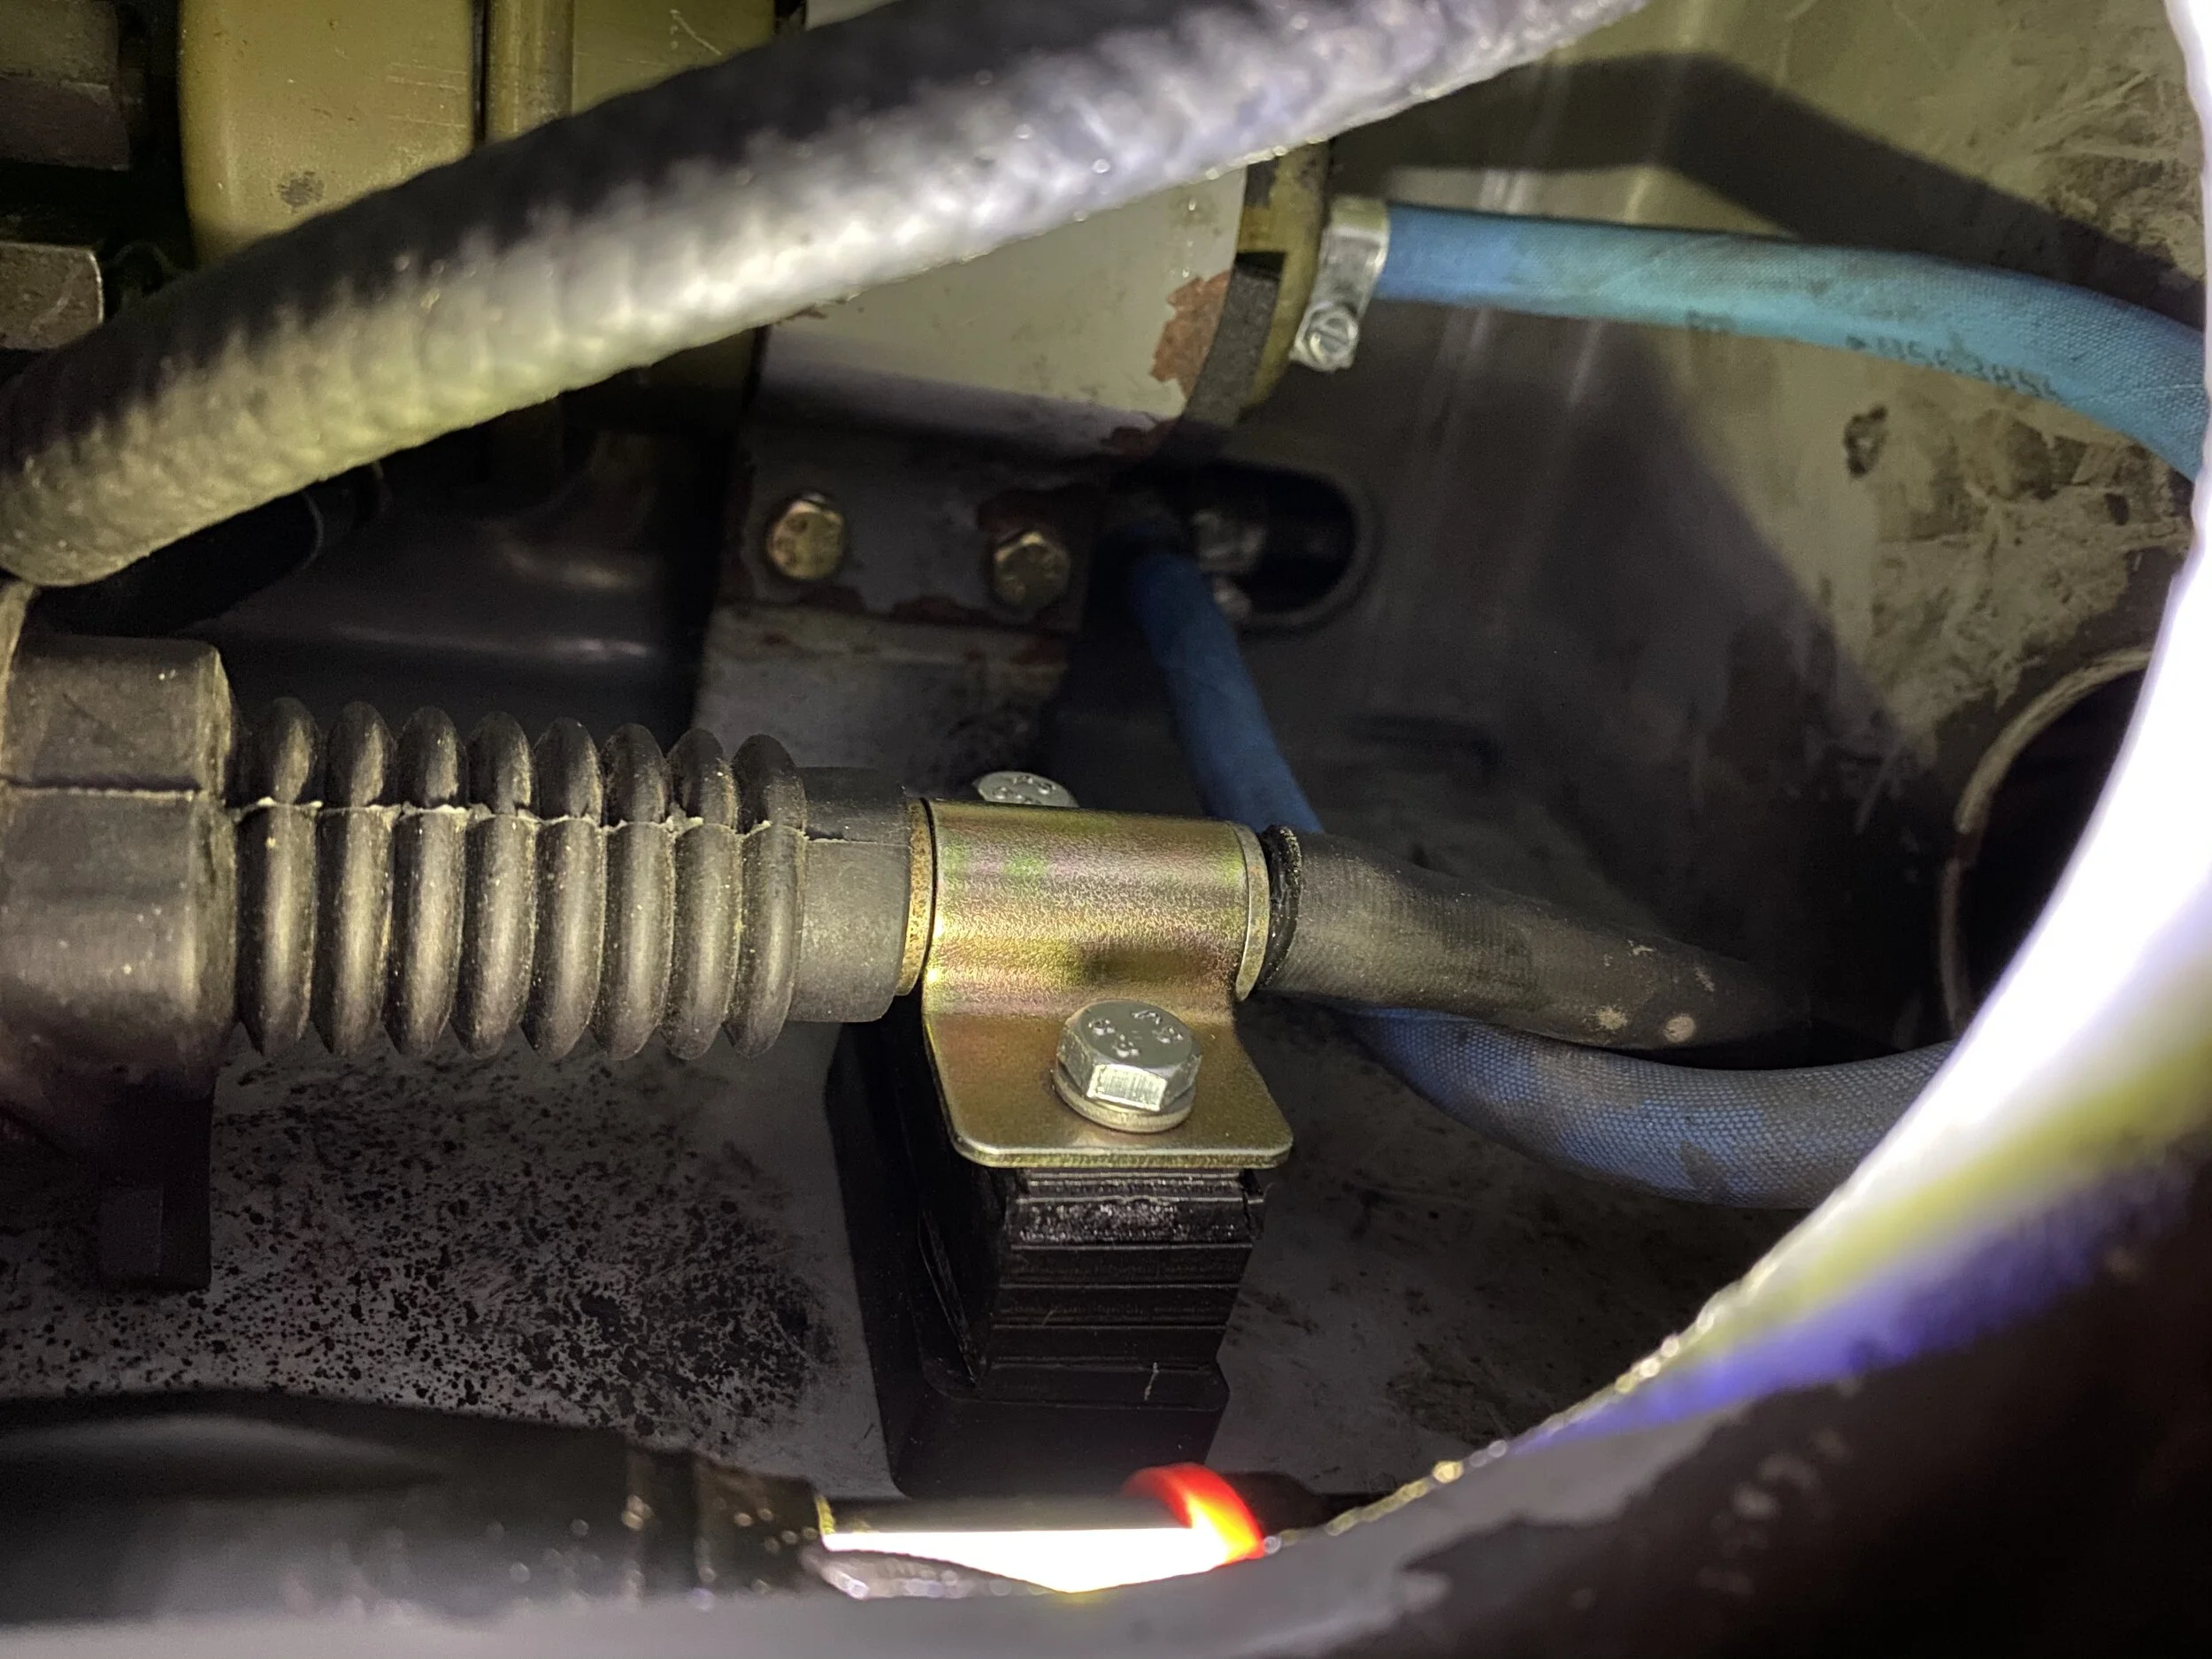
The plastic carrier installed. The silver paint marks help align the carrier; the more distant marks are for the slightly longer aluminum carrier.
Final installation. Although I had trouble getting the top bolt into the carrier. I’ll look again once my lift is set up.