Tail Light Terminal Strip
Joe Angell
Over the years, more and more accessories have been added to the tail light wiring in my car. At the moment this includes:
HCSL/CHMSL (High Center Stop Light/Center High Mount Stop Light) — a third brake light, wired to the passenger side brake light and mounted on the louvers. Purchased from Special T Auto, this is actually from a Corvette C4.
Backup camera, connected to an accessory-switched 12v source run from the cabin through the driver’s side pontoon, and grounded to the passenger side tail light connector.
Backup camera reverse trigger, connected to the passenger side reverse light to automatically turn on the backup camera when in reverse.
Backup sensors connected to the passenger side reverse light. Currently disconnect due the sensors picking up the exhaust smoke all the time, but the wiring is still there.
Hidden antenna in the bumper, connected to accessory-switched 12v power and ground on the passenger side.
This has led to a mess of taps and solder joints on the passenger tail light connector wiring. I went about cleaning all that up with a terminal strip.
Design
I probably could have just bought a strip, but I decided to print one. I made it in two parts: the main body and a backing/base. The main body has hexagonal holes in the bottom for M6 bolts, whose shafts poke through to act as posts for ring terminals. There are also partitions between the posts to avoid the wires twisting around and shorting against each other between posts. The backing is the other part, just a simple with embossed lettering to label each post.
I screwed up my first print of the main body slightly, forgetting to account for how much the first layer spreads out. This meant that the hex heads of the M6 bolts wouldn’t quite fit. I overcompensated by making the holes too large on my next attempt, but rather than doing another print I just filled the space around the heads with Krazy Glue. This kept the bolts from turning and allowed them to do their jobs as posts.
Installation
I removed the passenger side tail light, marked out where the terminal strip would go, then drilled two 5/8” holes in fascia backing. I then interested an M6 rivnut into each. I had to use two different rivnut tools for this due to space, a bolt cutter style one and an offset squeeze-style one. I could have simply removed the fascia to get better access and used only one too, but this saved me the trouble.
The strip easily mounted to the fascia backing with two M6 bolts and an 11mm socket. Next came the wiring.
For the most part, this involved cutting off the soldered and tapped connections and crimping on new ring terminals. I only had blue ring terminals available, so to handle thinner wires I stripped extra insulation off and folded the wire back on itself once or twice to thicken it up so that the terminal would grab it.
A couple of wires need to be extended. I happened to have some almost correctly colored wire, so I used that as best I could. The reverse light wire was broken off almost right at the connector, but I was able to add a new run from there to the terminal strip,
The wires from the harness were cut and extended to run to the strip, then another wire run from the strip to the connector. This means I modified the original harness, but I’d already modified it, so it wasn’t a big deal.
The 12v post isn’t connected to the harness, but rather to a purple wire I ran from the accessory relay in the cabin. This is used for backup camera and hidden antenna power.
After the ring terminals were installed, all that was left to do was slip them onto the posts and spin on a nut to lock them in place. I managed to forget a reverse wire, but that was found when I tested everything before I put the tail light back in and was quickly rectified. I didn’t yet have any wires for the reverse light, but I kept it handy for future use.
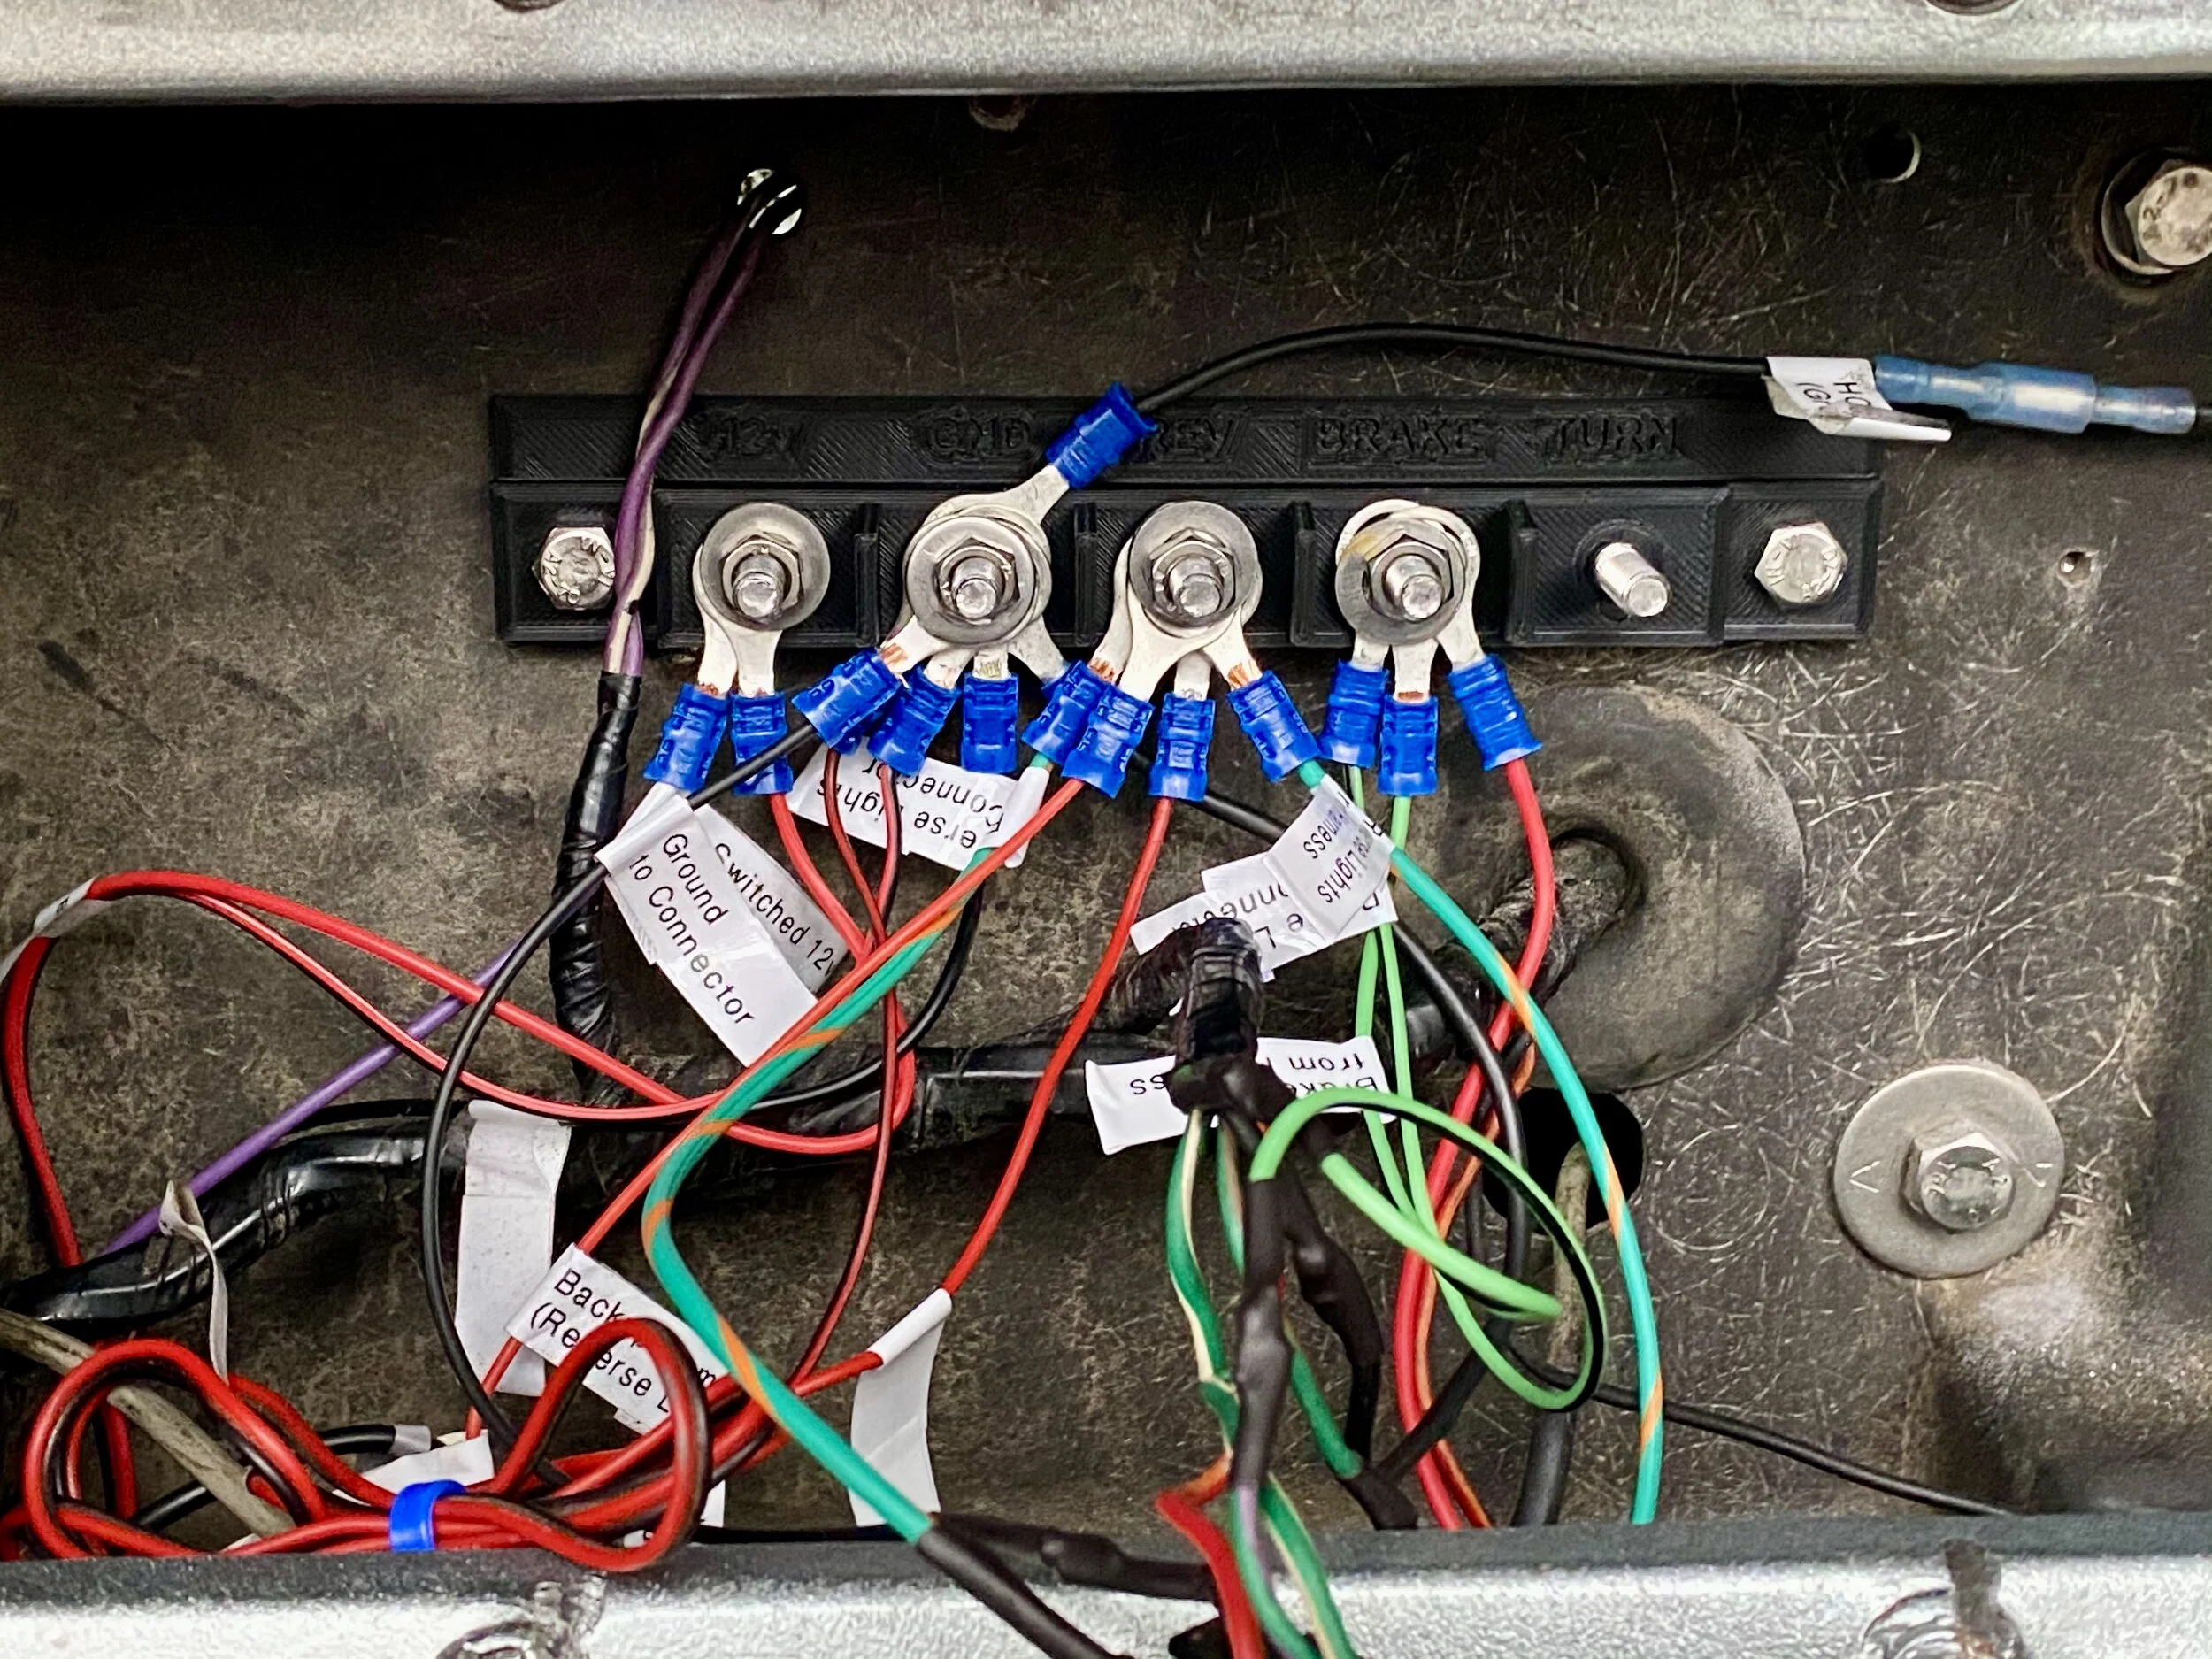
Finally, all wires were labeled as I attached the ring terminals. This makes it much easier to figure out what goes to wait when I look in here again in six months.
The two kinds of rivnut tools I used.
The rivets installed on the fascia backing. The purple and purple/white wires go to the old engine bay light.
The final terminal strip installation with all of the wires attached to their respective posts.
Results
I now have a much cleaner, more organized and easier to maintain, and less likely to have something break off or otherwise fail on me.