Fixing First Drive Issues
Joe Angell
I finally had my first drive on Christmas Eve, but there were some issues to fix before I could bring it home.
Bad Brakes: Flushing and Bleeding
The brakes were very, very soft. I had tested the brakes in the garage to make sure I had any brakes at all, but on the road it was clear that they were lacking. The car would eventually stop, but very slowly. For a quick drive around the block with no other cars around it wasn’t a problem, but I didn’t dare go any faster or on any busier roads.
Checking the Fluid
The problem here was simple enough — the brake fluid was low. This was immediately obvious after popping the cap off the reservoir in the luggage compartment.
The cap has an electrical connector attached to it. This goes to a float inside the top of the cap that is supposed to light up the “brake” light in the instrument cluster when you’re low on brake fluid. This is the same light that goes on when the emergency brake is engaged. The light works fine for me when I pull the e-brake, but I got nothing from the brake fluid level sensor. The part (109041) is no longer available, so there’s not much I can do about it. I don’t actually know if it ever worked, but I’ll keep on eye on the fluid going forward.
There is a plastic orange cylinder in the reservoir that has a metal disc with a small hole in the center on the bottom. This appears to be considered part of the reservoir, as I can’t find it in the parts manual. I think this serves as a kind of filter, as both the metal disc and the bottom of the orange cylinder were pretty dirty. I cleaned them with a shop towel and re-installed them.
I refilled the reservoir with DOT 4 brake fluid; it took about half a bottle. Near the cap towards the driver’s side of the car there’s a small indentation with the letters “MAX” embossed on it; you should fill it to that level and not above. The DeLorean site recommends DOT 4, but specifically notes that DOT 5 is not recommended. It also mentions like many European systems, the DeLorean brake system is not sealed, and should be flushed every two years. I have never flushed my system, so that might be part of my problem. In this context, flushing appears to mean getting all the old fluid out of the calipers by bleeding, which it seems takes about four of the little bottles of DOT 4 for the entire system.
The orange tube and metal disc (filter?) inside the brake reservoir. The detritus on the filter can be seen clearly.
With the filter removed it’s easy to see just how low the brake fluid was.
Flushing and Bleeding the Brakes
Bleeding is done by taking off all four wheels, finding the bleed screw on each caliper, and opening the screws one at a time until all the air is out, and only clear brake fluid is left. In practice, there’s a bit more to it, but not much.
Normally you need a helper to bleed, as one person watches the fluid coming out of the calipers while the other presses the brake. However, there are a number of one-man bleed kits on the market that simplify this, even if you do have a helper. These kits take the form of a large bottle with a hose that screws onto the brake reservoir where the cap would normally go. It has a handle that you use to pump up the brakes to 10-20 PSI (but never over 20) to pressurize the brake system. This provides a more consistent pressure than the pedal does, and lets you do the work entirely by yourself. It also feeds brake fluid into the reservoir, ensuring that you won’t run it dry while bleeding.
You also don’t just bleed the fluid onto the ground. You are supposed to attach a short piece of hose and bleed into a small bottle so that you can monitor the color and look for air bubbles to know that you’ve gotten all the air out. Amazon and various auto-parts stores sell little bottles that magnetically attached to the disc brake and include the hose for under $10, and is worth the investment for the convenience. That said, the bottle I got was pretty small, and was more suited to bleeding than flushing.
Because you’ll be removing brake fluid from the system during bleeding, you need to be absolutely sure that the reservoir level stays full enough that it doesn’t suck air in. If it does, you’ll need to bleed everything all over again.
Some other details I found:
You don’t need to separately bleed the master cylinder before installing a new one. It sits fairly level in the car, so even when installing a new one there isn’t a need to separately bleed it. Even so, it is still recommended that you bench-bleed it, but not strictly necessary.
Raising the rear of the car when bleeding the rear calipers may make it easier to get the air out, since it will rise to the highest point.
While the manual specifically states that you need to bleed in order of rear right, rear left, front right, front left (meaning, starting with the caliper furthest from the master cylinder and moving forward), the system is of such a design that in practice the order doesn’t really matter, as long as you’re consistent.
It is recommended to bleed the system at least twice to make sure you got all of the air out.
DOT 4 brake fluid absorbs water, which means you never want to use old or open fluid bottles, since they may have already absorbed water from the air and are no longer useful in the brake system. This is also why you have to bleed the DeLorean’s unsealed brake system every two years. DOT 5 won’t absorb water, but that just means that it will rust out the brake system from the inside, which is why it’s not recommended in unsealed systems.
All four wheels have to be off the ground to bleed, as you need to take all the tires off. I positioned the pallets I normally put under the wheels so that they were under the engine subframe and front frame extension for this purpose.
I used a PowerBleeder to pressurize the brake system. I added two quarts of DOT 4 fluid to it, then attached the cap to the reservoir as directed and pressurized it to 10 PSI via the integrated pump, making sure that it held pressure. When it didn’t, I tightened the caps and the connection on the hose, and all was good. There was some air in the hose, but it seems this is normal and doesn’t pose any problems. I used a final pressure fo 15 PSI when bleeding.
Each caliper has a small rubber cap protecting its bleed valve. Or it should — only one of mine did, and it was cracked. I started with the rear right caliper, breaking the valve nut free with a 11mm box wrench, then inserting the collection bottle’s hose tip into the valve and loosening the screw further until brake fluid flowed. Since I was flushing the system, I filled my little collection bottle four times, emptying it each time. I repeated this for each wheel, checking the PowerBleeder pressure to make sure it was between 10 and 15 PSI. I went in the order in the manual (rear right, rear left, front right, front left), then did it a second time just to be sure.
Once bleeding was completed, I snugged down the bleed valve nuts and looked to removing the bleeder. You need to unscrew the cap on the bleeder itself to release the pressure, then remove the cap on the reservoir. Of course, at this point the reservoir was overfull. I found that the simplest way to drain the excess fluid was to lift out the orange cylinder in the reservoir and empty it into my used fluid bottle. This contained just enough fluid to bring the level back down to them line. All unused fluid should be considered unusable and discarded.
After that, it’s just a matter of replacing the reservoir cap, putting the tires back on and lowering the car to the ground. The pedal was stiff as soon as I’d filled the reservoir, but bleeding improved it even more. Unfortunately, it didn’t fix an old issue I’ve had, which is where the first pump feels a little soft and the second pump is firm. This repeats after a minute or so of not using the brakes. I plan on replacing the entire system with Delorean.co.uk’s “big brake” system in a few months anyway, so I’ll make due with it for a bit longer.
The PowerBleeder attached to the brake reservoir.
Filling the bleeder with its second quart of DOT 4.
The bleed screw on the rear calipers is on the outside of the wheel.
The bleed scree on the front calipers is on the inside.
Old, yellowed brake fluid being drained from the caliper.
Yellowed fluid is in the bottom of the bottle, while the new fluid is running clear through the hose now.
Stalling on Deceleration: Switching to Closed Loop Idle Initial Values
The next issue was how the car would stall out on me if I took my foot off the gas quickly. FABombjoy on DMCTalk once again came to the rescue, suggesting I re-scale my advanced timing table to add more idle columns, then set the leftmost column to add a few more degrees of timing, and included a link to a video showing an easily overlooked feature in TunerStudio to do such rescaling.
I reset the VE table in a similar fashion, giving myself some lower-end RPM cells, with columns at 740 and 840 that allowed we to set all the same values in a 2x2 grid around the 790 RPM idle target. I raised the highest cells of the table (about 4000 RPM in the 40 kPa range), then interpolated between the idle cells and the highest cells. This gave me a clean VE table to restart auto-tuning from.
I still had problems with stalling, though. I tried increasing the advance in the leftmost column to 17-18 degrees, even trying 25 degrees at one point, but this had no effect. I noticed that when I put the car in Drive, the RPMs dropped to about 650, which was really too low. After some more discussion on DMCTalk, I decided to increase the unloaded throttle to around 850 or 900 RPM by cracking the idle screw open a bit more. This would provide some headroom when loaded, likely bringing me back to the 790 RPM range, and ensure that enough air can get into the engine to keep it from stalling on rapid deceleration.
I finally figured out that the problem was with how it was finding the idle steps to use. There’s a setting in the Closed Loop Idle panel labeled Use Last Value Or Table. I had it set to Use Last Vale, but this was causing the idle to drop too low. I changed it to Use Initial Idle Table and set up a Closed Loop Idle Initial Values. This table is used to provide a stepper motor position (as a number of steps) for when the engine has dropped below idle given an RPM (horizontal axis) and a temperature (MAT or CLT, vertical axis, which is not explained well in the interface). A decent article on the topic can be fond here. I set this to use MAT, and rescaled the vertical axis to 0 to 100 degrees. MAT makes more sense here as the air temperature affects its density, which affects how wide the throttle (stepper motor) needs to be open. I set all rows in each column the same number, with higher numbers for higher RPMs. Eventually I’d have to set higher numbers for lower MAT values (rows) as well, but for now I just wanted to keep the idle up when decelerating.
I found good starting values by revving the engine and watching the RPMs as it dropped back into the idle range. If the initial value was too high, the engine would sit at a higher RPM and slowly drop to the target idle speed. I lowered the values until the engine had a “soft landing” at my target 790 RPM. The next time I cold started I watched the changes to the MAT and revved the engine, watching to see if the RPMs dropped too far, and updated the appropriate cell in the table to keep them closer to 790.
I also tried what was suggested in the Miata TunerStudio article, where you use IAC Test Mode to manually open the IAC until I reach one of the RPM values in the table, then set that as the number of steps for the current MAT. This should give more consistent values than just revving the engine does. However, I found that in testing (ie: revving the engine while in Park) that the RPMs would still drop below 700, which was too low for my comfort. I wound up increasing the table values until it stayed consistently high. I’ll be tinkering with this more on future cold starts as well.
I also returned the maximum IAC steps to 200. I was using 150 to keep the idle from going too high on start, but that was really just limiting how far the IAC could open at all. The initial values table should fix that problem for me, and this change restores the full IAC range for use by the closed loop system.
Finally, I changed the RPM Idle Target’s finale value from 790 to 850. I felt like the car ran smoother at the higher idle, and that it would run too low when the RPMs dropped a bit too far on deceleration.
TPS Binding: Switching to MAP for Acceleration Enrichment
The Jeep throttle has a mounting point for the TPS, but every time I snugged down the bolts, the TPS would seize, and eventually stop working entirely. Leaving the bolts loose might cause a vacuum leak at the throttle body, so I couldn’t do that. I used some gasket material to make a slightly thicker gasket (about 1/16th of an inch), sat the O-ring on top, and bolted it back up. I also mounted the TPS upside down, which ensured that it cleared the flange at the base of the throttle body.
This seemed to work, but only briefly. It soon got stuck and wouldn’t change until I pressed the pedal all the way down. I found this out during a drive when the RPMs dropped to below 650 — the idle should have kept it at 790. Because MegaSquirt thought the throttle was open, it never allowed the idle to kick in.
Testing Another TPS
I did some more research and found that the TPS is a Dodge/Chrysler unit, but the throttle body is from a Jeep with an inline six, but I thought it was from a Mustang for some reason. That’s when whenI compared this with an actual Mustang TPS and found that the barrel diameter is different, as are the “ears” that hold onto the bar from the throttle. A true Mustang TPS has an upward-pointing connector, which is a problem because my air intake pipe runs directly above it. Also, I’d need a new pigtail, as the connector is different from the Dodge/Chrysler one.
After a trip to a junkyard, I returned with two used Ford TPS units, one from an actual Mustang. Neither fit the throttle body — the barrel was slightly too big, and the screw holes were slightly too far apart. This wasn’t going to work, because I didn’t realize I needed one from a Jeep.
I tried a larger O-ring on the original TPS, but after a few successful runs it eventually seized again.
Disabling the TPS
In MegaSquirt II, the TPS is primarily used for acceleration enrichment, and even then you can fall back to MAP if needed (it just won’t be as responsive as TPS). MegaSquirt III uses the TPS for engine states and other advanced features that aren’t available in MS II, so it is more critical there. However, it is also used for some secondary features, like engaging flood clear when the TPS is greater than a preset value, or to decide when not to apply closed loop idle.
In the end, I gave up on the TPS for now and switched entirely to MAP. You can’t simply unplug the TPS, as this causes the MegaSquirt input to float and report random values. You need to also jump the ground and sense wires so that MegaSquirt reads the TPS as always being closed. Closed loop idle only works below certain RPMs, so there’s no need to change anything else there. Flood clear can be simulated by adding a switch that toggles the sense wire from ground to 12v, but I’m just skipping flood clear support for now.
For acceleration enrichment, I dragged the MAP/TPS mix slider all the way to MAP, then copied the TPS table into the MAP table as an initial table. Now when I rev the engine, it doesn’t stall out once, and instead smoothly rises when the pedal is pressed, mostly. I wound up doubling the “Add” cells from their initial values, which helped out a fair bit. It still needs to be tuned further (mostly by examining logs, as described here), but this is much better than before.
Jeep TPS (left) and the TPS I got from Josh (right) that I mistakenly thought was from a Mustang. While not obvious in this picture, the Mustang TPS has a larger barrel and slightly wider screw hole spacing.
The unplugged TPS with a jumper tapped between the ground and sense lines, effectively disabling the TPS and forcing MegaSquirt to always read it as closed. The TPS itself is still mounted to the throttle in the top-right corner of the picture, but the connector is unplugged.
IAC Steps When Warm
FABombjoy also noted that you want the IAC to be completely open at idle (0 steps). This gives the maximum step range (from open to closed) to control idle. To do this, the throttle idle screw is adjusted (after warming up the engine) until the target RPM is reached (790, in my case) and the IAC steps gauge shows 0. This requires very small turns of the idle screw, but provides the maximum amount of closed loop control once dialed in.
Burning the Tune While Running
Just a quick note: it seems to be safe to burn to MegaSquirt while the car is idling. I wouldn’t do it while driving, but while idling seems fine. With MegaSquirt 3 there are no side effects, it seems; with MS 2, there’s a “burn stumble” for a half second or so while the burn is being applied and MegaSquirt resets. I’ve done this repeatedly without issue.
Sealing the Exhaust
I felt like the exhaust was a bit loud on the driver’s side. Also, I saw visible white exhaust escaping from the end of the cat after cold starting the car. I needed to seal the exhaust better.
The problem here is that I’m using cats that are meant to be welded, but I’m clamping them to my pipes. Also, the space is so tight that I can’t use proper lap band clamps, but rather simple 1” band clamps.
My solution was some Permatex Muffler and Tailpipe Sealant. This is a paste that goes between the two pipes that are being fitted, after wetting the mating surfaces of the pipes. After setting for 30 minutes, the engine is run for 10 minutes. This seemed to work and provide a better seal between the cat and pipes, at least noise-wise, but it does need some more thorough testing.
Permatex Muffler and Tailpipe Sealant.
The driver’s side cat after sealing. Not much to see, as all the sealant is inside the joints, except for the bit I got on the outside of the cat.
Passenger side cat — same deal.
Broken Key
I have an early VIN car (767) with a gas flap hood, which means I also have a locking gas cap. The mechanism is very tight, and I’ve been worried I’d break my only key in it. This happened the other day.
I took the broken key to a local locksmith (Cobb’s in North Attleboro, MA), and we were able to find a compatible blank with a bit of Googling (an X29, or Volvo VL6, depending on which numbers you look at). We still couldn’t get the gas cap lock to turn, but it worked perfectly in my ignition. I ordered two more key blanks from DeLorean so that I’ll have spares, along with a non-locking gas cap. I’m not worried about someone stealing my gas or contaminating my tank, and the hassle of the key isn’t worth the trouble.
My broken key (right) and the replacement (left).
Tensioning the Belt
The belt had started to squeak, which meant it was time to tension it again. The trick is that you need three hands — one to pry the alternator out, and two to hold wrenches to tighten the belt.
I hit upon an alternate one-man solution called a belt tension jack. It is placed between two pulleys and extended with a wrench, pushing the ends (and thus the pulleys) apart and tightening the belt. You can then tighten the nuts with both hands at your leisure. Unfortunately, the only one I could find notes that there is a weak weld that can cause the tool to break, but that once it is re-welded it works just fine. Beyond that, it’s a nice design, and features a spring-loaded body to make it easier to get between the pulleys, and comes with a couple of extensions to handle different pulley distances.
On my first use, the head rotated against the pulley and snapped off. I did a crude welding and was able to use it again without issue. A 19mm wrench works well to turn the jack and tighten the belt, after which I could use both hands to tighten the alternator brackets. When I took the wrench out, the other head failed, so I welded that back together for the next time I’d need it.
The belt tensioner jack I bought from Amazon, and a 19mm wrench used to turn the jack. The top piece is an extra extension for longer pulley distances.
One freshly-welded end next to the other previously-welded end. Note the best welds, but strong than the original ones.
Adjusting the Transmission Cable
The automatic transmission was working well, except for one minor issue: when the car was in park, sometimes turning the key would do nothing. On an automatic, the start inhibit relay disables the starter unless the car is in Park or Neutral. If I switched to Neutral it started fine, and sometimes slamming the shifter into park fixed it as well.
Basically, the automatic transmission linkage was slightly misaligned, and this was keeping the Park switch from engaging — it thought the car was in gear. The linkage just needed to be adjusted slightly to fix it.
Johnathan on DMCTalk first suggested that I look at the brass ring on the shifter. If this wasn’t tight and had gotten twisted around, it may well be keeping the shifter from reaching the end of its travel. Normally this ring is used to lock the shifter at specific detents, but mine is missing the lower (and currently unavailable) spring that would allow it to be pulled up. I disabled this feature by sliding the ring up the shaft and locking it into place.
For the shifter linkage, you have to get under the car to the access hole in the middle of the frame that contains the fuel accumulator. Here there is a bell crank lever that reverses the push of the shifter so that it pulls on the transmission cable. A 13mm wrench will remove the nut that holds the linkage from the shifter to the top of the lever. A full counterclockwise turn of the end (which is screwed onto the link rod) was all that was needed to fix the alignment and restore starting when in park. Of course, this is something of a pain due to the cramped space, but wasn’t too horribly bad this time. It helps a little that you can put a light between the frame and the transmission to illuminate the cavity without your hands blocking the light, but it’s still an annoying space to work in.
When I went for my next test drive, I found the transmission was acting odd — the engine would rev, but the transmission wouldn’t seem to catch properly or consistently. A check of the dipstick found it to be dry — good thing I only went around the block. I’m certain I added Dexron III, but it was clearly low. I think I only I added it when the car was cold, soon after reinstalling the engine and transmission, and never moved it through the gears, and didn’t account for any that had accidentally drained from the torque converter when I had it out of the car. You’d think that since I’m on my fourth transmission that I’d be wary of such things by now. After topping it off, the car shifted just fine.
The brass ring on the shifter, properly adjusted. I moved it out of the way (further up the shaft), since my return spring is missing.
Fuel Leaking at Accumulator Hose
I also found some gas leaking from the return line on the fuel accumulator. It was a very small amount, probably not much to worry about, but you really don’t want any gas leaking. I tried using a 19mm crow’s foot wrench on a socket wrench to try to tighten the connection just a little bit more to remove the leak, but I’m fairly certain that it’s jot getting any tighter.
Some googling found that the orange lines are composed of Teflon and were the best available about 10-15 years ago. However, vendors have seen these lines degrade and leak, and advise that they all be replaced with rubber fuel injection hose supporting at least 100 PSI.
The fuel accumulator is a pain to get to, so I tried just cutting off the orange hose without dropping the accumulator itself. This really didn’t work, so in the end I took the whole thing out.
To start, you use a 17mm wrench on the hardline fitting. You put the wrench on the line, not the elbow. This took me a while to break free, and the wrench would fit one way but not give me enough room to turn it, and would barely not fit the other way due to the edges of the hole in the frame. I finally managed to get a wrench on it and break the nut free.
Next you remove the four bracket bolts with a 10mm socket on a long extension. In theory, you can now drop the accumulator. However, mine was both stuck in place from the rubber that wraps it, and the hardline was stuck in the 90 degree fitting. A few raps to the nut on the hardline with a hammer broke it loose, and the sticky rubber was simply pried from the frame after that. Be prepared for some fuel to leak out. I also had to cut a zip tie that was holding the orange line away from the shifter linkage.
The accumulator now hangs down below the frame, suspended by the two remaining fuel lines. The fuel hose on the end (blue in my car) comes off next by loosening the hose clamp and pulling the hose off. This let out a steady stream of fuel for at least 10 minutes. More than a gallon of gas — probably everything in the car — came out. I’m not quite sure how that happened, since the pump was off and I thought that both the lines were at the top of the tank, but I still got a lot of gas out.
Once the fuel finished draining, the orange line had to be cut off. I used a sharp box cutter and repeatedly scored it, finally breaking through the outer casing and the interior and pulling it off of the connector in the car. I was able to remove the other one on the bench.
Note that the connectors themselves are left in the car or on the accumulator (unless you’re installing a new accumulator as well). My accumulator had the date “4-26-10” written on it with marker, most likely when I last replaced it. That’s nearly nine years ago, but it still worked fine, so I didn’t replace it.
Next I had to source some high-pressure fuel injection hose. Specifically, the orange hose was a 1/4” inner diameter, and the new hose must handle at least 100 PSI. The three auto parts stores near my garage didn’t have any, but good old O’Reily’s once again came to the rescue with Both the 225 PSI 1/4” ID fuel hose and a fuel hose clamp assortment.
It instead the hose onto the accumulator first. This was impressively difficult, as it was cold (about 40 degrees) and the line is very tight. I wound up mounting the accumulator in a vice and pulling it on with both hands. This same technique would not work inside the car. There, I used a heat gun very briefly to soften the rubber. Don’t do this too much, or you’ll melt the hose and ruin it. I did it a little long and got rubber residue on my hands, but the hose held once it was in place, and it went on much, much easier.
I made sure to put two hose clamps on the line before mounting it. My clamps used a 7mm socket, although I used a 9/32 for a bit before I figured out the 7mm fit better. The one on the accumulator itself was easiest, since I could do it on the bench, but the one in the car was a massive pain. I figured out that I could orient the hose clamp screw so that it pointed towards the back of the car, then insert a long socket extension through the hole in the frame where the transmission linkage goes to the transmission and attach the socket wrench to that. This also allowed me to use both hands: one to hold the extension near the hose clamp, and one to hold the wrench itself. It still took me 10 minutes or so to get the clamp tight.
I kept the blue hose, but replaced the hose clamp. Since the line spins on the accumulator, as re-install the accumulator in the car, I didn’t tighten the clamp immediately, but rather mounted the accumulator first with the hose loosely fitted to the end. Actually getting the accumulator up there was a pain, since I could only fit one hand in there. I held a screw in my right hand, then pushed the accumulator up into position, then used a 17mm wrench to hold it in place with my left hand while I fit the bolt into the bracket with my right hand. After a few turns, I could line up the hard line and tighten that down with the same 17mm wrench. Finally, I inserted the remaining bracket bolts by hand and used a long extension and a 10mm socket to secure them.
The blue hose’s clamp was the last thing to tighten. This was a pain because of space constraints. I couldn’t reach my bit driver in there, so I had to use a short socket extension with a 7mm socket on the end to get it mostly tight, then switch to a small socket wrench for final tightening. It took another 10 minutes or so at least, but it worked.
The last thing to do was zip-tie the new fuel line away from the shifter linkage. Once again, this has to be done with one hand, which is exceedingly difficult. I put in two zip ties, and they probably took 10 minutes each.
With that done, I poured a few gallons of gas in the tank, I booted up TunerStudio and ran the fuel pump in test mode. This runs the pump continuously, allowing me to easily test for leaks. All the accumulator connections were solid with no leaks at all.
All told, this probably took about 4-5 hours, not including the trips to the auto parts stores.
The fuel accumulator nested in the center of the frame, with some drips of leaking fuel on it. The very end of the bell crank lever is visible at the top of the picture, and the cable running to the transmission on the left side.
The accumulator unmounted from the bracket, but still connected by the blue hose on one end and the orange hose on the other.
After disconnecting the blue hose, quite a lot of fuel spilled out.
And I do mean a lot — it was more than a gallon when I was done. That oil pan had a little bit of oil in it — the rest was gas.
The accumulator removed from the car. One end of the orange hose is partially cut for removal, while the other end was cut off in the car.
Using a vice to hold the accumulator while I put on the new fuel line. Note that this is 225 PSI fuel injection line.
The newly installed fuel line and re-mounted accumulator. The hose extends forward into the frame, but could run against the shifter linkage, which is probably bad.
The hose pulled forwards and zip tied out of the way of the linkage.
Oil Pressure Gauge Sender Failure
Next the oil pressure gauge stopped working. It seems I’d snapped off the blade that the connector slips on to, so I needed a new sender. O’Reilly Auto Parts had a compatible sender in stock, so I purchased that for installation. Strangely enough, the guy who helped me also has a 1982 DeLorean that he has been restoring. Although there are over 5000 cars still on the road, that seems like an awful big coincidence for a random encounter, but there you go.
The oil pressure sender for the gauge is O’Reilly part number PS155. It is an exact match for the original DeLorean part 102763.
I had a lot of trouble removing the sender, primarily because I have a “fat” oil filter. First, the 19mm hex on the end of the sender will not turn the sender — it just turns the outer shell of the sender around itself. You need to get a 9/16” wrench and put it on the hex part closest to the engine.
The next issue I had is that you really, really should remove the oil filter first. The filter sits immediately adjacent to the sender, and the lip of the sender will get stuck on the edge of the filter if you try to remove the sender first. This also makes it hard to remove the oil filter afterward once you’ve partially unscrewed the sender. I pretty well mangled my filter getting it off after partially unscrewing the sender.
After that, I discovered that 2.8L oil filters aren’t compatible with the 3.0L filters. The 3.0L needs a slightly larger diameter threaded hole to mount to the engine., at least for the Purlalator cross references I found at Advanced Auto. I tried a few more of the tall filter as well, but none would fit. The original filter was about 1mm wider than any of the Puralator ones.
In the end, I re-installed the sender, then put on a spare, unused "fat” Wix 51626 that I had lying around. It works fine; I just need to keep in mind the removal order next time I need to change out the sender, which hopefully will be “never”.
The old DeLorean sender with the broken connector (right) and the new PS155 from O’Reily (left).
Final installation with a Wix 51626. There is just barely enough clearance.
Oil Dipstick Bracket
I had to use the 2.8L dipstick, but there’s no place to mount the top end to the 3.0L engine. I solved this problem with a custom bracket. I cut some slotted angle iron into an “L” shape with an angle grinder and a cutting wheel, then used a longer bolt and five extra washers to secure the bracket to the valve cover, and the oil dipstick to the bracket. It took about an hour of angle grinding and stacking washers, but now I don’t have to worry about the dipstick tube falling out on the road.
My bracket for the oil dipstick.
The dipstick tube attached to the bracket, which is then attached to a valve cover bolt behind the A/C compressor, supported by a stack of washers.
Another Test Drive: Getting Stuck on the Side of the Road (Briefly)
This one is entirely down to user error. On New Years Day I drove the car down the road, turned a corner, and the engine simply shut off on me. I assumed it was another issue with my tables, so I pulled off and tried to restart the engine… and it wouldn’t start. It would crank, but it never seemed to even try to catch.
After about 10 minutes of tinkering with spark plug wires, checking fuses, etc. I finally figured out the problem: the fuel pressure gauge in the engine bay was reading zero — I was out of gas. The fuel gauge had been reading very low, but it’s a new DeLorean Texas unit that has to calibrate with a full tank, and I had yet to put a full tank in, although it did read something when I put gas in it. The fuel light never came on, so I”ll have to look into that.
I went to the nearby gas station with my other car and got some gas, and after fighting with the broken “no spill” nozzle and fetching my siphon, I got some gas in the car. Turning the key showed positive pressure at the gauge, and the engine started right up when I turned the key. I made it back to the garage with no further issues. It was getting dark, so that was it for the day.
Taking It Home
The car ran well enough that I decided that it was time to take it home. I turned on auto-tuning for the twenty minute drive, but of course forgot to turn on data logging. I had no real issues during the entire drive. The brakes still kind of suck, but no worse than they did before the swap. It’s hard to tell how different new engine feels, since it has been five and a half years, but it feels like a DeLorean — meaning, with the pedal down it still feels like you should be moving faster than you are. There was a slight slip of the transmission when it was cold, but I never saw that again. I think it was because of how briefly I drove it after filling it last time, vs the longer drive home that fully lubricated the system.
The exhaust tone of the Borla Pro XS is a bit higher than I’d like, and is a bit of an annoying sound when cruising at highway speeds. It probably sounds more like the stock exhaust than the DPI exhaust I had before, although I believe it is quieter — I can’t really hear it when idling with the doors closed. At a later point I’ll re-install the silencers, which should both quiet it down further and lower the pitch of the exhaust.
Deceleration seemed good, with no stalling. MAP-based acceleration enrichment worked pretty well, but there was a point where the engine would be starved (engine noise slowed/stopped) for an instant when accelerating from idle, so I need to tune that a further.
I also put more gas in it, although the pump cut off at only half a tank. Odd, but I wouldn’t have to worry about running out of gas. I’ll have to diagnose what’s wrong with the gas light at some point, too.
The climate control system worked great, with the new kneepad air ducts blowing hot air right at me. I design decision with my new air distributor box (part of the double DIN radio install and A/C overhaul) led to removing the top duct from the defroster, which means that when in heater mode there’s no way for heat to get to cabin. Bi-level and vent modes both provide heat, though, so it’s not an issue. The A/C is still at vacuum, but I won’t need that until the spring, so no hurry there.
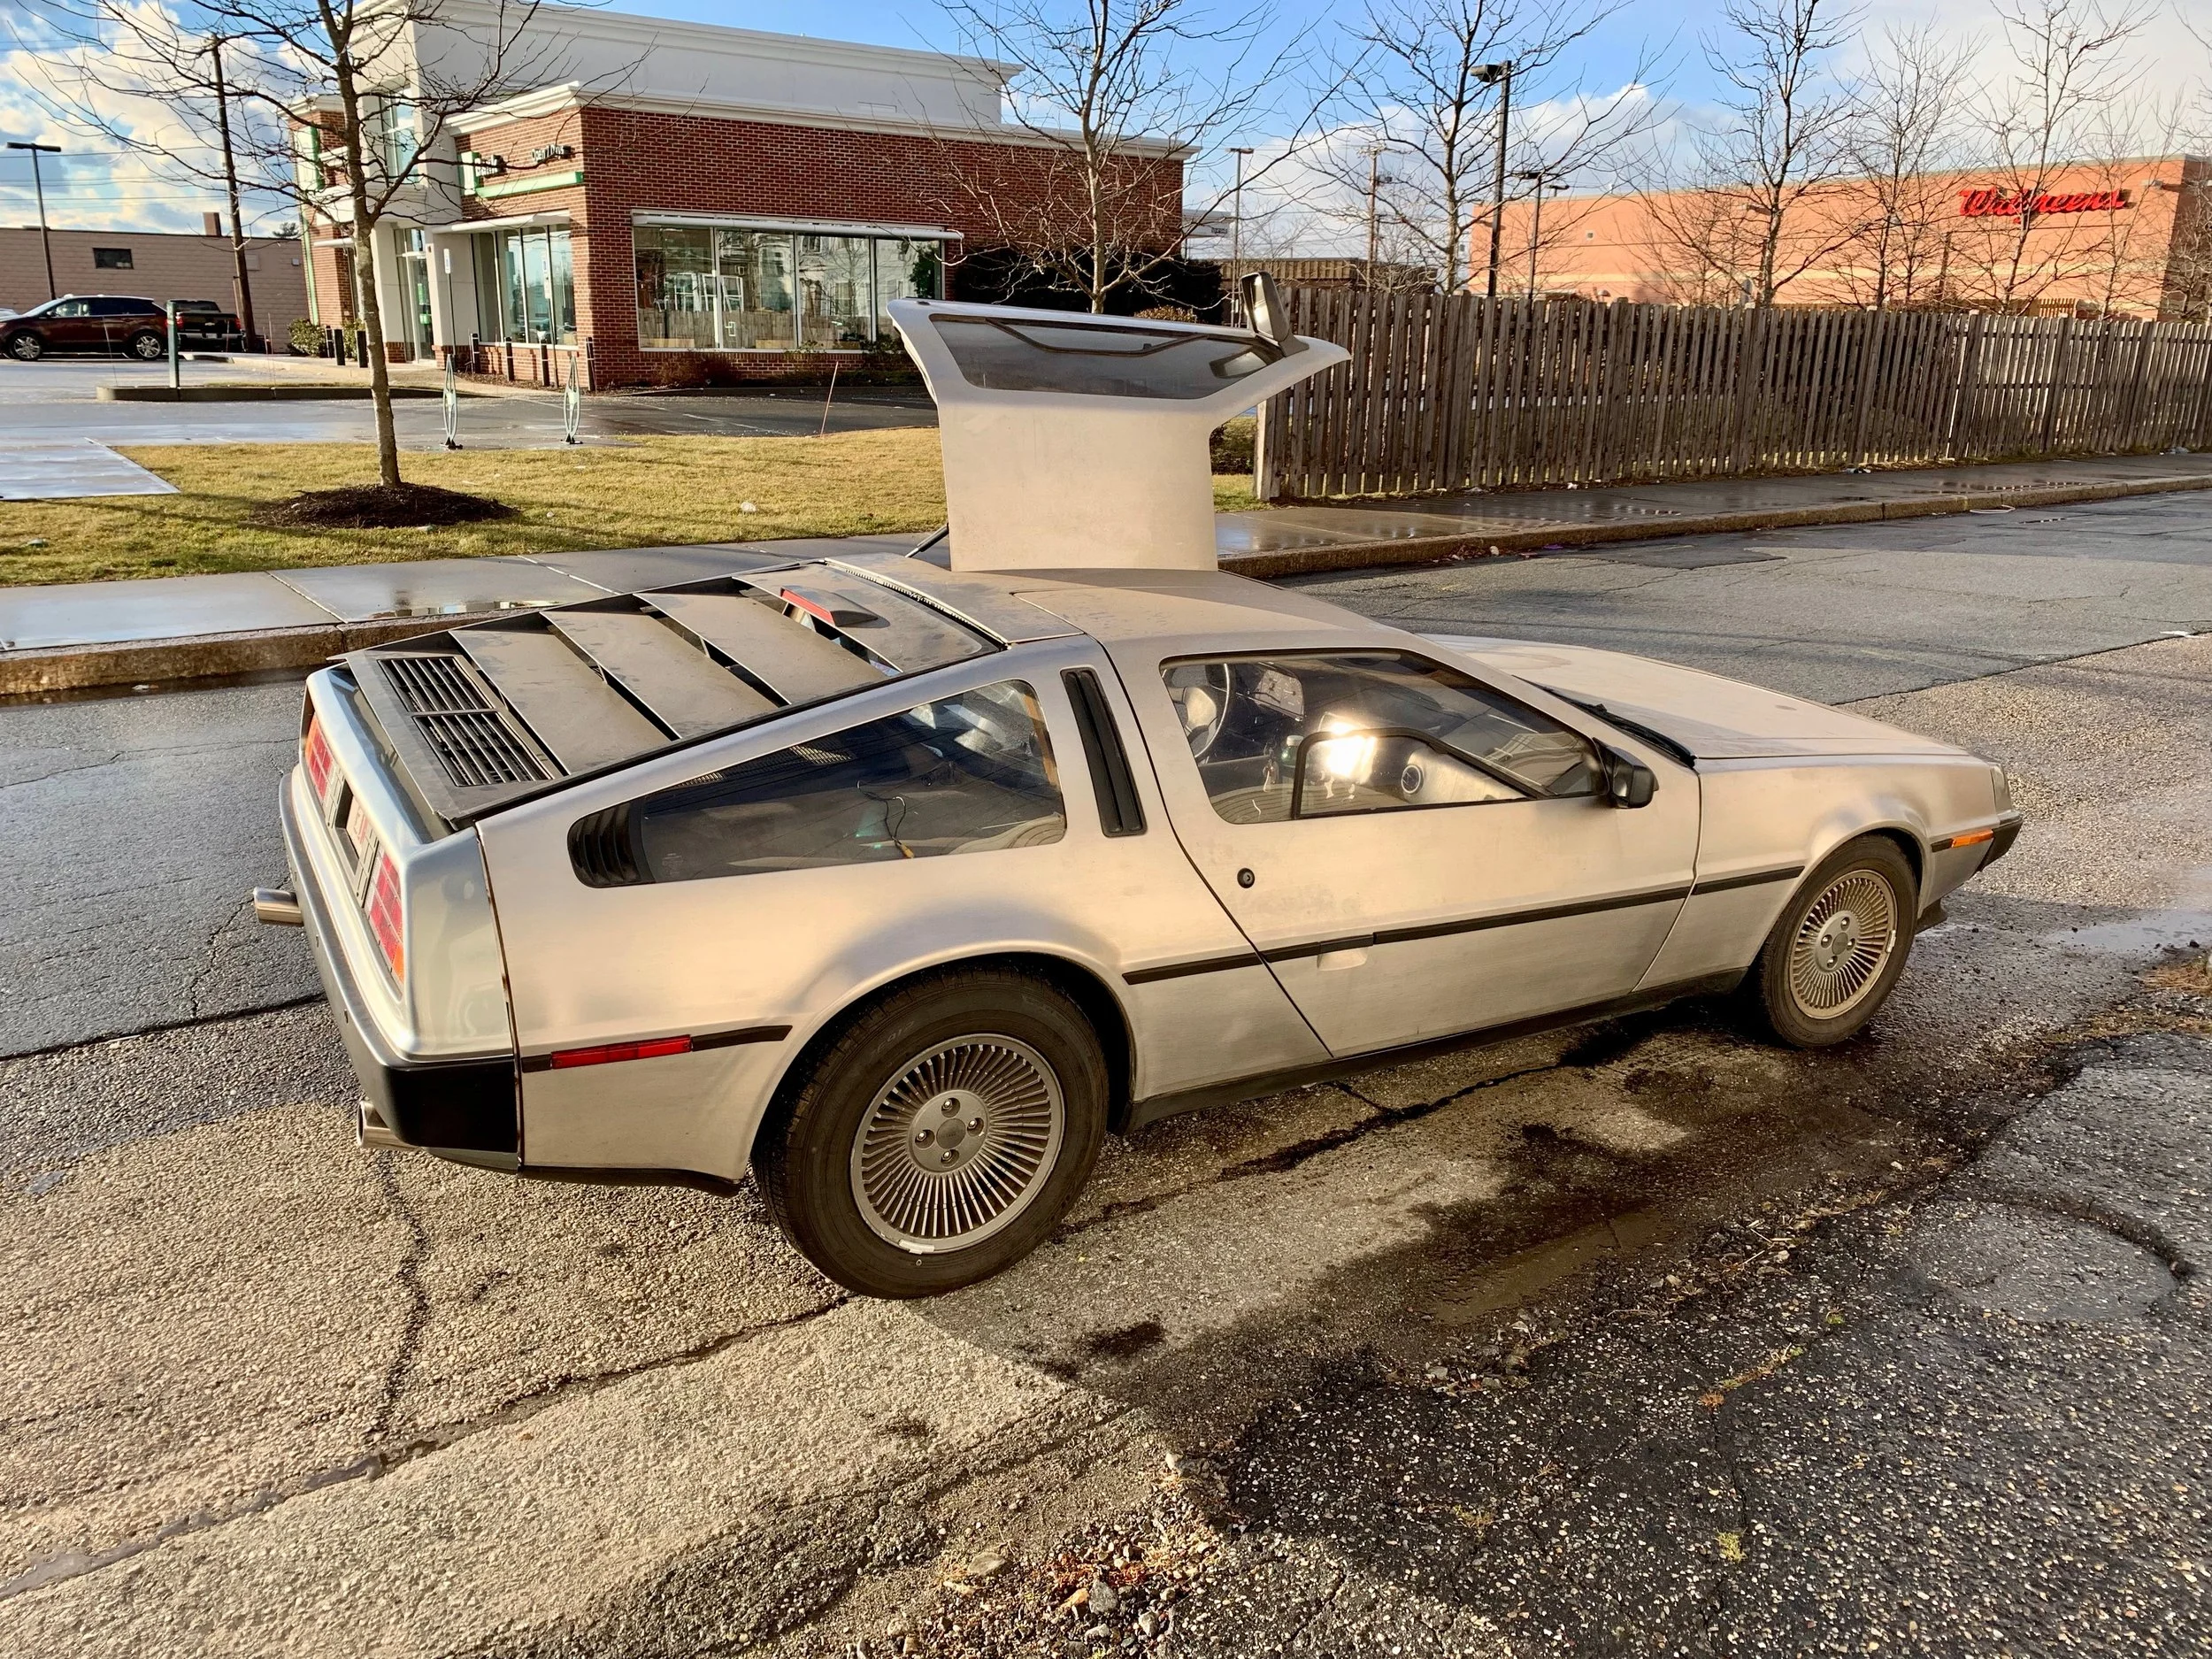
Other than that, everything’s looking good. The car is incredibly dirty and needs a good cleaning, but it runs decently well. Now I just have to drive it, auto-tune it and adjust the acceleration enrichment. Finally, it’s back on the road.
It’s very dirty, but it’s not confined to the garage anymore.