Rust and Holes in the Frame
Joe Angell
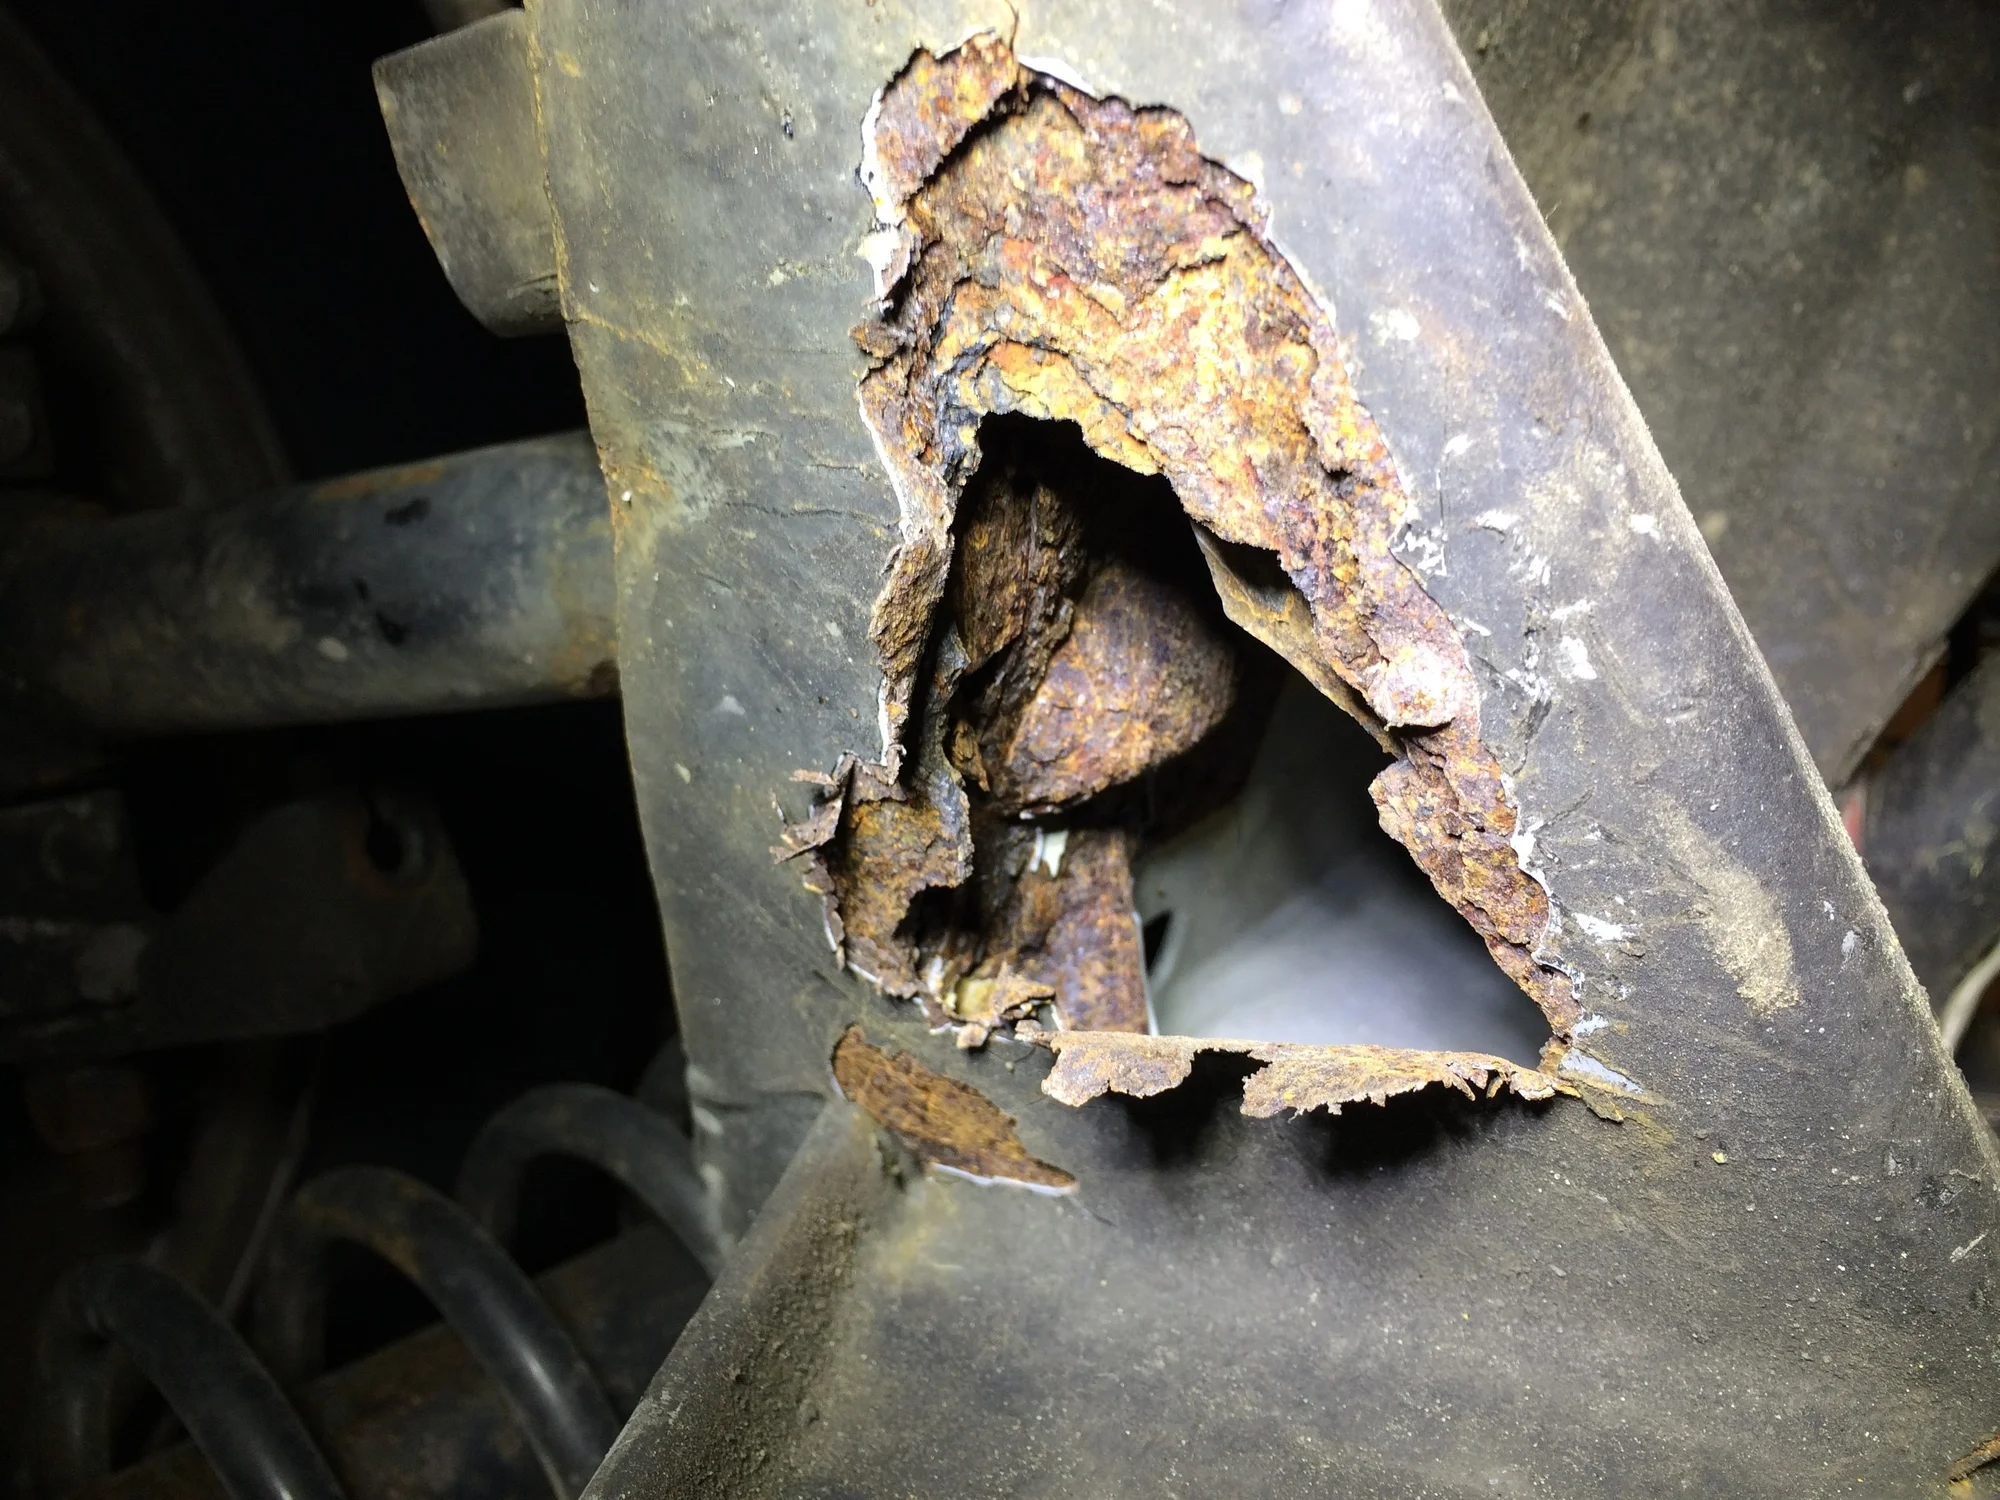
While pulling the engine form my DeLorean, I noticed a little rust under the frame where the lower link arms for the rear suspension are attached. I tapped at it with my fingers, causing loose rust and bits of ruined metal to fall out, creating a small hole. The more I tapped, the larger the hole got. I switched to pics to know harder on the rusted surfaces and the apparently good surfaces, knocking out all the loose metal and rust I could find -- if the metal isn't strong, it is worthless and should be removed. Eventually I had two roughly triangular holes measuring three inches across.
Hole under the lower link arm on the passenger side.
Layers of rusted sheet metal are clearly visible.
Looking into the hole reveals the inside is rusted, but tapping it revealed the metal is solid.
Driver's side hole in the same location under the lower link arm.
Sheets of epoxy that had separated from the frame and flaked off.
Further inspection found a smaller hole behind the passenger side lower link arm. I removed the lower link arm itself to get a better look. It is mounted with a bolt to the frame, and a nut and bolt to the hub carrier. These can be on quite tight. I soaked them with Kroil penetrating oil for a few days before trying to remove them, and they came out without too much trouble, although a fair bit of force was needed to turn the hardware. This can make the bolt hot due to friction, too.
It's important to note that the bolt can be rusted to the metal sleeve inside the bushing. You can try to apply heat and penetrating oil, and tapping it with a hammer against a block of wood (the wood being used to avoid rounding or chipping the bolt head or flattening the end of the bolt) can sometimes work, and is how I've gotten these out in the past. However, it is possible that the only option left is to cut it out, or risk cracking the ears of the hub carrier. This thread on DMCTalk talks about one particular stuck bolt and the experiences of others, and the risks of tapping vs. cutting.
Using a wrench to remove the bolt securing the lower link arm to the frame.
Two wrenches remove the nut and bolt from where the link arm meets the hub carrier.
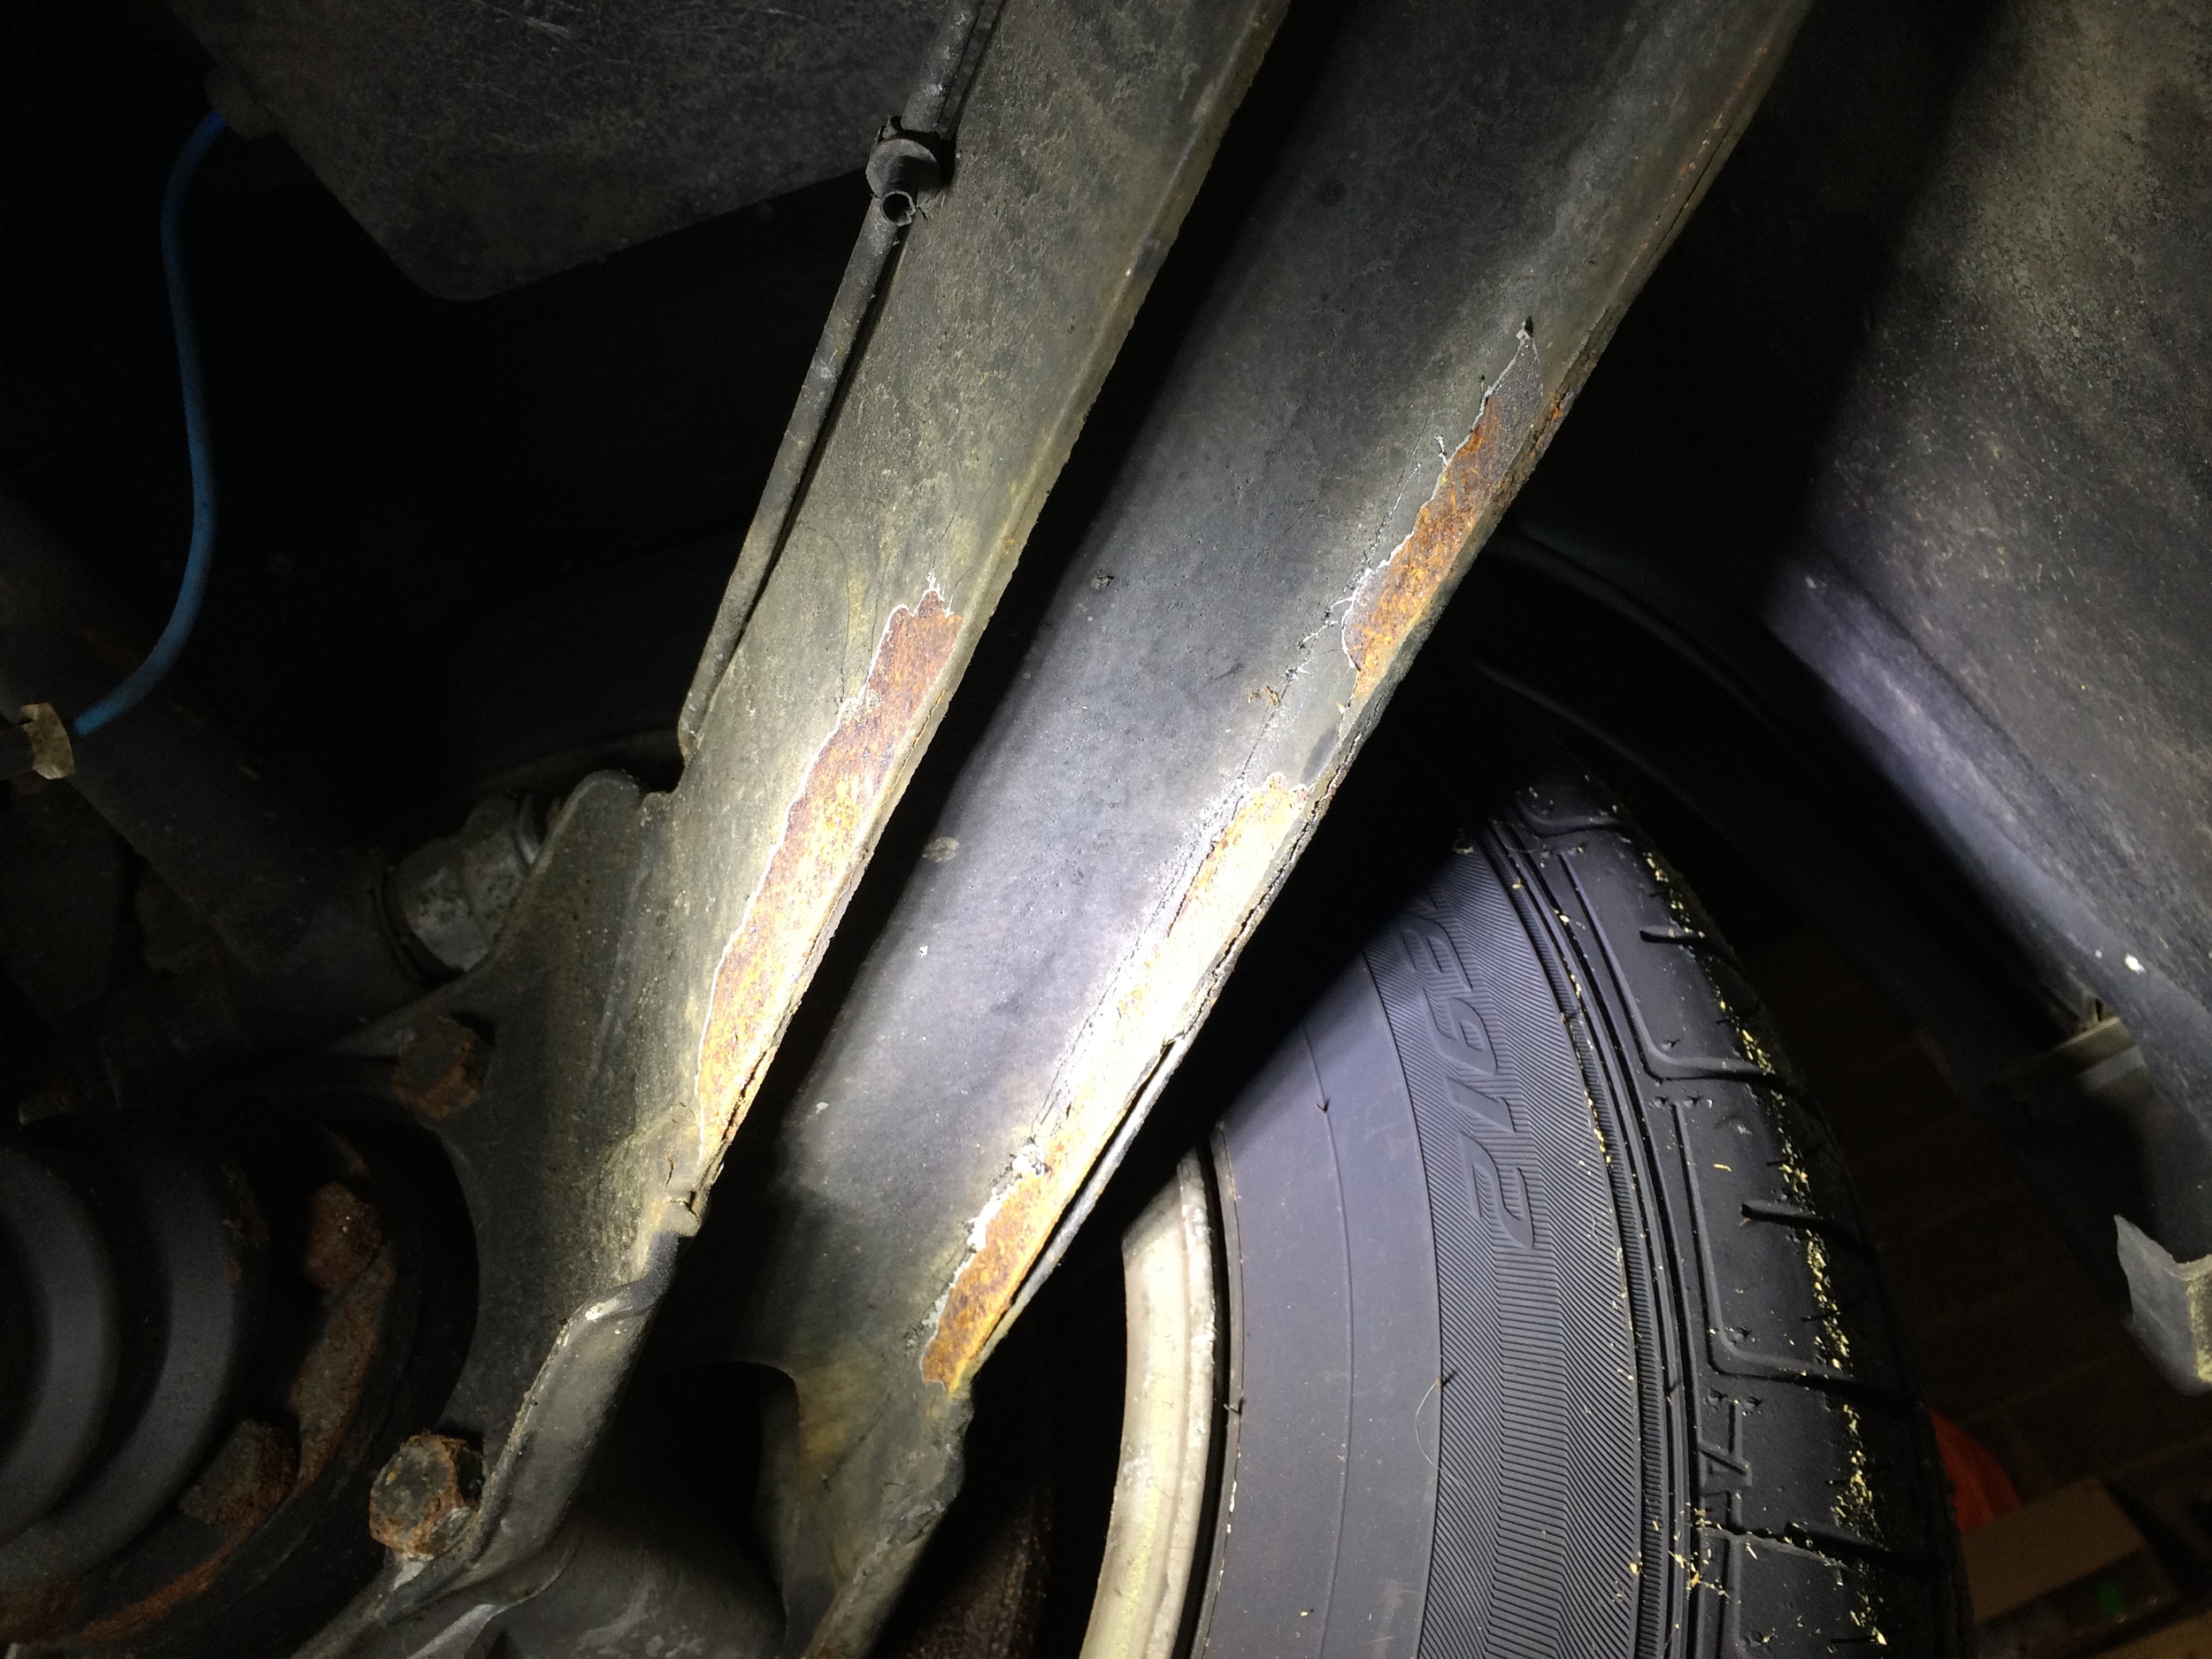
Minor surface rust on the link arm itself.
The link arm sits so close to the frame that it is designed with a square hole to allow it to fit without rubbing. The factory then sealed the hole by welding a piece of metal matching the curve of the link arm.
Looking up through the larger hole towards this smaller one made the damage look quite severe, but it really isn't; the shadows from the lighting just makes it look quite worse than it is. To make sure of this, I quite strongly poked and tapped at all of the metal with a pick, making sure that even metal that was still covered by a epoxy wasn't compromised.
From the outside, the hole is visible just under where the link arm meets the frame.
With the link arm removed, the hole is more clearly visible, as is the loose epoxy on the plate.
After removing the epoxy, the rust is revealed to be only on the surface, and the metal is still strong.
From the inside the hole looks horrible, but the metal is solid.
Fixing the Small Hole at the Link Arm
The position of the hole behind the link arm is so close to the mounting points that the bolt goes through that I was afraid I would warp or otherwise damage them if I tried to weld so close to them. I finally hit on the idea of using JB Weld Steel Stick. There are many similar products, but the basic idea is simple: it's a steel-reinforced putty that hardens so strongly that you can drill and grind it once cured. You just cut off as much as you need with a knife, rub it between your fingers until the inner and outer compounds mix completely, and form it into the shape you want it to harden in.
I pushed the putty into and around the hole, making sure to blend it around on the inside of the frame by reaching up through the larger hole rusted through the bottom to make sure the putty was as secure as possible. I also blended the edges as smooth as I could to get rid of any lips, which worked as well as could be expected.
After I had actually learned to weld, I realized that I could have probably cut a small patch of metal, heated it to make it malleable, hammered it into the recess and welded it in place without really worrying about causing too much deformation. It's possible I could have just filled the gap entirely with filler rod. I might do that if the JB Weld fails on me.
JB Weld Steel Stick comes in a small plastic tube.
The putty contains two compounds that are mixed together by rolling it around in your fingers.
The hole soon after patching it with the putty. Care was teen to blend the edges and to make sure that the shape was similar to the original plate so that the link arm would fit properly, as well as pushing it inside the frame to make sure it has as much grip as possible.
Fixing the Large Holes
These were going to require some welding. I didn't actually know how to weld, and no one else really wants to deal with liability issues on a car frame. Some more questions on DMCTalk led to me buying a small oxyacetylene welding kit, with the suggestion that it would be easier to weld such think metal than MIG. I was also limited to only a 120v power source, so if I did use MIG I'd be limited to smaller units. I was warned that MIG, while easy to use, was also easy to blow through the sheet metal.
I brought the tanks to the nearest welding supply company I could find on Google; they filled the oxygen tank and swapped my new empty acetylene tank for a well-used full tank (seems they don't refill tanks in Massachusetts). Paranoid as I am, I also bought a fire blanket, welding gloves, sleeves, apron, jacket, hat, and flash arrestors for both the tank side and the torch side of the hoses, and multiple fiberglass welding blankets to project other parts of my cramped garage from flying sparks and dripping hot metal.
I then spent quite some time googling for proper procedures so as to not blow myself up, and then practicing with some sheets of mild low-carbon 1/16" steel (the same kind of steel used on the DeLorean's frame) and RG45 welding rods. As practice projects I built some speaker stands, shelf supports and a bracelet rack, all of which can be found on the projects pages.
Prepping the Surfaces
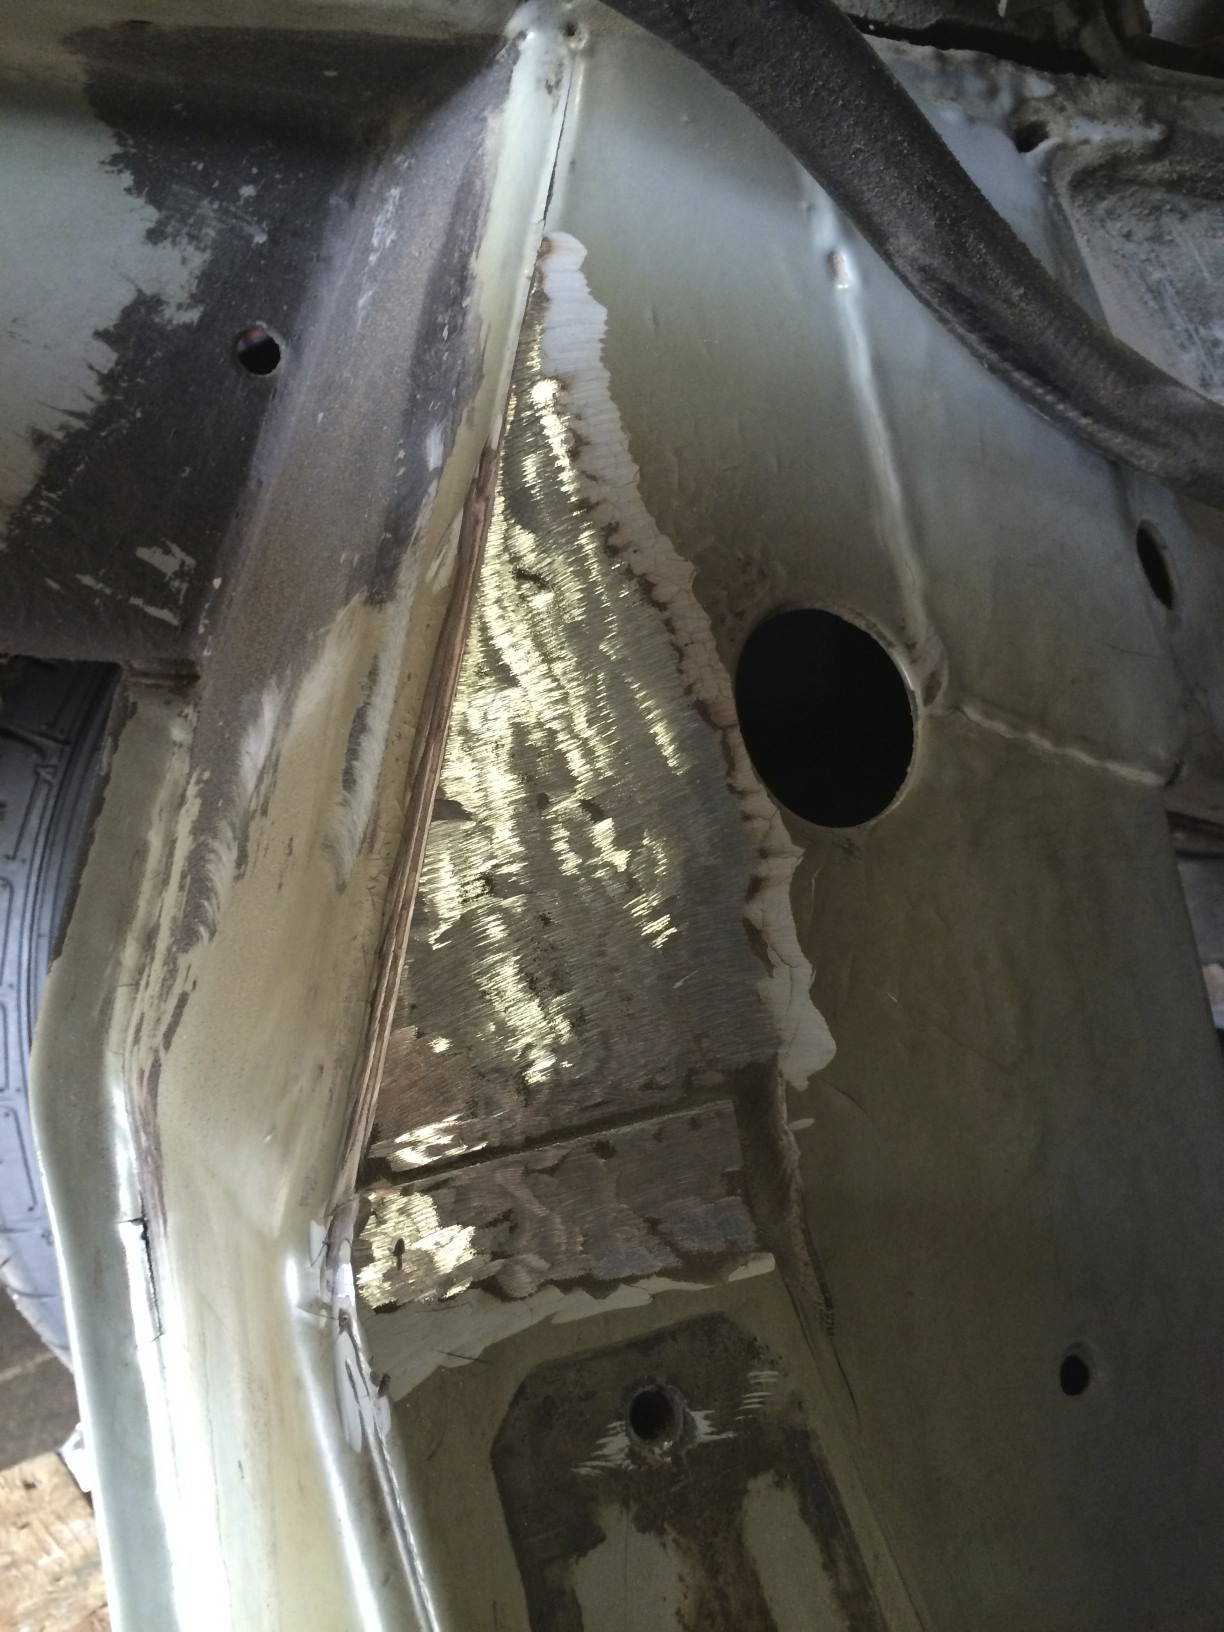
You can't weld to rust, epoxy, paint, or anything else that isn't clean, bare metal. To this end, I used my new inexpensive electric angle grinder from Harbor Freight with a cutting wheel to cut out all the bad metal around the holes, leaving me with just good strong metal. I then put on the grinding disc to remove the sharp edges and and to clear off a few inches of epoxy and surface rust from around the holes, ensuring that the weld will stick.
Cleaned up hole on the passenger side.
Cleaned up hole on the driver's side.
Welding the Driver's Side Hole
I started with the hole on the driver's side link. I started with a 4" x 4" piece of 1/16" low carbon steel as my patch. I placed it over the hole, marked it with a sharpie and cut it down with the cutting disc on my angle grinder to fit more cleanly over the hole. After a few fits, marks and cuts I was ready to weld it.
The first trick was figuring out how to hold the patch in place while I welded it. A set of welder's clamps that I'd bought on a whim a few weeks earlier wound up working perfectly, allowing me to tack it with the oxyacetylene torch. Once tacked, I was able to remove the clamp and weld the piece on.
Welding went pretty well, but it was kind of sloppy. About half way through I slide a pry bar under one side and tried to break the welds free, but they held firmly. A couple of times I burned holes through the metal and had to fill them in with filler rod. One of them was big enough that I wound up welding a second triangular patch to the edge of the first piece. I didn't even need to clamp it -- it sort of just stuck there on its own. There were also some angles that were just hard to get to, but I managed to get it working eventually.
I had every intention of using all my safety gear for welding. My friend's welding helmet was just too bulky when lying on my back, so I stuck with the welding goggles. I wore my leather apron as well, figuring that I might drop some hot metal on myself, but in practice I was not actually under the bit that I was welding so I took it off. Lighting the torch under the car was cumbersome, so I only wore a welding glove on the hand that held the torch, using my ungloved hand to hold the filler rod. This all worked just fine, and I had no problems and got no burns or anything like that.
The flame from the torch caused the nearby epoxy to burn and flame. It wasn't much, and went out quickly when the torch was removed. Epoxy in the immediate area became scorched and flaked, which I'd eventually have to knock off before painting. Some residue inside the frame box also burned, causing some smoke to rise up from inside and out larger machined hole nearer the top. At one point I set up a fan to blow the smoke out of the garage, as it was starting to collect like a light fog above the car. A soot covered parts of the nearby frame as well, including up the side of the engine cradle.
After welding, I shined a light through a hole in the frame (a circular one from the factory) and looked for any light leaking out. I found a few pinholes (likely from were I burned through the metal by mistake) and filled them in with filler rod.
I ground down the welds a bit to make them look a bit better, and to check for any weak areas. Everything looked good. Well, the patch is very ugly, but it seems plenty strong.
The first cut in the four inch patch.
Test fitting the patch.
The patch clamped against the frame, ready for welding.
The patch tacked in place by three corners.
The cleaned up hole under the driver's side engine cradle.
Mostly welded in place, but with a few too many accidental burn-throughs in on one end.
Fully welded.
A New Hole
While cleaning off some of the soot from the engine cradle, I discovered another hole I hadn't noticed before. This was in the form of a gash about six inches long on the vertical surface just above the hole I'd just patched.
The procedure was the same as before: I knocked out the loose material, then used the grinder to remove a few inches of epoxy around the hole. I cut another piece of metal large enough to cover the hole, and then trimmed it down until it was about an inch wider on each side. I also had to bend the end of the metal, as the hole wrapped around a slight corner. I did this by putting it in a vice and bending it by hand.
I wasn't able to get the patch completely flush I decided to tack it and hammer it flat afterward. It was big enough that I was able to hold it in place with a gloved hand while I tacked the opposite corner. I wound up misaligning it slightly, and had to heat up the tack, tap it down a bit, and let the tack cool again. I tacked the opposite corner, then welded the top edge. This led to the untacked corner sticking up a bit. To fix that and the general lack of lying flat, I heated the edges with the torch and then gave them some strong taps with a four pound hammer. The heated metal easily bent and sat flush with the frame, and was easy to finish welding in place.
The new hole found above the one on the driver's side, after being cleaned up with an angle grinder.
A closer view of the hole, and the previously-welded patch below it.
A version of the patch next to the gash. The patch still needed to be cut down a bit more.
The patch tacked down from one corner. It had to be shifted a little due to being misaligned at the lower right.
The fully welded patch. Not exactly pretty, but it'll get the job done.
The two patches after a bit of clean up.
Welding The Passenger Side Hole
Again the process was the same for the hole on the passenger's side. I grinned down the epoxy around the hole, using both an angle grinder and a Dremel with a grinding head to get into some of the hard-to-reach areas. I cut a piece of 1/16" mild steel into a roughly triangular shape that matched the hole.
Before welding, I used bungee cords to keep any hoses and lines out of the way, so that I wouldn't accidentally wave the torch over them. Next I clamped it in place and tacked a corner and a few points along one edge. This unfortunately revealed that the frame bows a bit, causing the other side of the patch to not sit flush. Heating it up and flatting it with a hammer seemed to get it pretty flush, but I couldn't get it perfect. I resorted to a lot of filler rod to help with the gap.
I once again screwed up with the size of the patch (or just the alignment) and had a small gap on one side that needed to be filled. More annoying was that one edge was very near a perpendicular surface and an overhang, making it very hard to clearly see where I was welding, so I had to do it a bit blind and hope for the best. I also had a couple of burn-throughs that I filled with carefully application of the filler rod.
When I was about three quarters done, I tested the quality of the weld by sliding a pry bar under the patch and trying to break it free; it was adequately strong, and I stopped before I'd bent the patch too badly At this point I ran out of acetylene, so I had to finish the weld the next weekend.
With my new tank of acetylene, I decided to redo the weld on the right side of the patch. I ground it down and re-welded it with notably better results. I also learned to wear welding gloves while grinding, or at least make sure to fully button up the sleeves of my welding jacket - a hot blob of ground metal fell down the sleeve and gave me first to second degree burns (minor blistering, like a rash), which stung for a couple of hours but did no real harm.
The other mistake I made was not properly testing the acetylene connections. My leak test fluid was frozen solid, and I didn't think to do a simply pressure hold test. I had been wondering what the smell was, but I didn't realize it was acetylene until I closed the tank after ac couple of hours and saw the regulator pressure drop quickly to zero. This was bad -- all the other valves were closed, so the regulator should have been holding pressure. I tightened it to the tank with a wrench, opened the tank valve and closed it again, and saw the pressure leak out much more slowly. I repeated this once more and the pressure stayed put. I got pretty lucky that I didn't blow myself up, and I probably wasted between a quarter and a half of a tank of gas.
Back under the car, my attempts to weld the bottom edge of the patch had mostly led to burn-through of the frame's metal. Part of this was due to my new panoramic welding goggles. These tint a bit differently than my old ones, so when I adjusted the flame I was actually making it too hot (too much oxygen), causing sparks to fly from the puddles and more easily burning through the steel. I decided that I should just weld a second patch over the first to take care of the holes I'd introduced.
I used a piece of rectangular scrap I'd cut off when making the other patches. I needed to remove more epoxy, but my angle grinder wouldn't fit int he space, so I used a grinding stone bit on a Dremel. I very quickly wore away stone surface, although I didn't notice until I'd finished that I was just scraping metal with metal. After clamping the patch in place, the I tacked it at three points along one edge, then heated another head and tapped it with a hammer to bend it around the patch and flush with the frame. I then tacked that and repeated the process for other two edges, then went back and finished welding everything down.
The new patch cut to size and test fit, after grinding away the epoxy and rust around the hole.
The patch mostly welded into place. While the weld is decently strong, the right edge is obviously very poor quality.
After grinding down the right side of the patch, I reworded it with better results. Unfortunately, my attempts at welding the bottom edge caused a few burnt throughs, and I decided to cover it with a second patch.
Minor burns from grinding without wearing gloves.
Dremel grinding stone used to remove hard-to-reach epoxy under the frame.
The second patch applied over the first, creating the final patch.
Edge Weld
I noticed some of the sheet metal separating the passenger side patch. I was worried about it rusting from the inside, so I decided to close the hole. I heated the metal with the welding torch and hit it with a hammer to narrow the gap, and then welded the two pieces together with my torch and some filler rod. This weld came out pretty decently, and should keep the metal from separating any further and keep rust from forming between the plates.
The separating metal plates under the frame, before welding. The patch previously welded under the frame is also visible here.
After flattening and welding the plates back together.
Surface Rust
There was a minor surface rust along the bottom of the engine cradle and the trailing arms, but this was mostly cosmetic. Much of it just needed to be cleaned up with a wire brush, coated with POR-15 and painted. The sheet metal plates that make up the trailing arms started to pull apart, with rust forming between them. Those could simply be painted, or the edges could be welded up first and then painted.


Rust Clean Up
The biggest concern was the three inch holes under the lower link arms. Next was the hole behind the passenger link arm, and finally the surface rust under the car. Of course, they were easiest to fix in reverse order.
I bought a small wire brush set from Harbor Freight to clean out much of the rust. This got rid of most of the loose rust and broken metal bits. I also tried using some small sanding discs on a Ryloc adaptor on the end of the drill, as well as some blending pads, but the wire brush worked best. This won't necessarily clean it to bare metal, but it doesn't need to; we just need to remove bits that the paint won't be able to stick to or that will fall off when painted.
Cracked Epoxy
Another issue was cracks in the epoxy. The worst was on the driver's side of the engine cradle, which had a bunch of small cracks all over it.
While I was here, I also looked in the circular holes designed into the frame; while there was no rust visible, reaching in with my fingers allowed me to peal strips of epoxy off of the opposite inside wall. I planned on dealing with this by spraying paint inside of it, or possibly slopping a paint-soaked rag around inside as best I can.
As for the cracked epoxy, after some discussion on DMCTalk, I used my electric angle grinder with a grinding wheel and used that to remove the damaged epoxy. The process is pretty easy; you know you've hit metal when you see sparks.
Small cracks along the surface of epoxy on the driver's side of engine cradle.
The bare clean metal after the epoxy was removed with an angle grinder.
Looking through the hole int he frame showed no damage tot he epoxy, but reaching in allowed me to peel off sheets that had come loose from the opposite face.
Another issue was the blackening of the surfaces near where I had welded the new parts on. After trying to clean it off with a bristle disc and some Simple Green, I decided that surface was simply black now and that it wasn't going to get any cleaner, and that I'd simply paint over it.
Treating the Surfaces
POR-15 Metal Prep (right) used on the bare metal, and Self-Etching Primer (left) used on top of the POR-15 before final painting.
At this point I hit a small snag -- by the time I'd finished welding and was ready to paint, it was the middle of winter and often below freezing. I was stopped in my tracks until it was at least 50 degrees out, as paints don't work well in cold or humid conditions. I still had plenty of EFI and ignition work to do on the engine, so this wasn't a total showstopper, but it meant I had to wait a bit longer before I could reinstall the engine in the car.
I treated both the clean metal surfaces and the surface rust on some other areas with POR-15 Metal Ready. This etches the surface to ensure that the POR-15 sticks properly. I'm not sure this was entirely necessary where I'd removed the epoxy, as the angle grinder roughed it up pretty good, but I figured it wouldn't hurt. It got the spray bottle version of Metal Ready, which made it easy to coat the surfaces. After 20 minutes, I wiped them down as per the instructions.
I used POR-15 to protect the surfaces themselves. POR-15 comes in various different can sizes, but it is notoriously difficult to reuse an opened can. If you get any of it on the lip of the can, you'll probably seal it forever. I decided to just roll with it and bought the six pack of 4 oz cans, with the intention of only using each can once. I used I used a cheap bristle brushes from Home Depot to paint the POR-15 onto the surface; I pretty much assumed I wasn't going to be able to clean the brush and was going to have to throw it away. Since this is the frame, I don't care too much about looks.
I used some plastic wrap between the POR-15 can and cap when I was done. This keeps the can from drying out between coats, while also making it possible to open it again without the POR-15 sealing the cap to the can. After a few hours the POR-15 was no longer tacky, so I popped off the lid and applied the second coat.
If you want some tips on applying POR-15, I found this PDF to be fairly handy.
Rust on the engine cradle treated with POR-15.
Driver's side weld coated with POR-15.
Passenger side weld covered with POR-15.
Inside the Frame
POR-15 isn't easy to spray without diluting it and using air spray tools, which I didn't really want to deal with. Instead I planned on spraying some Rustoleum Stop Rust spray paint using a Dinitrol Extension Spray Wand. These comes in 10 packs under the part number DINE17149-10, but no one would ship those to the US. I finally bought three from an eBay seller in Lithuania, with the knowledge that it would take roughly a month to get here.
The nozzles replace those of an existing spray can, but unfortunately it didn't fit my Krylon can. The issue is that you can't remove the Krylon nozzle, at least not on the can I had. I also tried a can of Rustoleum, but that nozzle slid onto a tube in the can, instead of the nozzle itself having the tube mounted on it.
I wound up buying a can of Eastwood Interior Frame Coating spray, mostly because it included its own extension spray wand. The end of the wand easily fits inside the holes in the frame, spraying paint in a wide cone to completely coat the interior.
Later I found that the Dinitrol wands fit perfectly into different Rustolium cans, so apparently you just need to be particular about what specific paint you buy, even from the same manufacturer. The key is to have a nozzle that pulls straight out and leaves a hole into the can.
Eastwood Internal Frame Coating and two cans of Rustoleum, with their nozzles removed (each sits next to the base of their respective can in the picture). Notice that the Eastman and grey Rustoleum have red nozzles that stick into their cans, while the white Rustoleum has a larger nozzle that fits onto a tube sticking out the top of the can. The extension wand will only fit on the former style, not the latter.
A top-down view of the cans. The middle can of Rustoleum can fit the extension wand (shown between the two left cans and on the leftmost Eastwood can). The rightmost can of Rustoleum has the wrong kind of nozzle, and the extension wand won't fit on it.
The Eastwood extension wand has five holes in a conical end to spray paint inside the frame in all directions. The Dinitrol wand has a different shape that sprays more out to the sides. Both work just as well.
With the wand attached, I simply inserted the end into the weep holes in the frame and sprayed it everywhere. This revealed a weep hole under the frame that I had previously attempted to weld up on the passenger side. It also showed that I hadn't quite done a perfect weld on one of my patches, causing some paint to leak through a pinhole under the passenger weld. I decided not to worry about this -- the rust prevention should help keep it from rusting up again, and it wasn't worth stripping the paint off, welding it back up, and painting the multiple coats another time.
Spraying paint into the frame through one of the machined holes.
The four mustard brown/green splatters on the floor mark where the paint sprayed inside the frame leaked out through weep holes. These aren't rusted through holes, but rather intentionally machined holes to allow water to leak out of the frame.
Paint that had leaked out through the machined hole on the other side of the frame, and through the weep hole under the cross member. The pinhole fault in my welding is near the right edge of the picture, and is somewhat masked y the paint from the messy paint from elsewhere.
Final Painting (aka Topcoating)
POR-15 is UV-sensitive, and will break down over time. While the frame isn't exposed to direct sunlight, I thought I should paint it anyway. While I think you can paint POR-15 directly, I also got the impression that sometimes paint has trouble sticking to it. Just in case, I bought a can of POR-15 Self Etching Primer, which helps create a better bonding surface for the paint, and sprayed it over the POR-15.
Driver's side weld after applying primer.
Passenger side after applying primer.
Link arm area after applying primer.
The primer is a remarkably good match for the original epoxy, but I wanted to put a final coat of paint on top of it anyway. A quick search of DMCTalk found that Krylon Smoke Gray is the best match for the DeLorean's stock epoxy color. I couldn't find it locally, but I did find it on Amazon. I applied two coats of this over the primer. I didn't do the best job of this; in some cases I held the can too close and it would run a bit, although in part that's due to the confined areas I was working in at times, trying to stay out of the way of other parts of the frame hanging coolant lines. I also got a little paint on the fiberglass, but overall it's reasonably decent.
A can of Krylon Smoke Gray, which matches the original epoxy color.
Freshly painted engine subframe.
The control arm and more of the subframe after painting.
And that's it -- with the frame patched and painted, I'm finally ready to reinstall the engine and transmission.