Radio Upgrade: From Double-DIN to Remote Screen
Joe Angell
About two years ago I’d installed a 7” Pioneer double DIN head unit, primarily because I wanted to use Apple CarPlay. This particular unit was fairly affordable, but only supported wired CarPlay, meaning I had to take my phone out of my pocket and plug it into the car. This doesn’t seem like a big deal, but I got very used to Bluetooth connections where it automatically connected without a cable.
Also, something was wrong with the backup camera that seemed like a problem related to the head unit. It would often just show black, but if you left the car in reverse for about 90 seconds, the camera worked again. Oddly, manually switching the camera on from the touch screen worked fine, but it really needs to work automatically when you go into reverse.
The New Radio
I really wanted wireless CarPlay and to fix the backup camera, so I decided to upgrade to a newer 9” Pioneer unit, the DMH-WC6600NEX 1-DIN Modular Digital Media Receiver. This new model has a screen that is separate from the main unit, providing quite a lot of mounting flexibility. If you buy an extension cable, you can mount the screen far away from the main unit, like under the passenger kneepad or some other place where you have more space. Since I already had a double-DIN unit installed in the standard location, I didn’t relocate the main unit, but the detachable screen was still quite useful.
Swapping the Old Radio with the New Main Unit
To get the old head unit out, I had to remove the entire center console and center stack. This means taking off the shifter plate, the center console, all the climate control dials and the panel face, and then the stack itself. With the stack on the bench I could remove the two bolts I’d added to mount the radio..
The wiring for the new head unit was trivial, since the Pioneer units use the same harness. I just unplugged the old one and plugged in the new one. This new unit also has GPS, and complains that I don’t have a speed sensor hooked up. My angle drive fails every 5 miles and I haven’t gotten around to building a pulse output from my digital speedometer project, so I just left it that way. The GPS and Apple Maps works just fine with only GPS; the speed sensor just improves the accuracy a bit, and would probably be more useful if I had to drive through long tunnels more often.
The new radio bolted right back up in the same place as the old one. The hard part is just making sure it’s flush, since these aren’t exactly precise holes that I put in the stack, nor necessarily level, so there was a lot of back and forth until it was properly aligned.
The hew main unit installed in the center stack. The screen is laying face down to the left.
The assembled screen and main unit using the included brackets. Notice how much wider the screen is than the center stack. The screen will have to be attached after the center console trim is installed, so another solution is needed.
Installing the New Screen
Attaching the new screen was a bit trickier. It is wider than the center console trim, so it can’t sit recessed like a normal radio would. Instead, it has to be installed after the center stack and the center console trim are in place in the car, string over the center console trim. There’s no good place to get screwdriver in to use the stock brackets that mount the screen to the holes on the top of the main unit. Mounting the screen to the main unit first would make it difficult to connect all the wires to the back of it.
A friend of mine suggested using magnets, so I decided to give the ta shot. My main concern was the strength of the magnets. This was not an issue at all. The neodymium magnets I got from Amazon were very strong, and easily hold the screen to the main unit so that it was very hard to pull straight off.
It did, however, slide around, and would drop down due to its weight. This is because I didn’t want to clue or otherwise permanently mount the magnets to the main unit or screen to avoid damaging them. If I were, I could do some tricks like place some magnets with their negative poles towards the main unit around other magnets with their negative poles aimed at the screen, and do the inverse on the screen. That would lock everything together and keep it from sliding around, but the magnets need to be firmly attached to the main unit and screen to pull that off.
My alternate solution was to fabricate some brackets from aluminum L stock that bolted to the back of the screen through the existing mounting holes, and were positioned such that they framed the main unit. The magnets would keep the screen from falling off, while the brackets kept everything lined up. It holds extremely well, and doesn’t shift at all when driving.
To figure out where to put the mounting holes in the brackets, I placed lined up a piece of cardboard with the back of the screen and punched holes through it where the the screw holes were. I then transferred those holes to the aluminum and drilled them out. Since I never get this right, I had to widen the holes into slots with the drill afterward so that the screen was level, but the original holes were pretty close.
One of the brackets, and the cardboard template I made from the mounting holes on the back of the display.
All four L-brackets mounted to the back of the screen with bolts, and the magnets that will lock it onto the main unit.
A view from above of the full installed bracket setup. The connector visible on the top is where the screen plugs into the main unit.
The main unit pre-installed in the center stack, and the center console trim reinstalled. The cable above the radio will be connected to the screen.
The screen does sit pretty far forward, overhanging the climate controls, but doesn’t interfere with it. It sits far enough back that it’s not in any way in the way of the shifter. You get used to it pretty quickly.
In the future I can mount the screen in a different place if I decided to upgrade the climate controls or whatnot. I could even position the main unit in a different part of the car, although I’d have to buy a $80 extension cable to do that. I can easily build a new bracket for future mounting options.
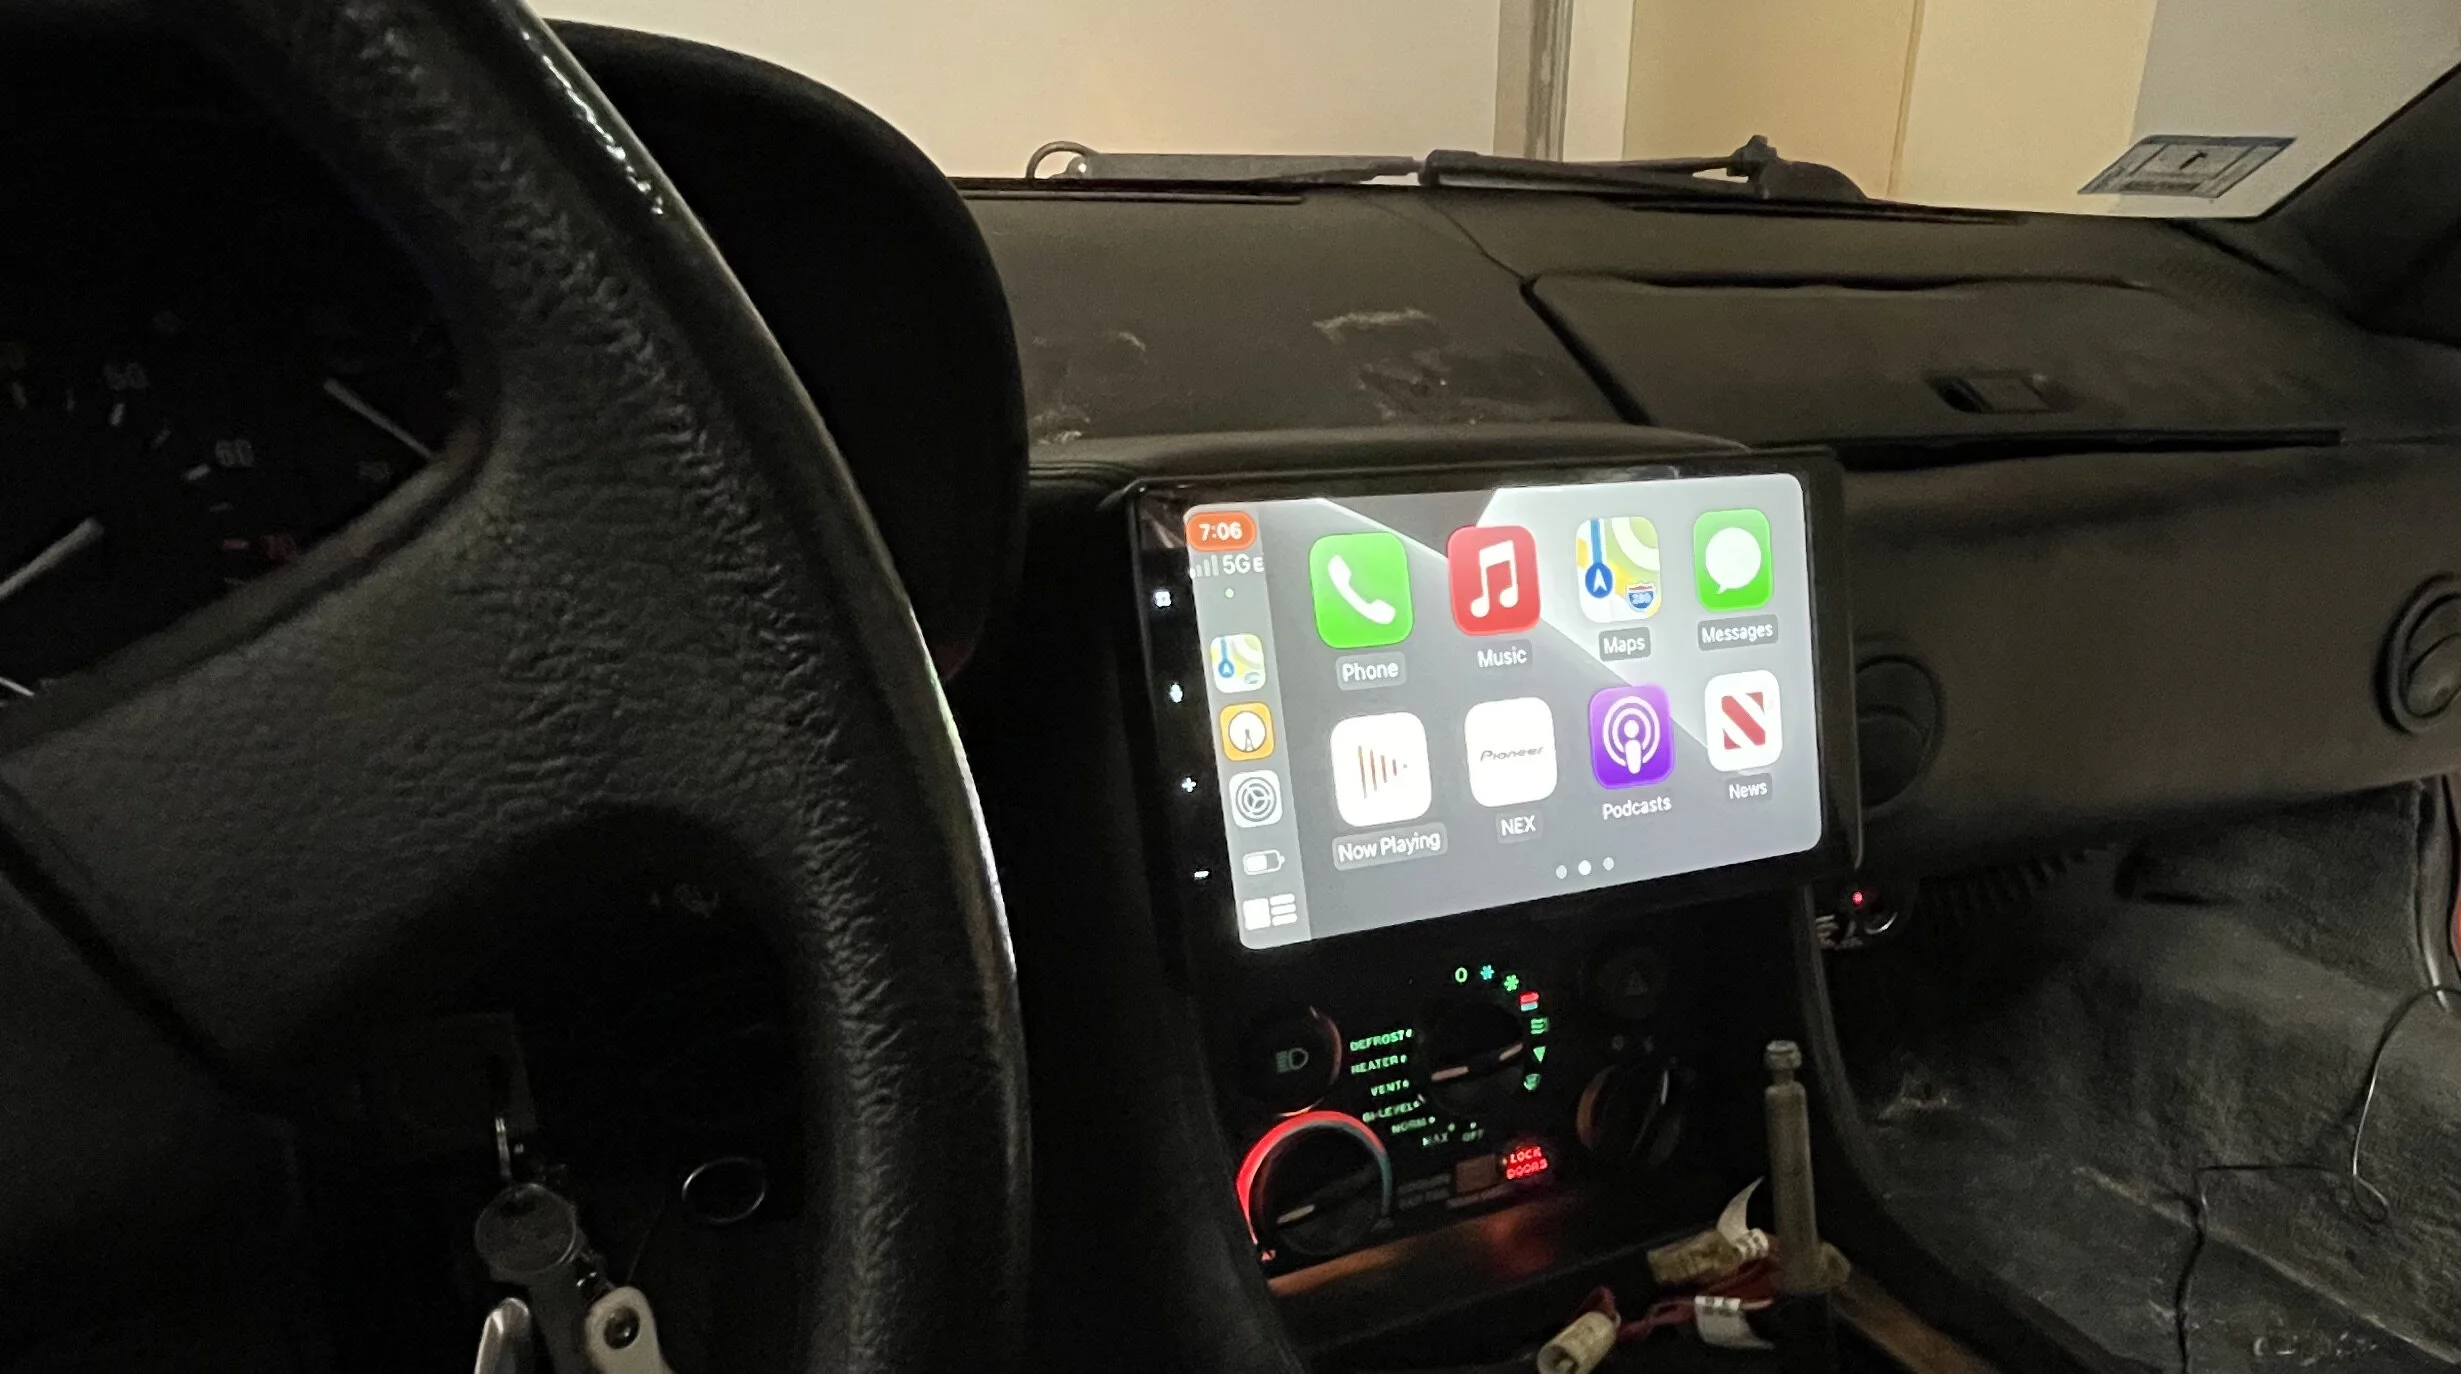
The final install, booting up the head unit.
A longer view of the final install, showing the CarPlay screen.
GPS Antenna
This radio has a GPS antenna, the data from which is sent to an attached phone for their mapping apps. The antenna just plugs into the back of the main unit, and has a long cable that goes to wherever you want it to go, which ideally should have a fairly clear view of the sky. The advantage of using this over your phone’s GPS is that it’s locked to the car’s orientation, unlike your phone which can be in any position, and if mounted correctly should have a better signal from the satellites than your phone in your pocket.
I mounted it by the passenger A pillar with some double sided tape, snaking the wire under the passenger kneepad and along the narrow gap between the A pillar trim and dash.
The GPS antenna is mounted on the dashboard near the passenger A pillar.
Head Unit Notes
The Pioneer unit has a park safety interlock, which basically means that you need to have the handbrake on to use special features that could be considered dangerous when driving. It was quite a while before I realized that in an automatic transmission car that you are supposed to use the start inhibit relay to prove the car is in Park instead of the handbrake light wire. I didn’t use either — I bought a cheap bypass kit from Amazon that gets around this issue. I don’t watch video or whatnot while driving; I just don’t want to have to deal with running the extra wires.
I also have a capacitor on the radio’s main power line that allows it to stay on while the engine is cranking while not diverting extra power to the radio, just like I did with the old radio. Without the capacitor, the radio would turn off while the car was being started, and then I’d have to wait the five to ten seconds for it to power back up. This way it can power up while I’m starting, and I can more quickly get to my maps and music.
This unit’s user interface is still a little sluggish. Less so than my old radio, but I expected modern electronics to be faster than this. Luckily, CarPlay is snappy, since the head unit is a glorified touchscreen for your phone when running in that mode. And since that’s all I want this to be, that’s fine.
There have been a few firmware updates since I got this unit that apparently fix some early CarPlay connection issues that some people have had, and by the time I got one it was working quite well. The only real problem I have is that sometimes after detecting the phone it will show “wifi audio” instead of CarPlay. You can go to the main screen and tap the CarPlay button to go to CarPlay, or press the “mode” button on the remote to switch back to CarPlay, but I don’t know why anyone would ever want to use wifi audio instead of CarPlay. I’m hoping they either fix this issue or automatically switch to CarPlay if it is detected after it auto-switched to the frankly pointless wifi audio.
Also, the backup camera works again. I’m not sure if the problem is my camera or the old radio (it’s not the best camera; I just haven’t gotten around to upgrading it yet). I’d forgotten how much I missed having that camera. It makes it so much easier to back up in parking lots. This model radio supports a front camera as well, but I haven’t bothered with that.
Even with these issues, I’m quite happy with the unit overall, and am willing to live with the shortcomings. Given the cost of the radio it shouldn’t have these issues, but the convenience and CarPlay support makes it worth it.