Coat Hanger
Indiana Jones inspired collapsing coat hanger.
circa 1999 - 2000
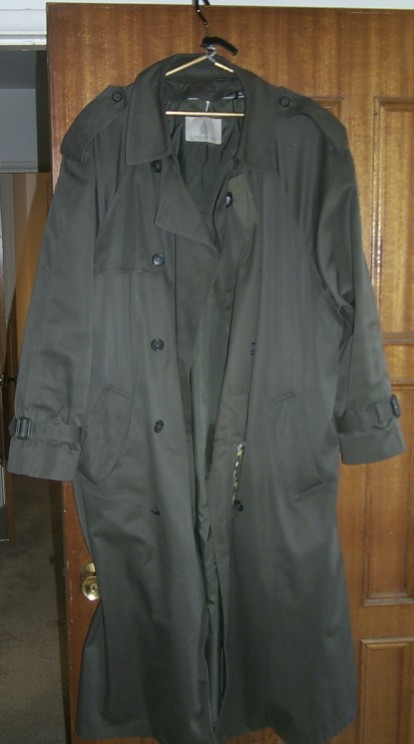
Back in the late 1990 and early 2000s, I routinely wore a long a long trench coat. Over time this evolved from a basic grey London Fog coat to a custom AbbyShot Stampede Duster (in a dark grey cloth) I decided that it would be neat to have a collapsible coat hanger similar to the one used by Toht in Raiders of the Lost Ark. Some quick research found that the original movie prop was much more simplistic than I liked, so I decided to design my own.
Single Cross Piece Hanger
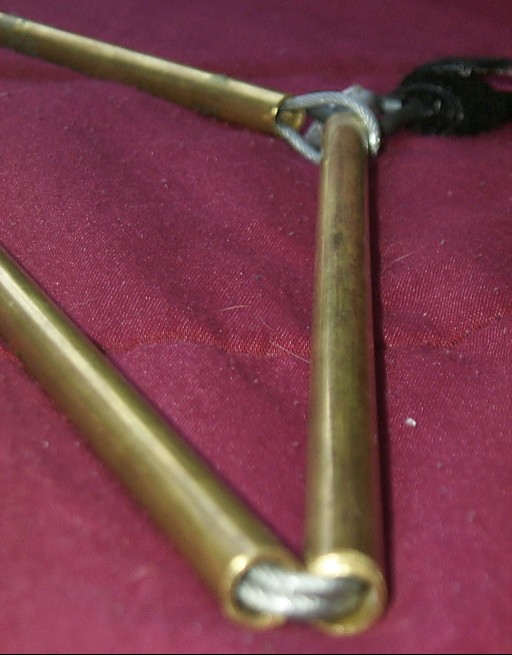
My first attempt was to use two short pieces of brass for the arms and a single long brass rod for the cross piece. Plastic-coated steel cable was used as to bind the rods together. A large plastic-coated eyelet was cut to create a hook, and a strip of veclro held it tight when collapsed. Collapsing was a mater of unhooking the hook from the steel cable.
This worked, but it wasn't terribly pretty, and it wasn't very short when it was collapsed.
Dimensions
Collapsed
- Length: 17 1/4"
- Hook Width: 2"
- Max Thickness: 3/4"
Expanded
- Length: 17 1/4"
- Height to Neck: 4 1/2"
- Heigh to Top of Hook: 9"
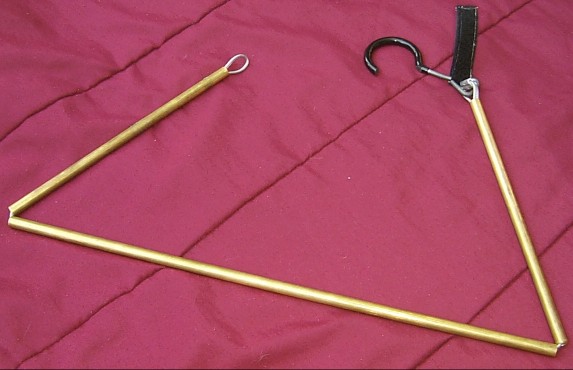

Telescoping Hanger
This was an early failed attempt at creating a telescoping coat hanger. The idea was to run a brass chain through four brass rods. Two of the rods would make the diagonal upper arms of the hanger, while the bottom two would be slightly different diameters so that they could slide over each other.
While a seemingly reasonable idea, in practice it didn't work so well. The main problem was that there was nothing to keep the sliding rods extended. Once weight was put on the hanger, the rods slid over each other and collapsed the hanger again. This probably could have been fixed by adding some kind of twist lock to keep it one, or figuring out how to make one of those spring-loaded ball bearing things to lock it in place.
This also shows my first attempted at a hook. I didn't have easy access to real coat hanger hooks, so I tried using a coat hook (the kind you'd mount on a wall to hang our coat on). This failed miserably, as the offset mounting point caused the hook to rotate at odd angles, limiting its ability to stay on a rod or other surface.

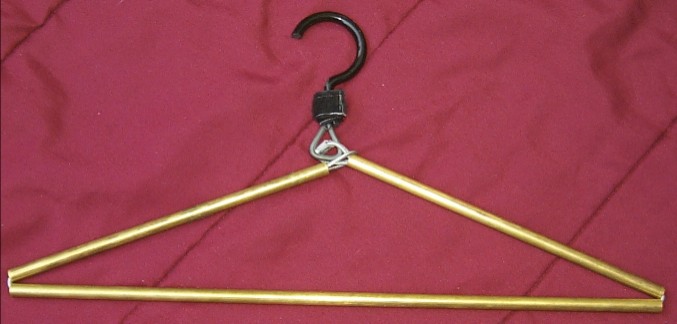
Segmented Crossbar Hanger
The third iteration closely followed the design of the first, but the solid crossbar was replaced with a two-piece version. One of the two pieces had a slightly smaller diameter rod glued into place, creating a stepped joint that could be slid into the other rod to lock the two pieces in place. This worked rather well, but was still lacking on the aesthetics front. Furthermore, the hook didn't need to be disconnected from the steel cable to collapse it, although that was still possible if desired.
Dimensions
Collapsed
- Length: 10 1/4"
- Hook Width: 2"
- Max Thickness: 1 1/2"
Expanded
- Length: 17 1/4"
- Height to Neck: 4 1/2"
- Height to Top of Hook: 9"


How to build a Segmented Crossbar Hanger
- Use the wire coat hanger to measure the length of each segment of the hanger.
- Using a utility knife, score the piece of brass for the first segment, rolling the brass under the utility knife to mark all the way around it. After enough scoring, the piece can be easily snapped off with your hands. Repeat for the remaining two segments on that tube, then do the same for the other two tubes.
- Cut the longest outer tube in half, about 1" to the right of center.
- Cut the longest inner tubes in half, about 1" left of center. The goal is to have the outer tube longer than two inner tubs, and two inner tubes longer than an outer team.
- File the ends down flat and round the sharp edges away with a metal file.
- Slide the three shortest tube pieces together, creating a single strong tube. Repeat for the other end segments. Use glue or similar to keep the pieces from sliding if you like, although I didn't actually do that here.
- Slide the longest outer crossbar tube over the two shorter inner crossbar tubes, making the female connector piece. Use glue or lock tight to keep the pieces together, as these pieces will undesirably slide.
- Slide the longest inner crossbar tubes into the shorter outer crossbar tubes, making the male connector piece. Again, use glue or lock tight to keep the pieces together to keep them from sliding.
- Run the steel cable down each layered tube, making sure the crossbar tubes mesh together correctly.
- Loop the cable back down the tube to the beginning. This creates a loop at one end of the hanger.
- Break the loop piece off of the Loop Hanger (just pull hard while twisting).
- Using a hacksaw, cut through the ring to make a hook. Make sure you cut through the right piece of the ring.
- Push the ends of the steel cable through the loops in opposite directions so they pass through.
- If you want, you can tie a knot in the steel cable, but a cleaner method is to slide each end of the cable through the aluminum ferrule, puling as hard as you can to make it as tight as possible. Squeeze the ferrule together with pliers, a vice, a special crimping tool, a hammer and nail set, whatever; just make sure the cable can't slide in the ferrule. Slide the remaining ends of the cable back down the tube. NOTE: Make sure you leave enough steel cable to get the crossbar apart. When measuring, make sure the crossbar is NOT connected together yet; leaving the hanger folded as much as possible helps here.
- Sew a hook piece of velcro to the back of a loop piece of velcro, leaving a hole that you can slide over the hook and down to the crossbar. This forms the strap that keeps the hanger together when not in use.
- Run the loop at one end of the hanger of the hook on the other end. Held up by the hook, connect the crossbar pieces together, and you have a hanger. Push the tubes flat to collapse it and wrap the velcro around; no need to take it apart for storage.
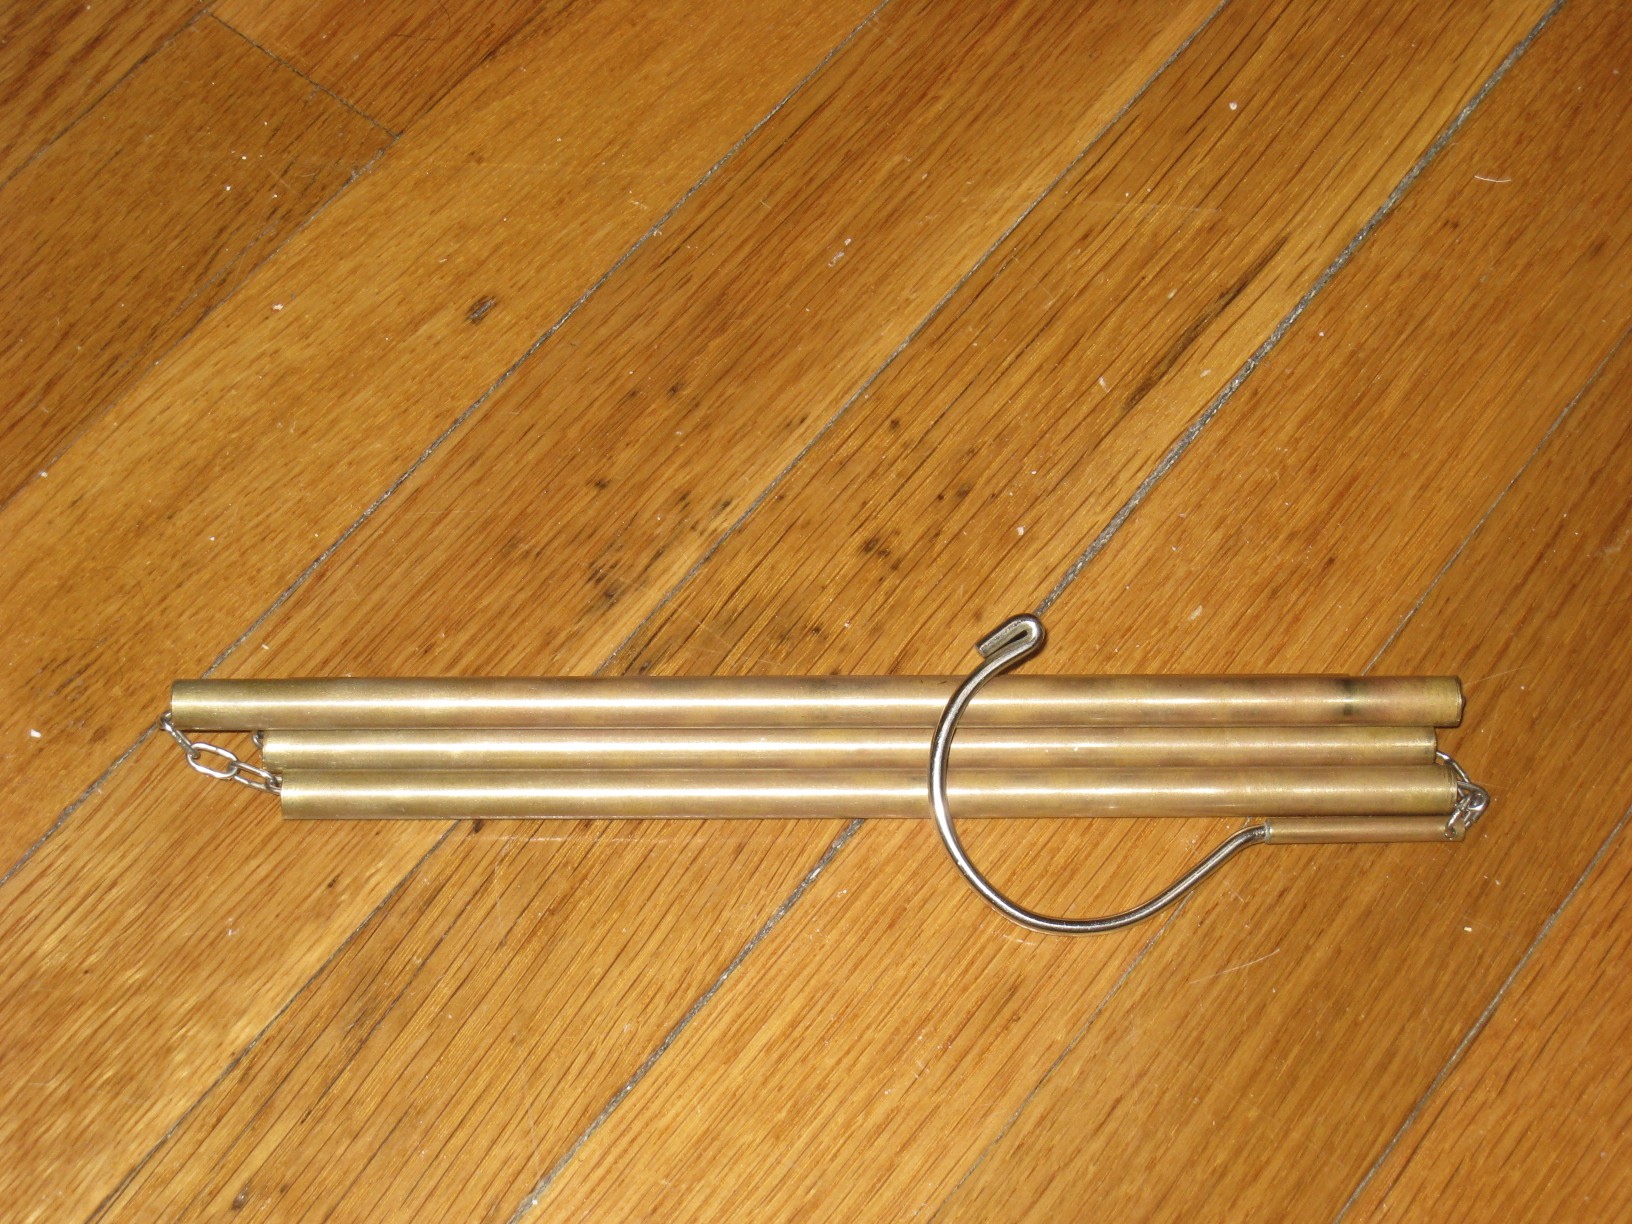
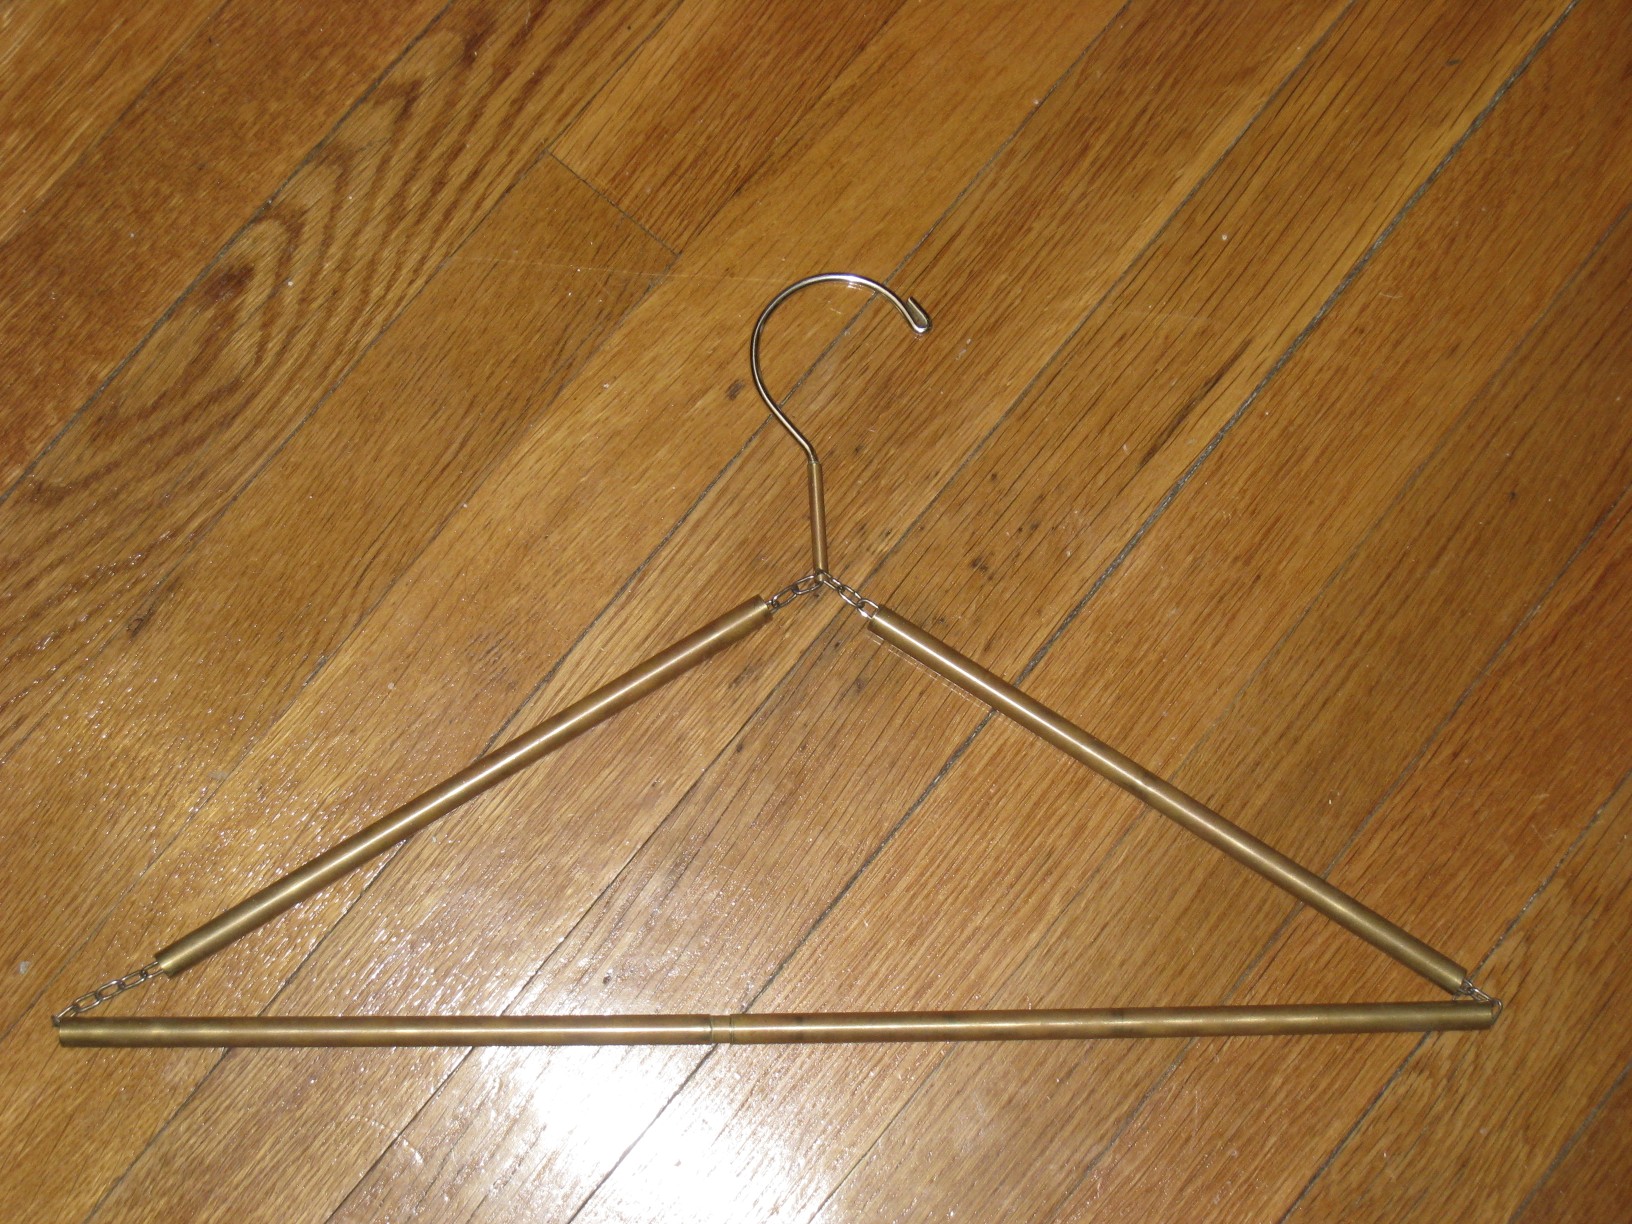
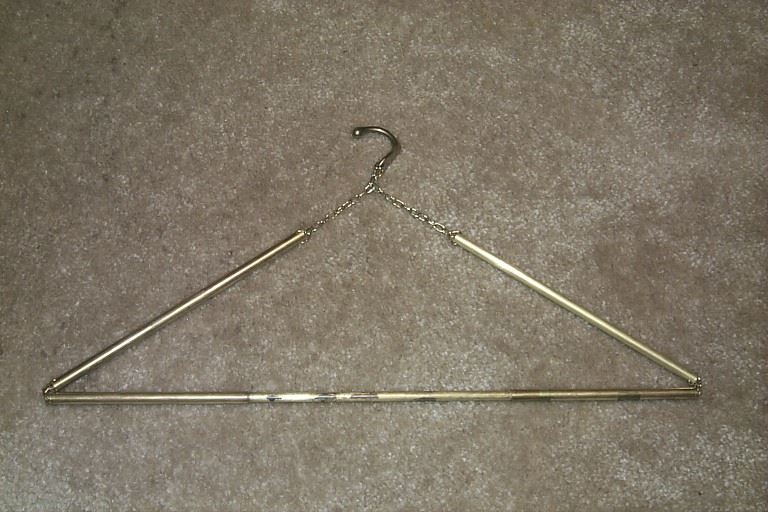
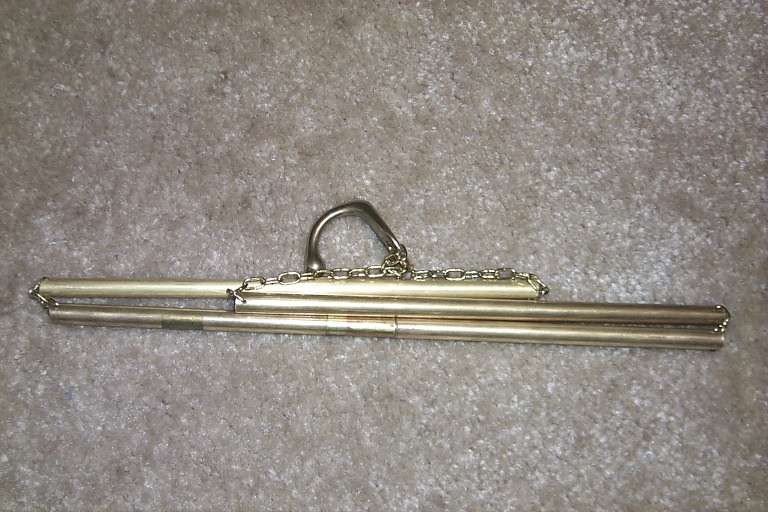
Final Design
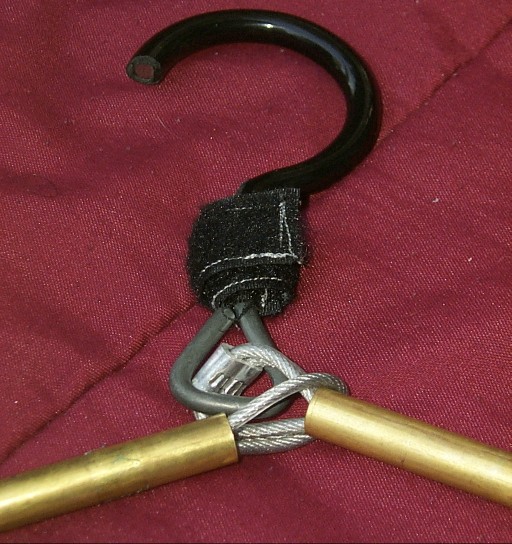
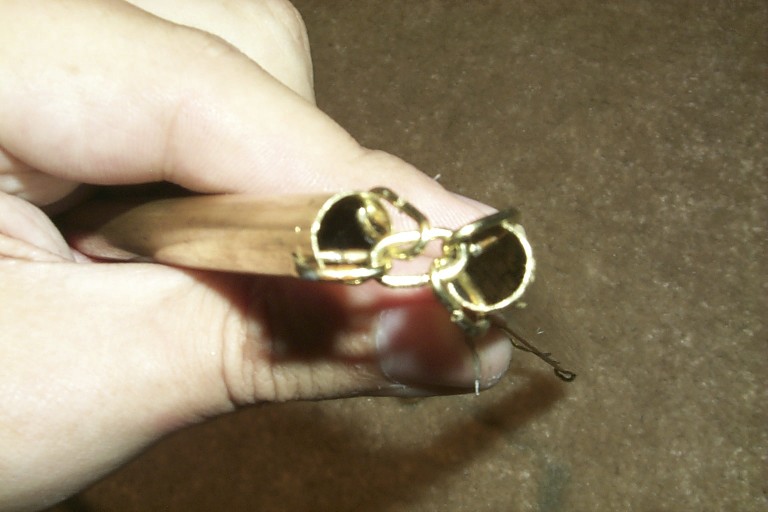
The final design combines the chain of the telescoping style hanger with the interlocking crossbar of the segmented style hanger. An actual hanger hook was purchased online. The hook is secured to the chain by drilling two small holes in a small piece of brass, which was then glued to the hanger shaft.
Construction of the final design is similar to the older segmented design. You just need to get a proper coat hook, and replace the steel cable with some brass chain from your local hardware store. The chain links can easily be bent open with two pairs of pliers so that you can hook them onto the small brass rod glued to the hook.
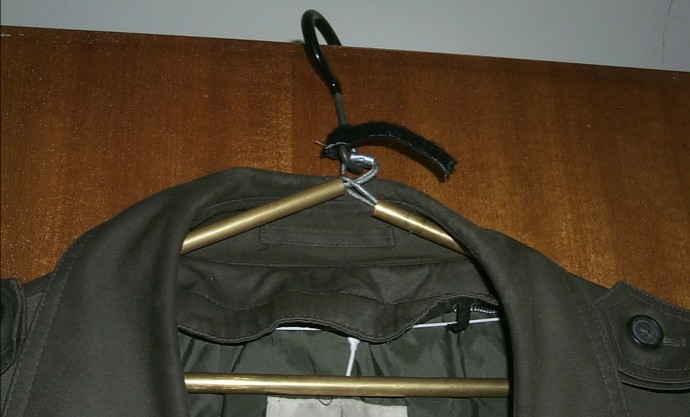
This design looks good, takes up little space, and works very well. The only improvement I'd like to make is to hinge the middle of the hook so that it takes up less space when collapsed, but it's not entirely clear how to do that.