
Washer/Dryer Finished Alert via SmartThings
Joe Angell
The washer and dryer are in the basement, and we're usually on the second floor or in the loft. These are HE units that run variable-length cycles based on the cleanliness or dryness of the clothes, which makes it difficult to guess when the laundry is done.
A common way to use a tell if your washer or dryer is done through SmartThings and other home automation systems is by placing a vibration sensor on the appliance. When it stops moving, the laundry is done, and you can have an app send a notification to your phone. But this only works with pretty simple washing machines by today's standards, as many modern machines start and stop throughout their cycle, including ours. I wanted something a bit more accurate.
First Attempt: Arduino and ThingShield
My washer and dryer have indicator LEDs for when they're done, so my first plan was to use a SmartThings ThingShield on an Arduino and some photosensors to pick up the light from the LEDs and send that as a "done" event to the SmartThings hub, where a SmartApp would then send a notification to my phone. The Arduino and ThingShield would be mounted outside the washer and dryer, with the photocells would be taped over the LEDs. A single Arduino/ThingShield would serve both the washer and dryer.
The circuit was pretty simple. I used a few feet of 30 gauge wire for the photocell and the LED for each machine, with two photocells on the dyer since I wasn't quite sure if the "wrinkle guard" feature would also light the "done" light. Photocells are basically variable resisters, so it's just a simple voltage divider (following tutorials on Adafruit). When the photocell was above a certain threshold, I'd light another LED to replace the one I was covering on the machine.
The wires that ran to the LEDs and photocells were snaked down white braided covers. This kept them together and made it look a little nicer. The LEDs and photocells themselves were soldered to a small piece of perf board, and heat shrink wrapped to keep them in position, with small windows cut out of the heat shrink for light.
It took me a bit to get the SmartThings Device Type setup up properly, but a few questions on the forums took care of that. The two tiles in the SmartThings app show the state of the washer and dryer separately, and indicate that it's either pending (white background) or done (green).
This all worked, to a degree. The ThingShield/Arduino hardware and software worked just fine. The problem was that the LEDs on the machine are covered in transparent plastic that allows a lot of ambient light to leak through. This would trip far too many false positives on my photocell. Furthermore, the wires had to be taped onto the machine in such a way that they wouldn't interfere with pushing the buttons, and looked pretty ugly to boot. It also needed a power cord, or for me to build a battery enclosure. It was a bit of a mess.
The two photosensors for the dyer's Wrinkle Shield and Done lights, wit the Arduino and ThingShield in the background.
The poor job of mounting the washer sensor over the Cycle Complete LED.
Another poor job of mounting the dyer sensor of the Done LED.
Second Attempt: Mulit-Sense Mod
After realizing that a SmartThings Multi-Sense could be repurposed into a momentary button, I thought that I might be able to repurpose it into a "laundry done" indicator. I'd need separate units for the washer and the dryer, but if it worked it would be a much cleaner installation.
I had previously taken apart part of the washer to replace the door seal, so I had a good idea about how to get to the display electronics. Washers and dryers the kind of appliances that they still includes service manuals in. On the washer, it was under the bottom panel, while in the dryer it was under the top panel. There was a fair bit of room inside where I could put the Multi-Sense, too.
The first thing to figure out was power. The Multi-Sense runs for about two years on a pair of AAA batteries. My bench power supply showed it using less than 0.01 amps, and I could run it as low as ~1.6 v without any problems (other than SmartThings warning me that the "battery" was low).
Next was the reed switch. A bit of poking with some probes found that connecting ground to the contact on the reed switch that was nearest to the large IC would cause SmartThings to read the switch as closed. That meant that when the "done" LED went on, I'd need to provide ground to the reed switch contact to simulate closing the switch. At worst, I'd have to hook up a transistor to make it work.
This all sounded good, until I got into the washing machine. I simply couldn't figure out where ground and positive lines where reliably coming into the control panel. I finally gave up on trying to hardwire an contact switch and took another approach.
SmartThings Mutli-Sense with a couple of wires solder to the reed switch.
Assembled Multi-Sense with the wires sticking out the sides and a push button for testing.
Third Attempt: Arduino and ThingShield Inside the Appliances
I went back to the ThingShield and looked at how I could put it inside the control panels of the washer and dryer. By mounting the photocell right next to the LED, I could completely avoid light leak issues and assure that I always read finished state properly. I could then mount my LED in the cavity where the original LED resided. Externally, the appliance would look unmodified, and the wiring wouldn't have to be changed in any way.
This would up working really, really well.
All the tools this project required.
The populated ThingShield mounted on the Arduino.
The uglier underside of the board.
Washer
In the washer, the surface-mount LEDs sit in very deep wells that lead to the lenses on the control panel. I used a Dremel to grind down one of the wells so that my LED's wires wouldn't interfere with the original LED. To mount the photocell, I cut a square out of some 3M Very High Bond (VHB) tape, sticking it onto the board around the LED. I then stuck my photocell next to it, and used another layer of VHB tape to completely both components. This ensured that the LED would only illuminate the photocell, and the photocell would see no other light.
Positioning the LED and reinstalling the circuit board wound up being less trouble than I expected thanks to the braiding, since it was easy to pull it down to separate the wires for the LED and photocell. Once in place, the braiding sprung back over the wires on its own.
The deep recesses that the LEDs sit in. The one on the left is where my sensor/LED pair need to be, and was ground down with a Dremel to make sure it fit.
VHB tape surrounding the LED in the corner of the board, with the photcell aimed at it.
Another piece of VHB covering the sensor and LED.
The board reassembled into the case. The white sheathing can be seeb coming out of the top left corner.
The reassembled washer control panel. The Arduino is resting on the back of the machine. The lit LED on the front of the washer is actually being controlled by the Arduino in response to the photocell receiving light from the washer's own LED.
Dryer
The dryer was much of the same. With the top of the machine removed, I was able to unbolt and unsnap the control panel from the front. The board was held on with the same kind of Torx screws as the washer, and came apart easily. I was only able to remove one side of the two-part board (I think the dial was keeping it from coming free), but that was the side with the lights I needed in it so it wasn't a problem.
The photocell was attached to the board with VHB and covered with a second piece of tape in the same way that it was done in the washer. The LED setup was a bit different, though. Instead of placing the LEDs into wells like in the washer, they have each sit on the end of an acrylic rod that leads to the front panel. This takes advantage of total internal reflection, where light bounces inside transparent rod and comes out the other side. I simply bent the rod out of the way with my pliers, and tapped the Arduino-controlled LED as close to the window in the control panel as possible. It just needed to be good enough, not perfect, and you could still see enough light from the outside.
This configuration didn't really work, though; while the photosensor was fine, the LED only dimly lit the edge of window, and wasn't really visible. I wound up breaking off the acrylic rod and taping the LED so that it pointed straight down it. It's not necessarily going to survive sitting like that, whit with how much a clothes dryer rocks around, but it'll probably be find, and it's not critical if the LED doesn't light on the machine.
With everything mounted, I ran a test cycle ran and got my SmartThings alert exactly as expected.
The dryer board, not yet disassembled.
The photocell in position on the dryer board. This was then covered with another piece of VHB tape.
Original LED mounting, with it tapped down next to where the original acrylic post resided.
Revised LED placement. I snapped off the acrylic post (you can see others on either side for the other LEDs) and taped my LED so that it pointed along it
Power and Mounting
For power, I got a sixteen foot long USB cable and plugged it into a USB wall charger. I wound up having to extend the sensor and LED wires a bit more due to running the wires out the back of the machine instead of just resting over the top like in my original external design.
I also made sure to put connectors on them (well, terminal blocks) so that they'd be a bit easier to deal with in the future. I screwed up a bit here and lost track of which wires went where, and had to trace back through my circuit to remember how everything worked (since it had been months since I'd put this together).
I got the cables out of the way by zip-tying the some holes in the side of the machine, or to other bundles of cables, before finally putting the tops back on and bolting everything down. From the outside, the machines don't look modified at all, except maybe the wire bundles coming out the back. The washer wire was able to run through a hole in the back of the machine, but the dyer one just sticks out from under the top panel.
I later realized I could have probably done this with the contact sensor just as well by replacing the reed switch with the photocell/LED circuit, although it's not clear to me how involved that would be. Since the Arduino setup is powered from the wall, I also don't have to worry about dismantling the appliances to change the batteries like I would with a context sensor.
Extending the cable wires by soldering longer wires to them.
The final installation, hanging off a hook on the wall with the wires running into the appliances.
A closeup of the mounted Arduino and ThingShield.
Arduino Sketch

The Washer/Dryer Finished Monitor device running in the SmartThings app.
The Arduino code is fairly straight forward. It just sends "washer:done" or "washer:pending" for the washer, and "dryer:done" and "dryer:pending" for the dryer, based on the amount of light hitting their respective photocells. It also turns on the LED associated with the appliance when it sends the "done" event, and resets it when it sends the "pending" event. The Arduino board used was an UNO.
SmartThings Device Type
The device type decodes the ZigBee messages from the Arduino ThingShield and passes them along to SmartThings. It also defines a tile for the washer and another for the dryer, and sets them up to change color and label depending on if the appliance is pending or done.
SmartThings SmartApp
The app is again rather simple. I used the IR Bridge project as an example for how to let me choose the ThingShield as the input for the app. After that it was pretty easy to read the state from the device and send push notifications. It has no options, and simply sends the hard-coded messages when the device trips them.
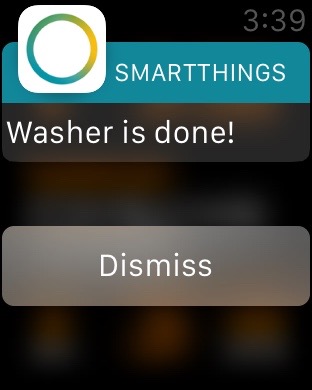
That's it. Now whenever the washer or dryer finishes, I get alerts on my phone (and, by extension, my watch).