Beefing Up the Front Suspension
Joe Angell
Watch the video where I talk about installing the new front suspension!
Not too terribly long ago, I refurbished the front suspension, replacing all the bushings and ball joints with new ones, added some stabilizers to the lower control arms, and boxed in the bottom of the lower control arms. This got rid of most of the vibrations in the front end, the whole “losing a ball joint nut on the highway” incident notwithstanding, but it didn’t get rid of all of them.
This time, I decided to just replace the whole front suspension with better parts.
As an Amazon Associate, I earn from qualifying purchases (learn more here), so if you want to support me, that’s a good way to do it.
The Parts
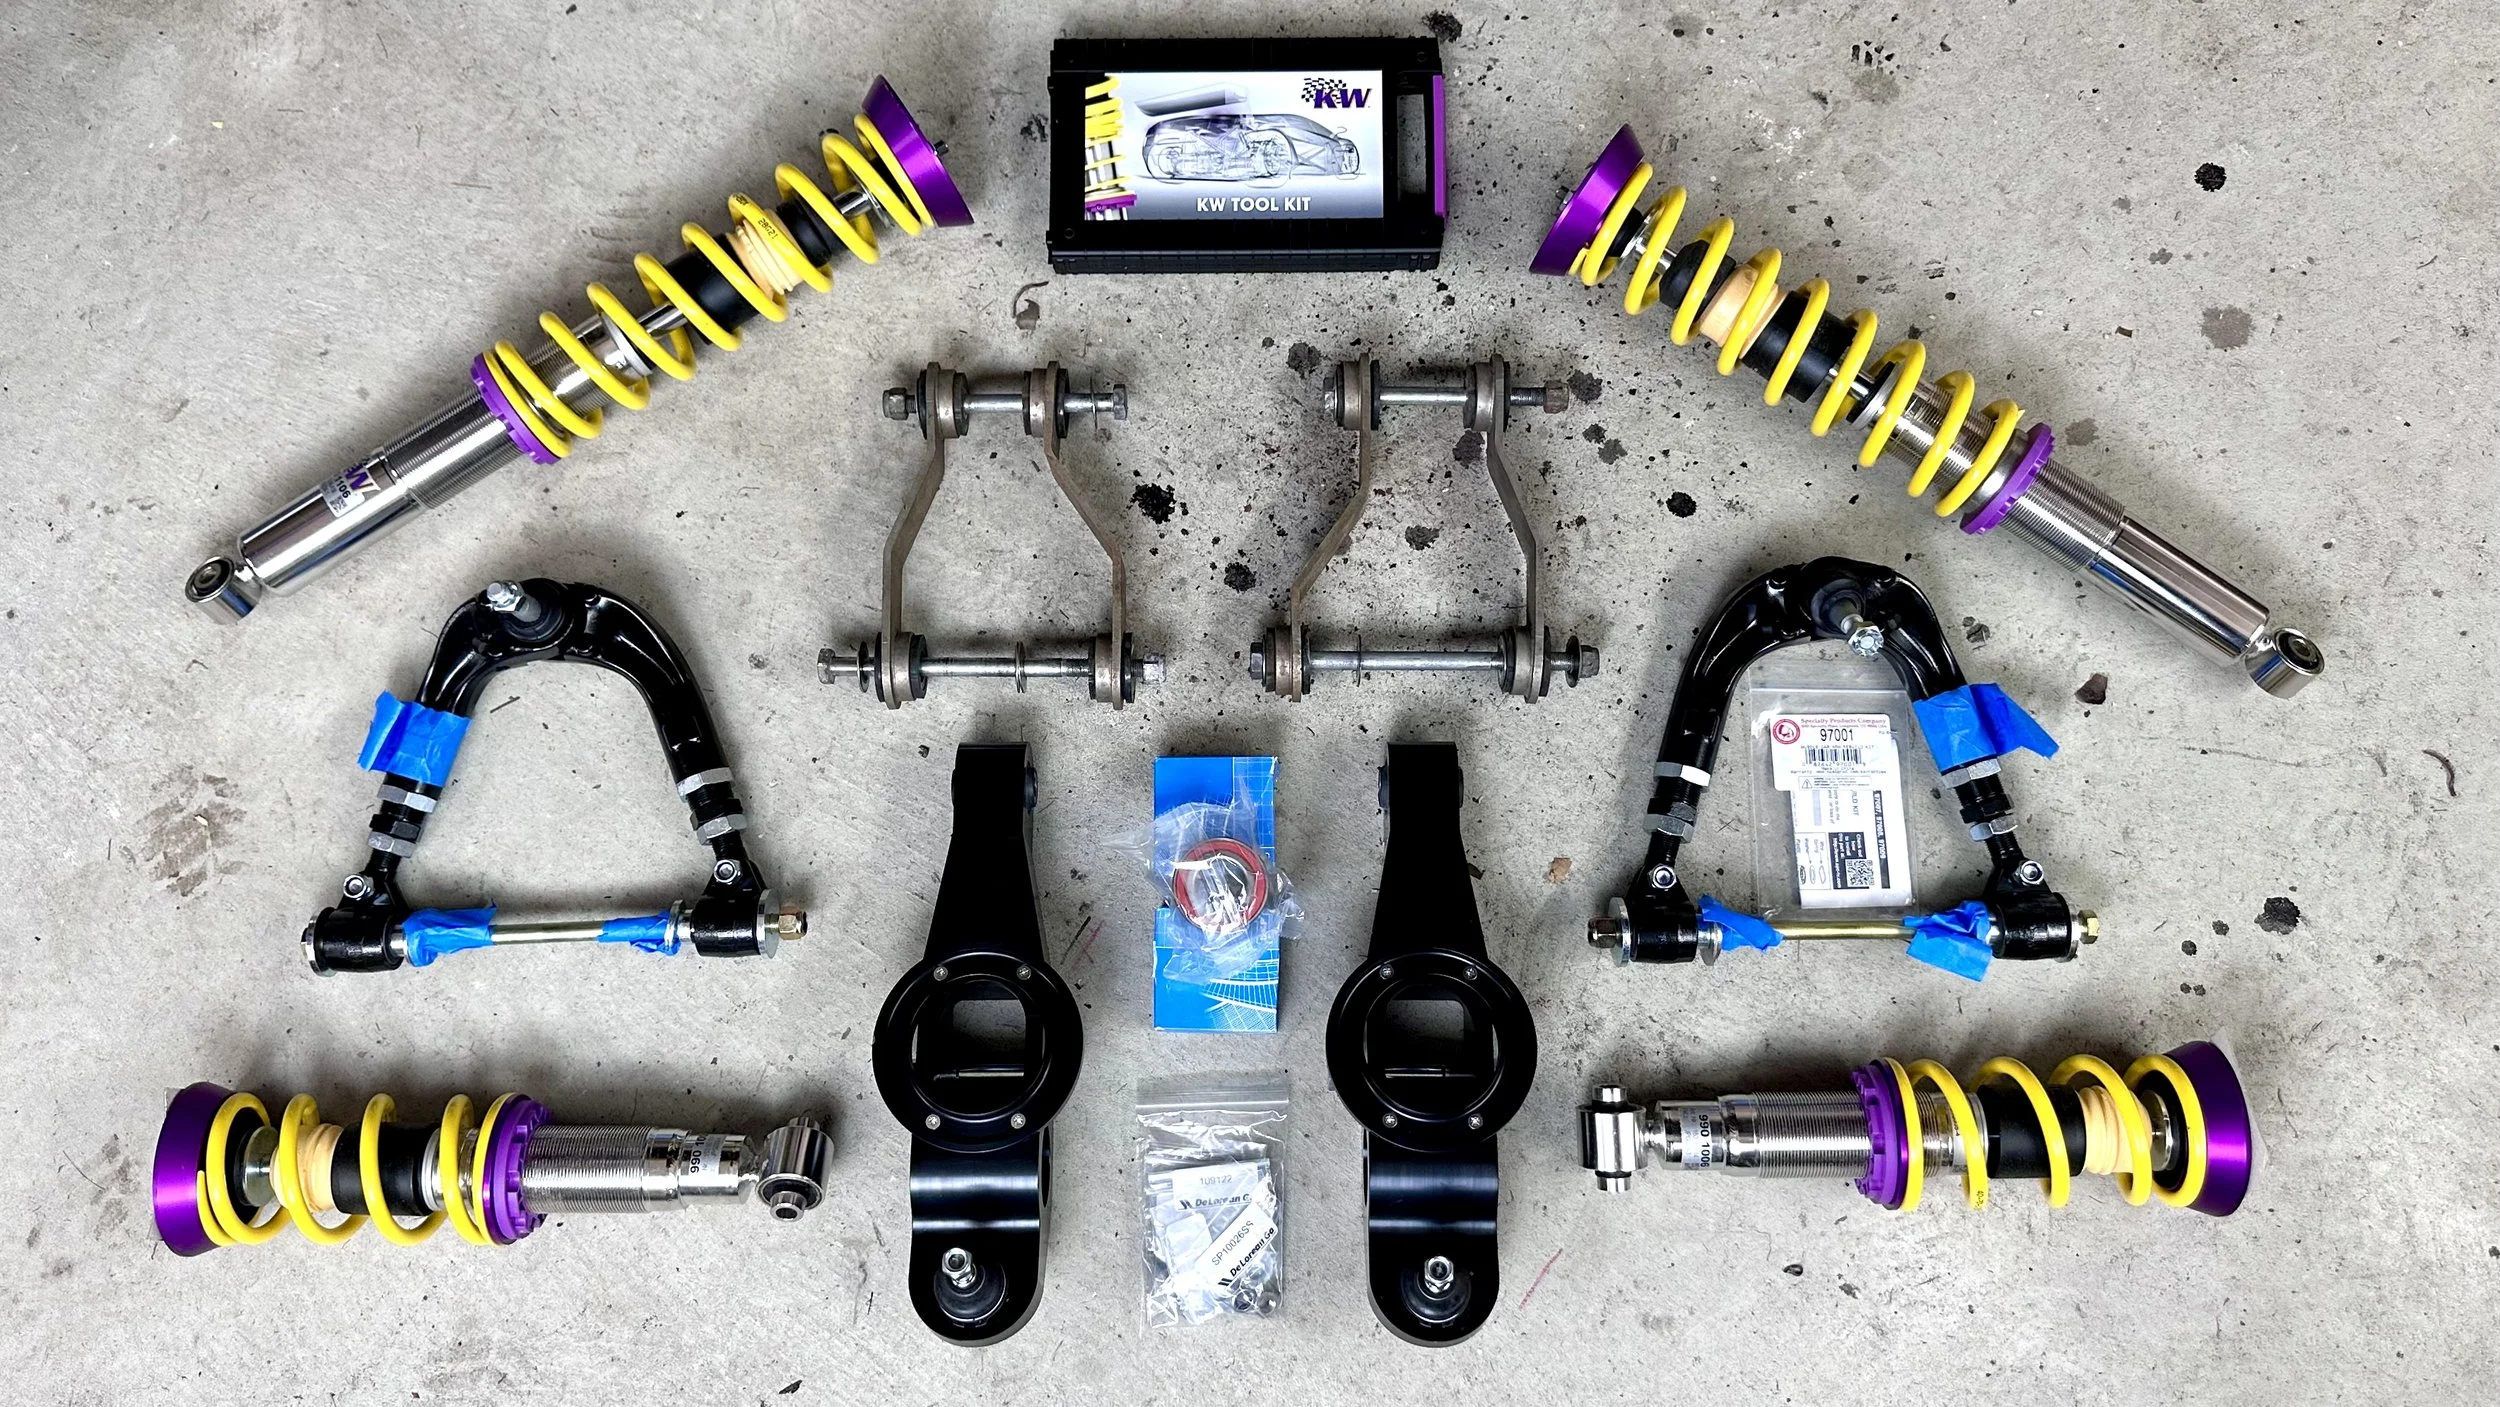
I went with a mix-and-match approach, with parts from a few different vendors.
Lower Control Arms
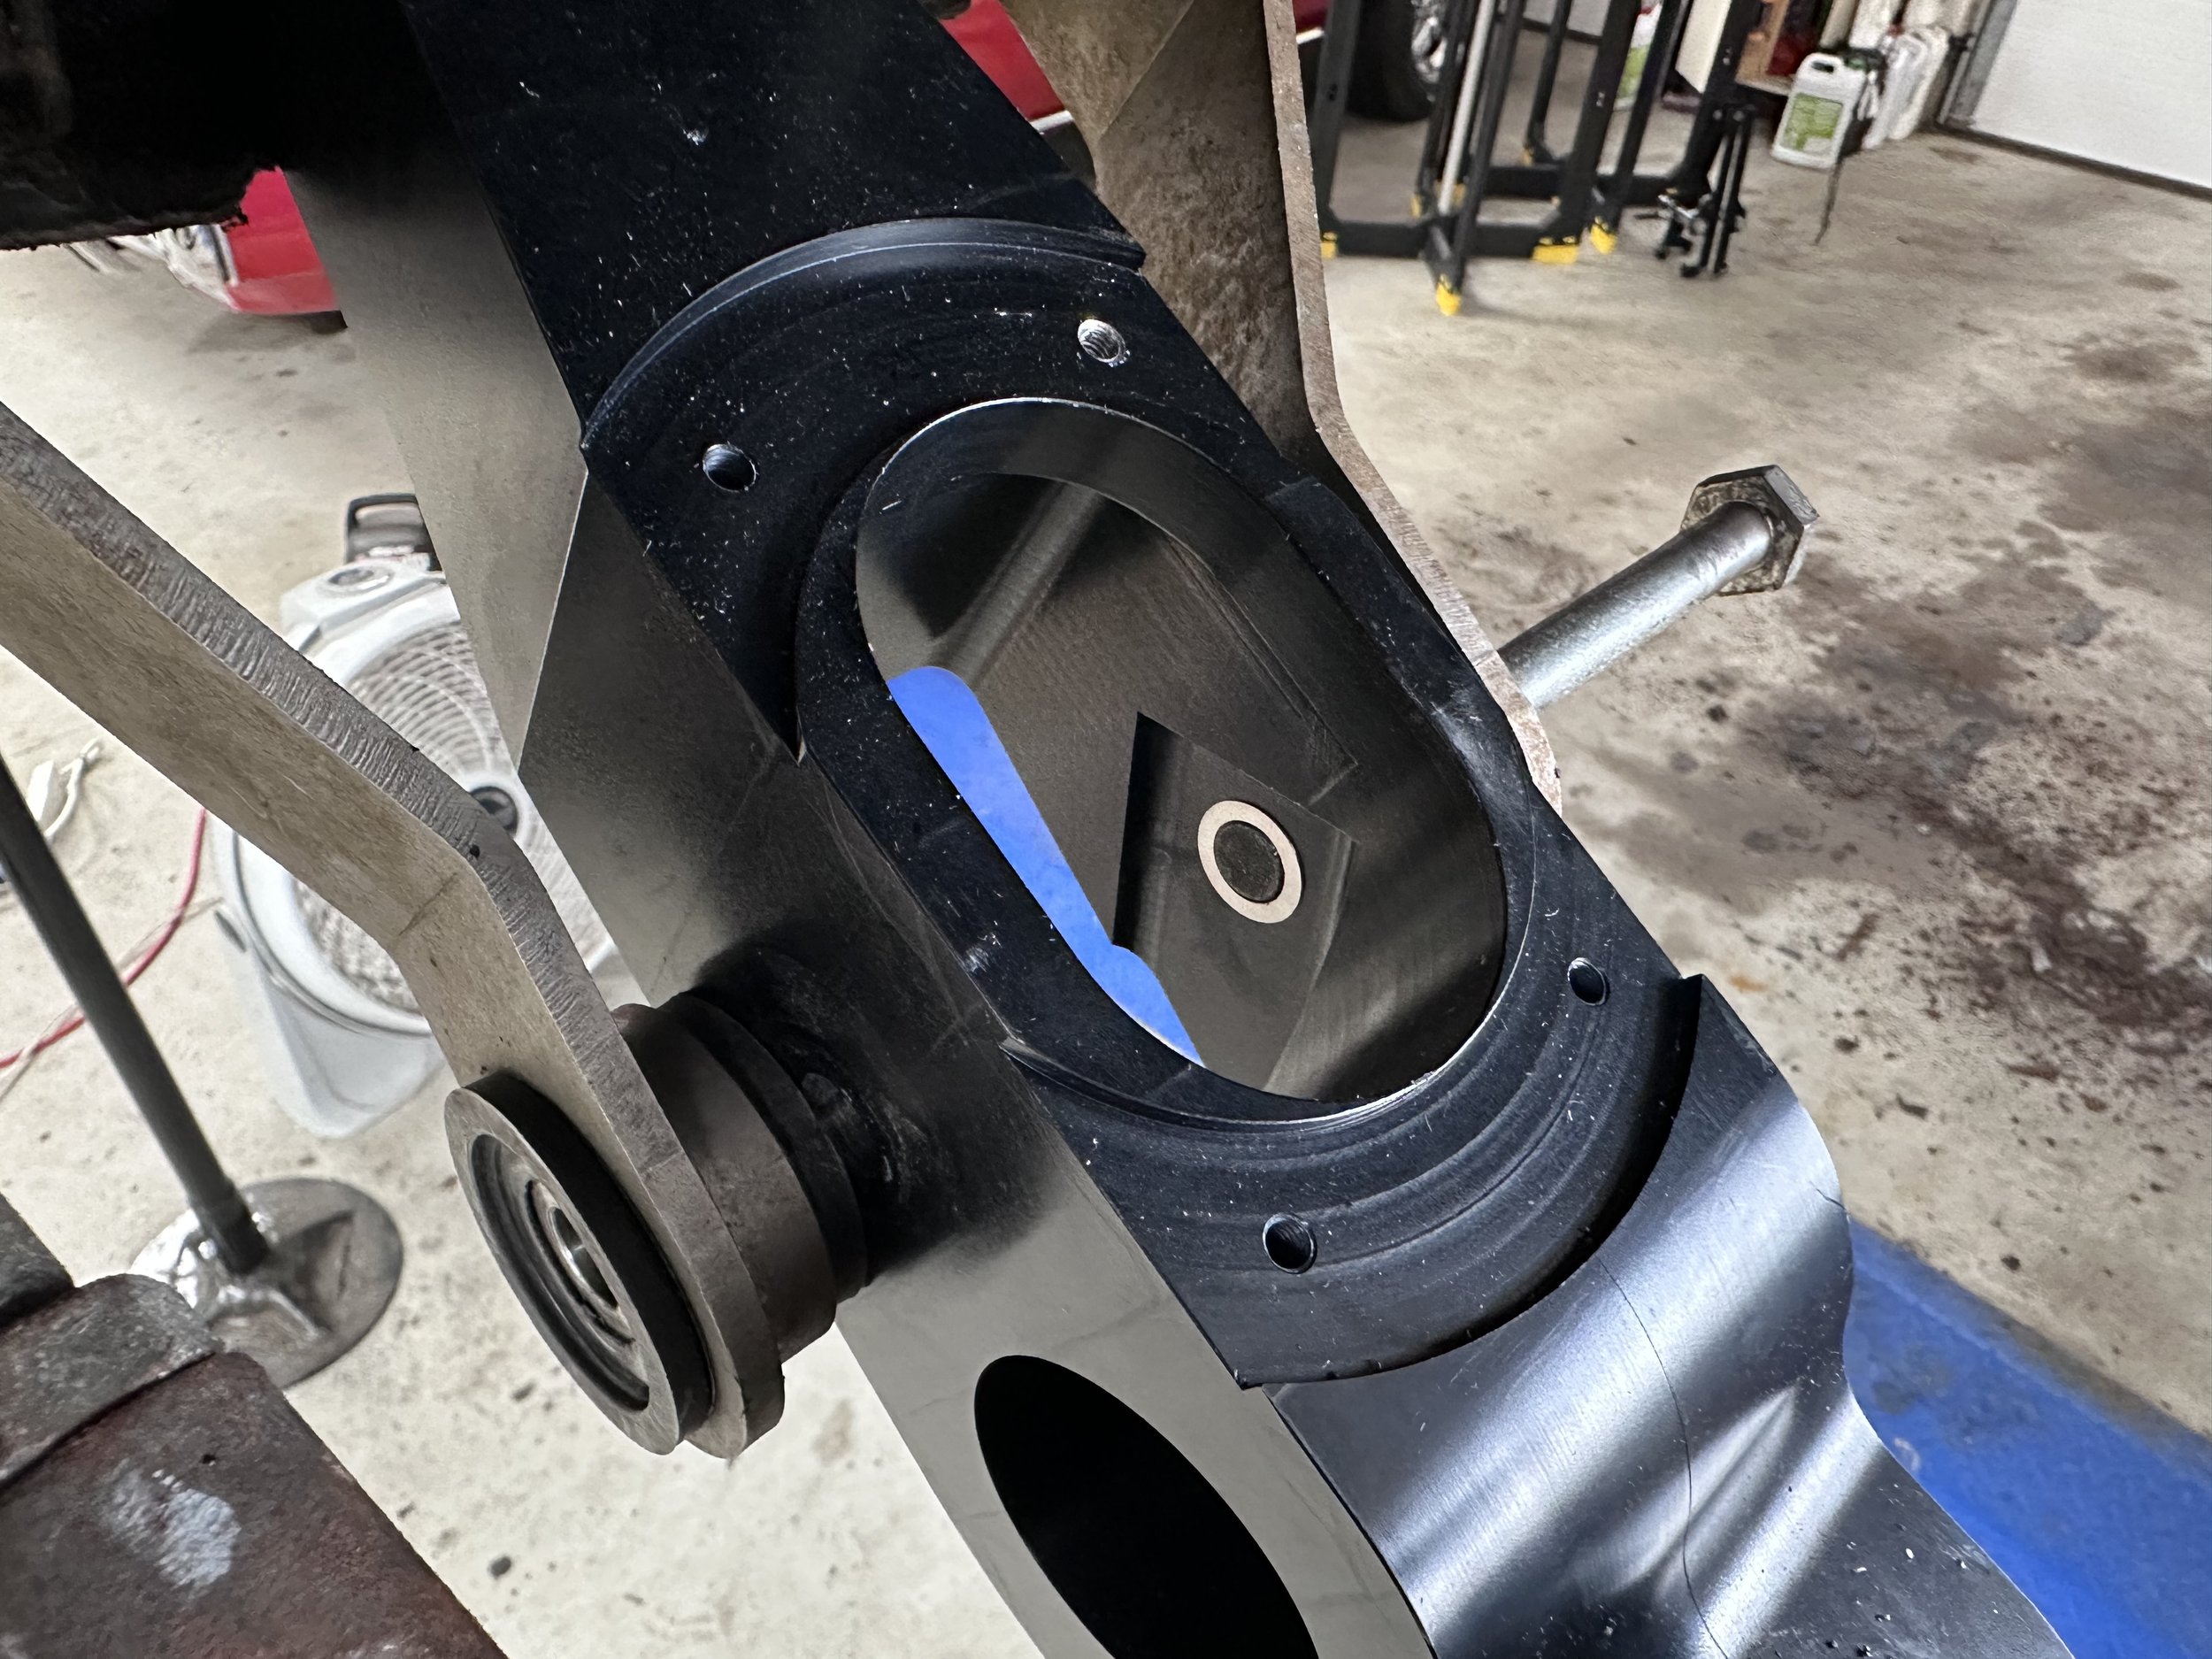
I replaced the LCAs with the billet aluminum ones from DeLorean Go. These are far more solid than stock, and come with removable perches in case you’re using coil-overs. They include pre-installed ball joints as well, as new shock pivot bolts, but since I’m using the longer bolts that come with the DeLorean Go stabilizer instead.
The new billet aluminum control arms are much more substantial. The spring perch can be removed when using coil-overs.
The LCAs also include new pivot bolts, but I’ll be using the longer ones included with the stabilizers instead.
Upper Control Arms
Here I went with Timeless Steel’s adjustable upper control arms. These are built off of an SPC muscle car arm kit, and are fully adjustable, meaning they add a camber adjustment to the DeLorean front end. Like the LCAs, these are much more solid than the stock stamped metal parts.
The catch with these is that the upper ball joint doesn’t fit directly into the steering knuckle. You need to ream out the knuckle a little to fit the ball joint shaft. Timeless Steel includes a reaming tool, detailed instructions from both SPC and themselves, and a review covering the installation of the kit. I’ll cover reaming the knuckle below, but it wasn’t very hard at all.
The passenger side SPC-based UCAs from Timeless Steel.
The new driver side UCA next tot he stock stamped metal one. You can see just how much more substantial the new one is.
Coil-Overs
Instead of putting in stock-style shocks, I went with a KW kit. This is designed for the DeLorean, and even has pictures of the DeLorean’s suspension in the manual. Both ride height and stiffness are fully adjustable.
A nice new box of shocks.
The original shock-and-spring vs. the new coil-over.
The KW instructions even include pictures of the DeLorean’s suspension.
The KW toolkit. The purple knob is for adjusting the stiffness, and the wrench is for the ride height.
The Price
The main thing you have to be aware of when doing this upgrade is the cost. Each of these parts is between two and four times as expensive as the stock parts. They’re very nice parts, but you’re paying for that quality. Combined, everything listed above ran me over $4000. The good news is, I’ll likely never have to replace any of them again.
Disassembly
This is pretty much the same as when I did the refurbishing. Most of it came apart easily because it had only been in there for a couple of years.
The exceptions were the cotter pins, which took forever to straighten out and then had to be tapped out with a punch. Another pin I just gave up on and carefully cut off with an angle grinder.
Carefully removing a stuck cotter pin with an angle grinder.
The other hard part was the nuts on the tops of the shocks. The passenger side came off easily, but I gave up on the driver’s side and let the angle grinder do the job. The old shocks were inexpensive stock ones, so I didn’t feel too bad about cutting them apart.
Carefully removing the top shock nut with power tools.
I also forgot that pickle forks existed and separated a few of the ball joints from the knuckles with a brass hammer before remembering that I own three forks. It did the job,.
Carefully removing the lower ball joint from the knuckle with a hammer.
One thing I did screw up was the rotors. I wanted to send them out to be refurbished, so I needed to separate the hub from the rotor. I lost track of where one ended and the other began, and wound up whacking the bearing itself with the hammer, ruining the race. So before I reassembled everything I’d have to replace the bearing. But I was able to get the rotors out to the machine shop, at least.
The result of not-so-carefully removing the wheel bearing. The cover for the bearing’s race was wrecked and the whole thing needs to be replaced.
Clean Up and Prep
There wasn’t much to do as far as prep before installation. The cavity behind the LCA was filled with debris again, and all the paint I put in there last time was gone. A friend suggested spraying with lithium grease instead of paint, since it should stay wet and stick to the surfaces, so I’m going to give that a try. I’d like to spray in POR-15, but I don’t have the tools to do that.
Installation
The LCAs or UCAs can be installed in any order, but I did the LCAs first.
Billet Lower Control Arms
These go in exactly the same as the stock ones, so there’s not much to say here, other than making sure to remember all the washers and anti-seize and to put the stabilizers on the right way around. I pretty much forgot to do all that and had to take it apart a few times before I got it right.
Removing the spring perch, since I don’t need that for coil-overs.
The new LCA mounted int he frame, ready for the shock.
Adjustable Upper Control Arms
Unlike stock, the uppers are different from the left and right side, but Timeless Steel clearly labeled them with painter’s tape, so it was hard to confuse them. They came with new pivot bolts as well as detailed instructions. Installing into the frame is only slightly harder than stock because of how adjustable the arms are, and before they’re mounted they’re “floppy”, but not in a way that is terribly difficult to deal with. They mounted very easily into the frame.
As mentioned before, the knuckle has to be reamed for the upper ball joint. This seems intimidating, but it’s really quite simple. It took maybe 10-15 minutes per side The reamer is included with the kit, and fits in a standard power drill. You just need to keep cutting oil on the knuckle and go slow, doing frequent test fits. The goal is to get enough of the ball joint shaft to poke out of the knuckle that you can see get the castle nut on and fit the cotter pin in. The only downside is you can’t easily go back to the stock UCA after you inatall this, there’s really no reason to ever do that.
Once completely installed, with the ball joints in both the upper and lower arms, you can torque the various bolts per the specs provided by Timeless Steel. There are two extra bolts near the pivot bolt, a pinch bolt near the ball joint, and the turnbuckles that adjust the camber. The alignment shop will re-torque the turnbuckles when they do the final alignment, so you just have to make sure they’re tight so they won’t fall off on the way there.
The reaming tool that Timeless Steel included for modifying the knuckle to fit the SPC ball joint.
Reaming the knuckle with the included tool.
One of the frequent test fits to make sure the ball joint fit.
The installed UCA with the ball joint properly seated.
KW Coil-Overs
KW makes a DeLorean-specific kit that includes all four shocks and springs, tools to adjust the ride height and stiffness, and detailed instructions including photos of the actual DeLorean suspension system.
Installation is the same as stock, as you’d expect. The only weirdness I encountered was the pivot of the shock seemed a tiny bit too small for the control arm. It was only about half a millimeter, but you’d hear and feel a click as you slid the shock back and forth. The old shocks were tight in the old LCAs.
I think in the stamped steel LCAs, tightening the pivot bolt will flex the sheet metal enough to compress around the KW shock. The billet aluminum LCAs don’t have any flex to them at all, so there’s this slight gap. My solution was to order some 0.1 1mm and 0.05mm stainless steel shims from McMaster-Carr. Two 0.1mm shims seemed to do the trick, mostly eliminating the shifting motion.
It was somewhat difficult to install the shims, since you have to balance them right on the edge of the pivot bolt while inserting the shock, which usually meant knocking them off while fitting the shock into the control arm, but I got it eventually.
The adjustable height is done with a wrench that screws the perch up and down. Pretty simple. What I did notice, however, is that after a few hundred miles the car will settle about an inch or so. Another owner told me they saw the same thing. I keep my car pretty low, so this barely left any space between the edge of the fender and the tire, which made it hard to get on my lift.
The ride height adjustment is a knob that slots into the top of the shock when you want to make an adjustment. I have it set to 50% right now, which feels pretty close to stock, but I’m going to play with stiffer and softer just to see what it’s like.
The shim carefully balanced on the end of the bolt before installing the shock.
The new shock installed and ready to go.
Refurbished Rotors
One of the sources of vibration is warping of the front rotors. I sent them off to be refurbished at a machine shop. But first, I had to separate the hub from the rotor, and I mistakenly hit the wheel bearing race and destroyed it. While they were out being resurfaced, I replaced the bearing.
Fixing my Press
I have a cheap Harbor Freight press, which works well for my purposes, up until the point that the bottle jack decided to stop storing fluid and instead leaked it everywhere. I couldn’t find a direct replacement, but I was able to get something close enough. I had to modify it slightly to mount it to the press plate — meaning, I had to drill a couple of holes in it — but after that it mounted up fine and worked perfectly with the press frame.
Marking the new bottle jack for drilling, so that it mounts properly to the press plate.
Drilling the bottle jack with the drill press.
Completed, fully operational press.
Installing the Bearing
I more or less covered this when I did the Big Brake kit. After 40 years, the stock bearings tend to disassemble themselves when removed, so I had to replace them when installing the new rotors and caliper mounts.
The replacement time was much the same. Remove the snap ring, press out the old one, and press in the new one, and reinstall the ring. I have a bearing drive set this time — a series of precisely sized discs that can be stacked between the press and the bearing to make it easier to push out bearings and seals — along with my DeLorean Wheel Bearing Press Tool that I made by grinding down the outside of the original bearing a bit. This ensures that the press is pushing on the edge of the bearing, not the race, thus reducing the chance of damaging it.
Removing the snap ring holding the hob to the wheel bearing.
An old bearing I turned into a press tool.
After that, the rotor was mounted to the hub, and that assembly was mounted back to the car.
Finishing Up
The last few details were to mount the calipers and install some new brake pads.
Once I put the car back on the ground I noticed that the passenger side wheel had a lot of camber, and in the wrong direction — the wheel was leaning out instead of in. While I wanted to the alignment shop to do most of this, I did adjust the turnbuckles on that upper control arm to make it a bit more vertical in first.
I still had to do the rears, at which point I’d also bleed the brake system. Then I could bring it into the alignment shop and get everything pointing in the right directly.