Coolant Gauge, Fuel Light, Bad Wiring, Power Inverter and Battery Tender
Joe Angell
This time I had a few electrical issues to deal with, and some small updates to make.
Coolant Gauge and Fuel Light
The temperature gauge had suddenly begun pointing straight down. It was finally time to remove the binnacle and diagnose both that and the fuel light.
Removing the binnacle involves removing the knee pads with 10mm wrenches. This is more annoying for me due to the vents in the kneepads, especially on the right side. In fact, I was unable to get the ducting back on there again. I would up buying a 2” rubber pipe connector from the plumbing isle of Home Depot and slipping that between the “Y” adaptor and the vent in the kneepad. This worked perfectly and was much easier to deal with than the ducting.
Once the kneepads are out, there are six nuts that hold the binnacle to the dash. These can be removed with an 8mm socket. Each has a wide flat washer and a small lock washer, so don’t lose them. After that, the binnacle can be lifted up a bit, and the speedometer cable disconnected by pushing on the spring-loaded latch. I removed my speedometer cable completely, as I wouldn’t be using the angle drive based system going forwards. Finally, the electrical connectors are removed by squeezing the clips towards the center of the connector and pulling them out.
The fuel light was easy to find, and its carrier twisted out nice and easy. A quick test with a PowerProbe proved the bulb was dead, and a short trip to NAPA later and I had a working fuel light again. I simply brought the bulb with me and they were able to match it.
The temperature gauge was another story. I applied 12v directly to it, and made the gauge spin around wildly. I feared I had broken it, but upon reassembly everything worked just fine. I later found this article that noted that the needle sometimes gets stuck pointing down, and a hard smack with a hand is often all it takes to fix it.
The temperature gauge pointing straight down for some reason.
Power Inverter Relay
My tuning laptop is an old MacBook Pro with a battery that isn’t doing so well anymore. I had clamped a power inverter to the car battery so that I could keep the laptop charged up on trips, but I would forget to turn it off. This once drained the battery on me and I had to jump start the car.
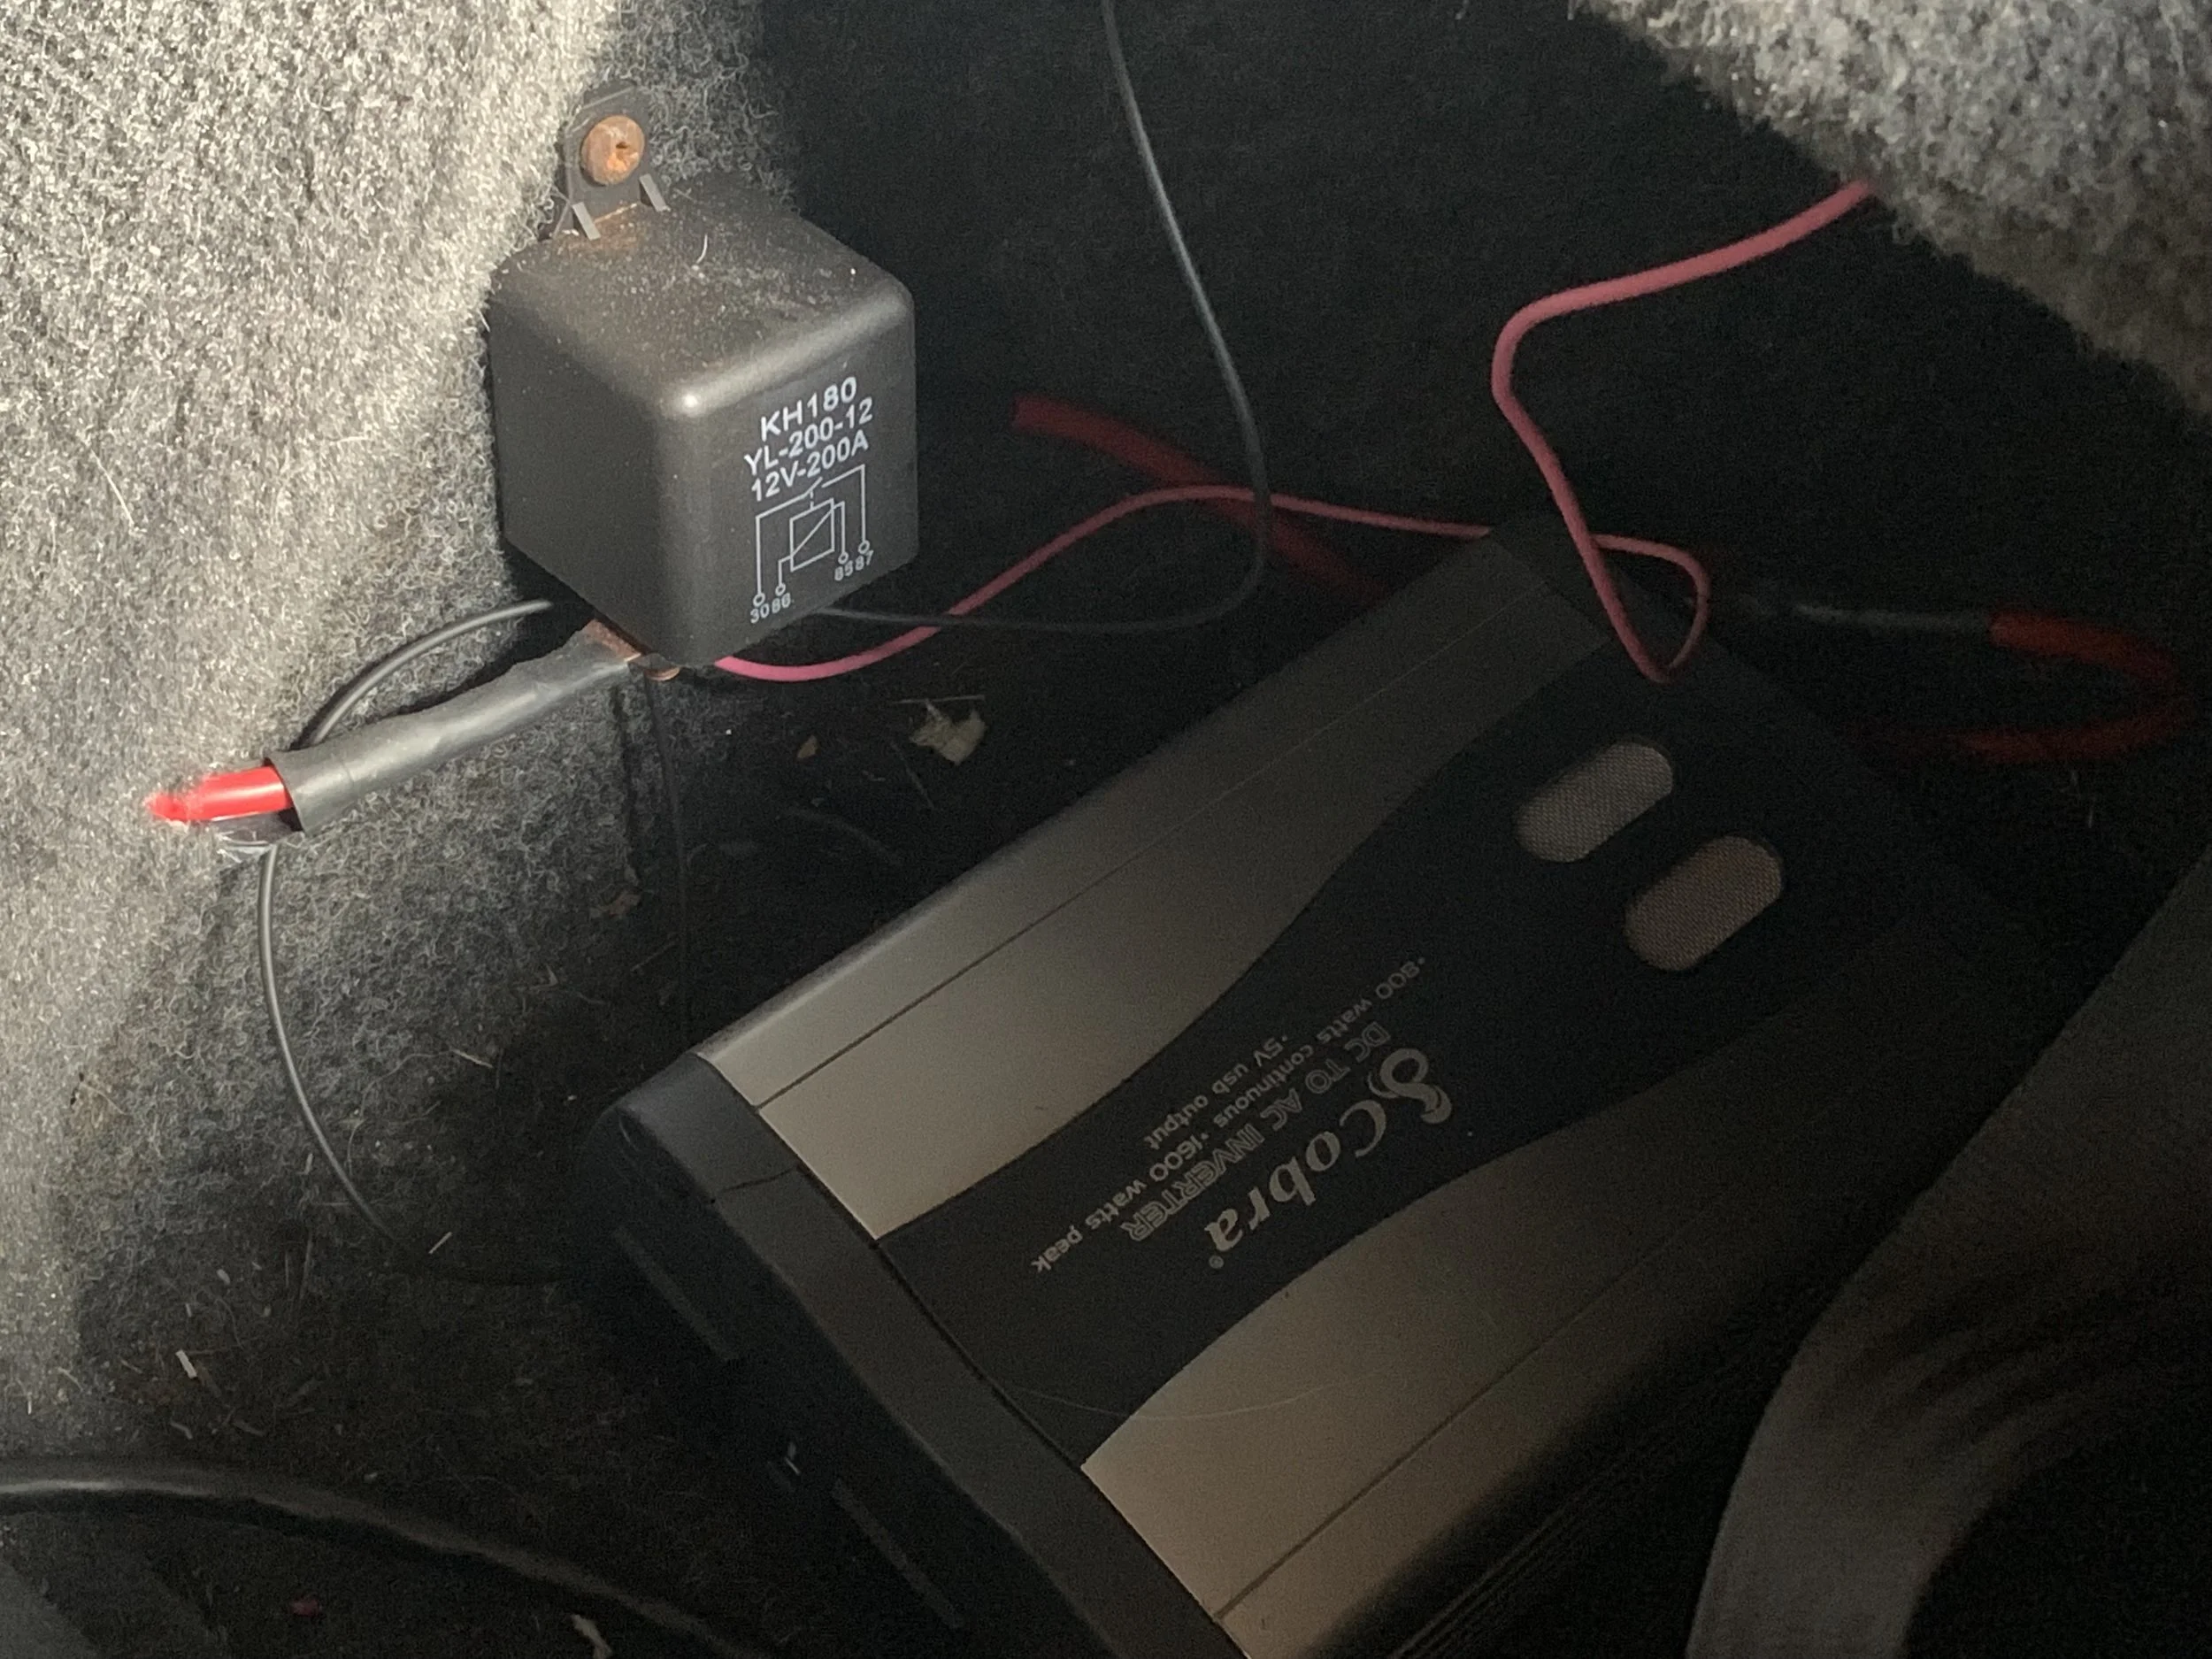
I decided to hard-wire a relay into the electrical system specifically for the inverter. I had set up something similar long ago, and still had the 12v and ground wires running from the battery to the lock box behind the driver’s seat. The old power inverter was smaller and switched by a 40 A automotive relay. This new one was much more powerful, so I went with a much beefier 200 A relay. My friend and I used pliers to crimp the terminals to the large 4 gauge wires, and ran smaller wires to my accessory-switched fuse box behind the driver’s seat. A single screw through the top of the relay secured it to the wall of the lock box.
In theory I could leave the inverter on all the time now. In practice, the inverter’s speaker lets out a long beep once the relay shuts off, which ramps down as its capacitor discharges. This alarm is to warn you that your battery is too low to run the inverter properly, but in the context of switching it’s pretty annoying. I’ll likely turn the inverter off when not in use.
The 200A relay screwed into the lock box behind the driver’s seat. One of the large red wires goes directly to the battery, while the other goes to the inverter. The smaller wires run to an ignition-switched fuse box behind the passenger seat. The inverter’s ground goes directly to the battery.
Bad Wiring
During a couple of recent test drives, I experienced sudden loss of power after hitting large bumps in the road. In one case the engine cut for an instant; in another the car completely stalled, and I had to pull over and restart it.
While installing the power inverter relay, I located found that if I fiddled with the wirings in the relay compartment that I could hear my extra accessory relays behind the passenger seat toggle on and off. I finally tracked it down to some rather poorly installed modifications I’d done around fifteen years ago. This had a series of taps and butt connectors that had eventually weakened and were resulting in intermittent connections.
I removed the section of bad wiring and the taps, and soldered new wires in their place. I needed to retain one tap for those accessory relays, but I did it using a special female blade connection that has a built-in hook for another female blade connector. This is a much cleaner install and doesn’t damage other wiring. As usual, I labeled all the wires with my label printer.
I also found a stray wire that should have been plugged into Lockzilla. It was an always-live 12v wire, and had pulled straight out of its plug. I think this was the cause of the energized relay tray that I was seeing, not a bad circuit breaker. It is also powered through that circuit breaker, so that fits. I put a connector on it and re-attached it to Lockzilla, which should take care of that little problem.
Battery Tender Hookup
I use a battery tender when the car is in the garage. Usually I just clamp it to the charging posts in the engine bay, but that was becoming a nuisance, so I replaced it with a a permanently-installed pigtail with a standard charging plug on it. that attaches to the same posts via ring terminals Now I can simply plug a long extension cable from the tender into the pigtail from the engine bay, and not have to worry about the clamps falling off. I need to more securely mount the pigtail when not in use, though; right now I’ve just zip-tied it out of the way. I will need to be sure that I disconnect it before I drive anywhere, though, but since the engine bay is open when it’s hooked up that shouldn’t be much of a problem.
The battery charger’s plug connections to in the engine bay. The positive lead has an inline fuse, and the connector has a cap. When not in use the wire is tucked along the rail on the firewall.
Complete Power Loss
One day I went to go for a drive and had no power at all. The door lights were out, the radio was dead — nothing had power. The battery posts still showed power, so something else must have been going on.
I eventually narrowed it down to the positive post that poses through the bulkhead connector plate. In the original setup, the plate is metal, and the stud has plastic shims to keep it from shorting to the plate. My new plastic plate eliminated the need for the shims, and I simply used a bolt through the plate.
Unfortunately, the bolt had slipped slightly. This caused the wires to slip, which resulted in more heat, which melted the the plastic and caused the wires to move freely along the bolt. Sometimes they made contact, sometimes they didn’t.
The solution was to ignore the the plate entirely, instead tightening the bolt directly to the wires. This ensured a solid connection and fixed the problem completely.
This is the post that had come loose, heated up and melted through the plastic plate.