Frame Rust Under the Rear Upper Link Arms
Joe Angell
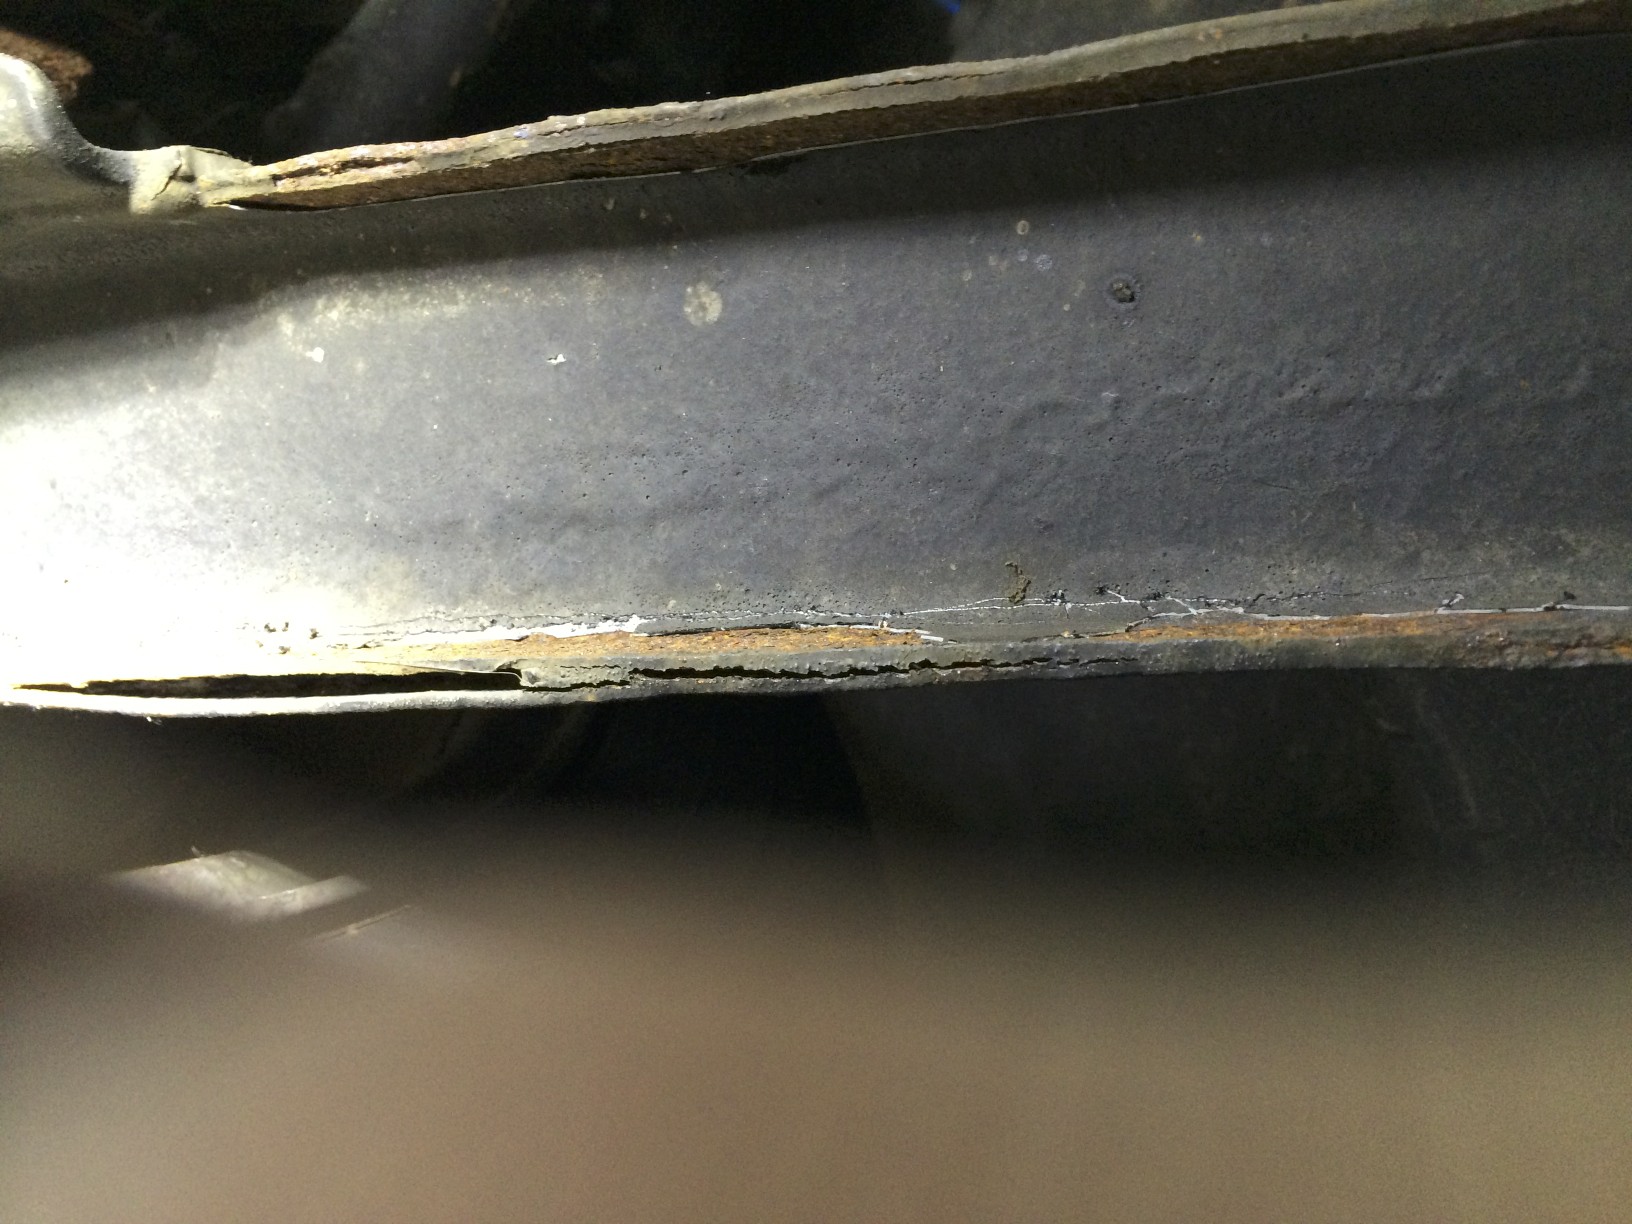
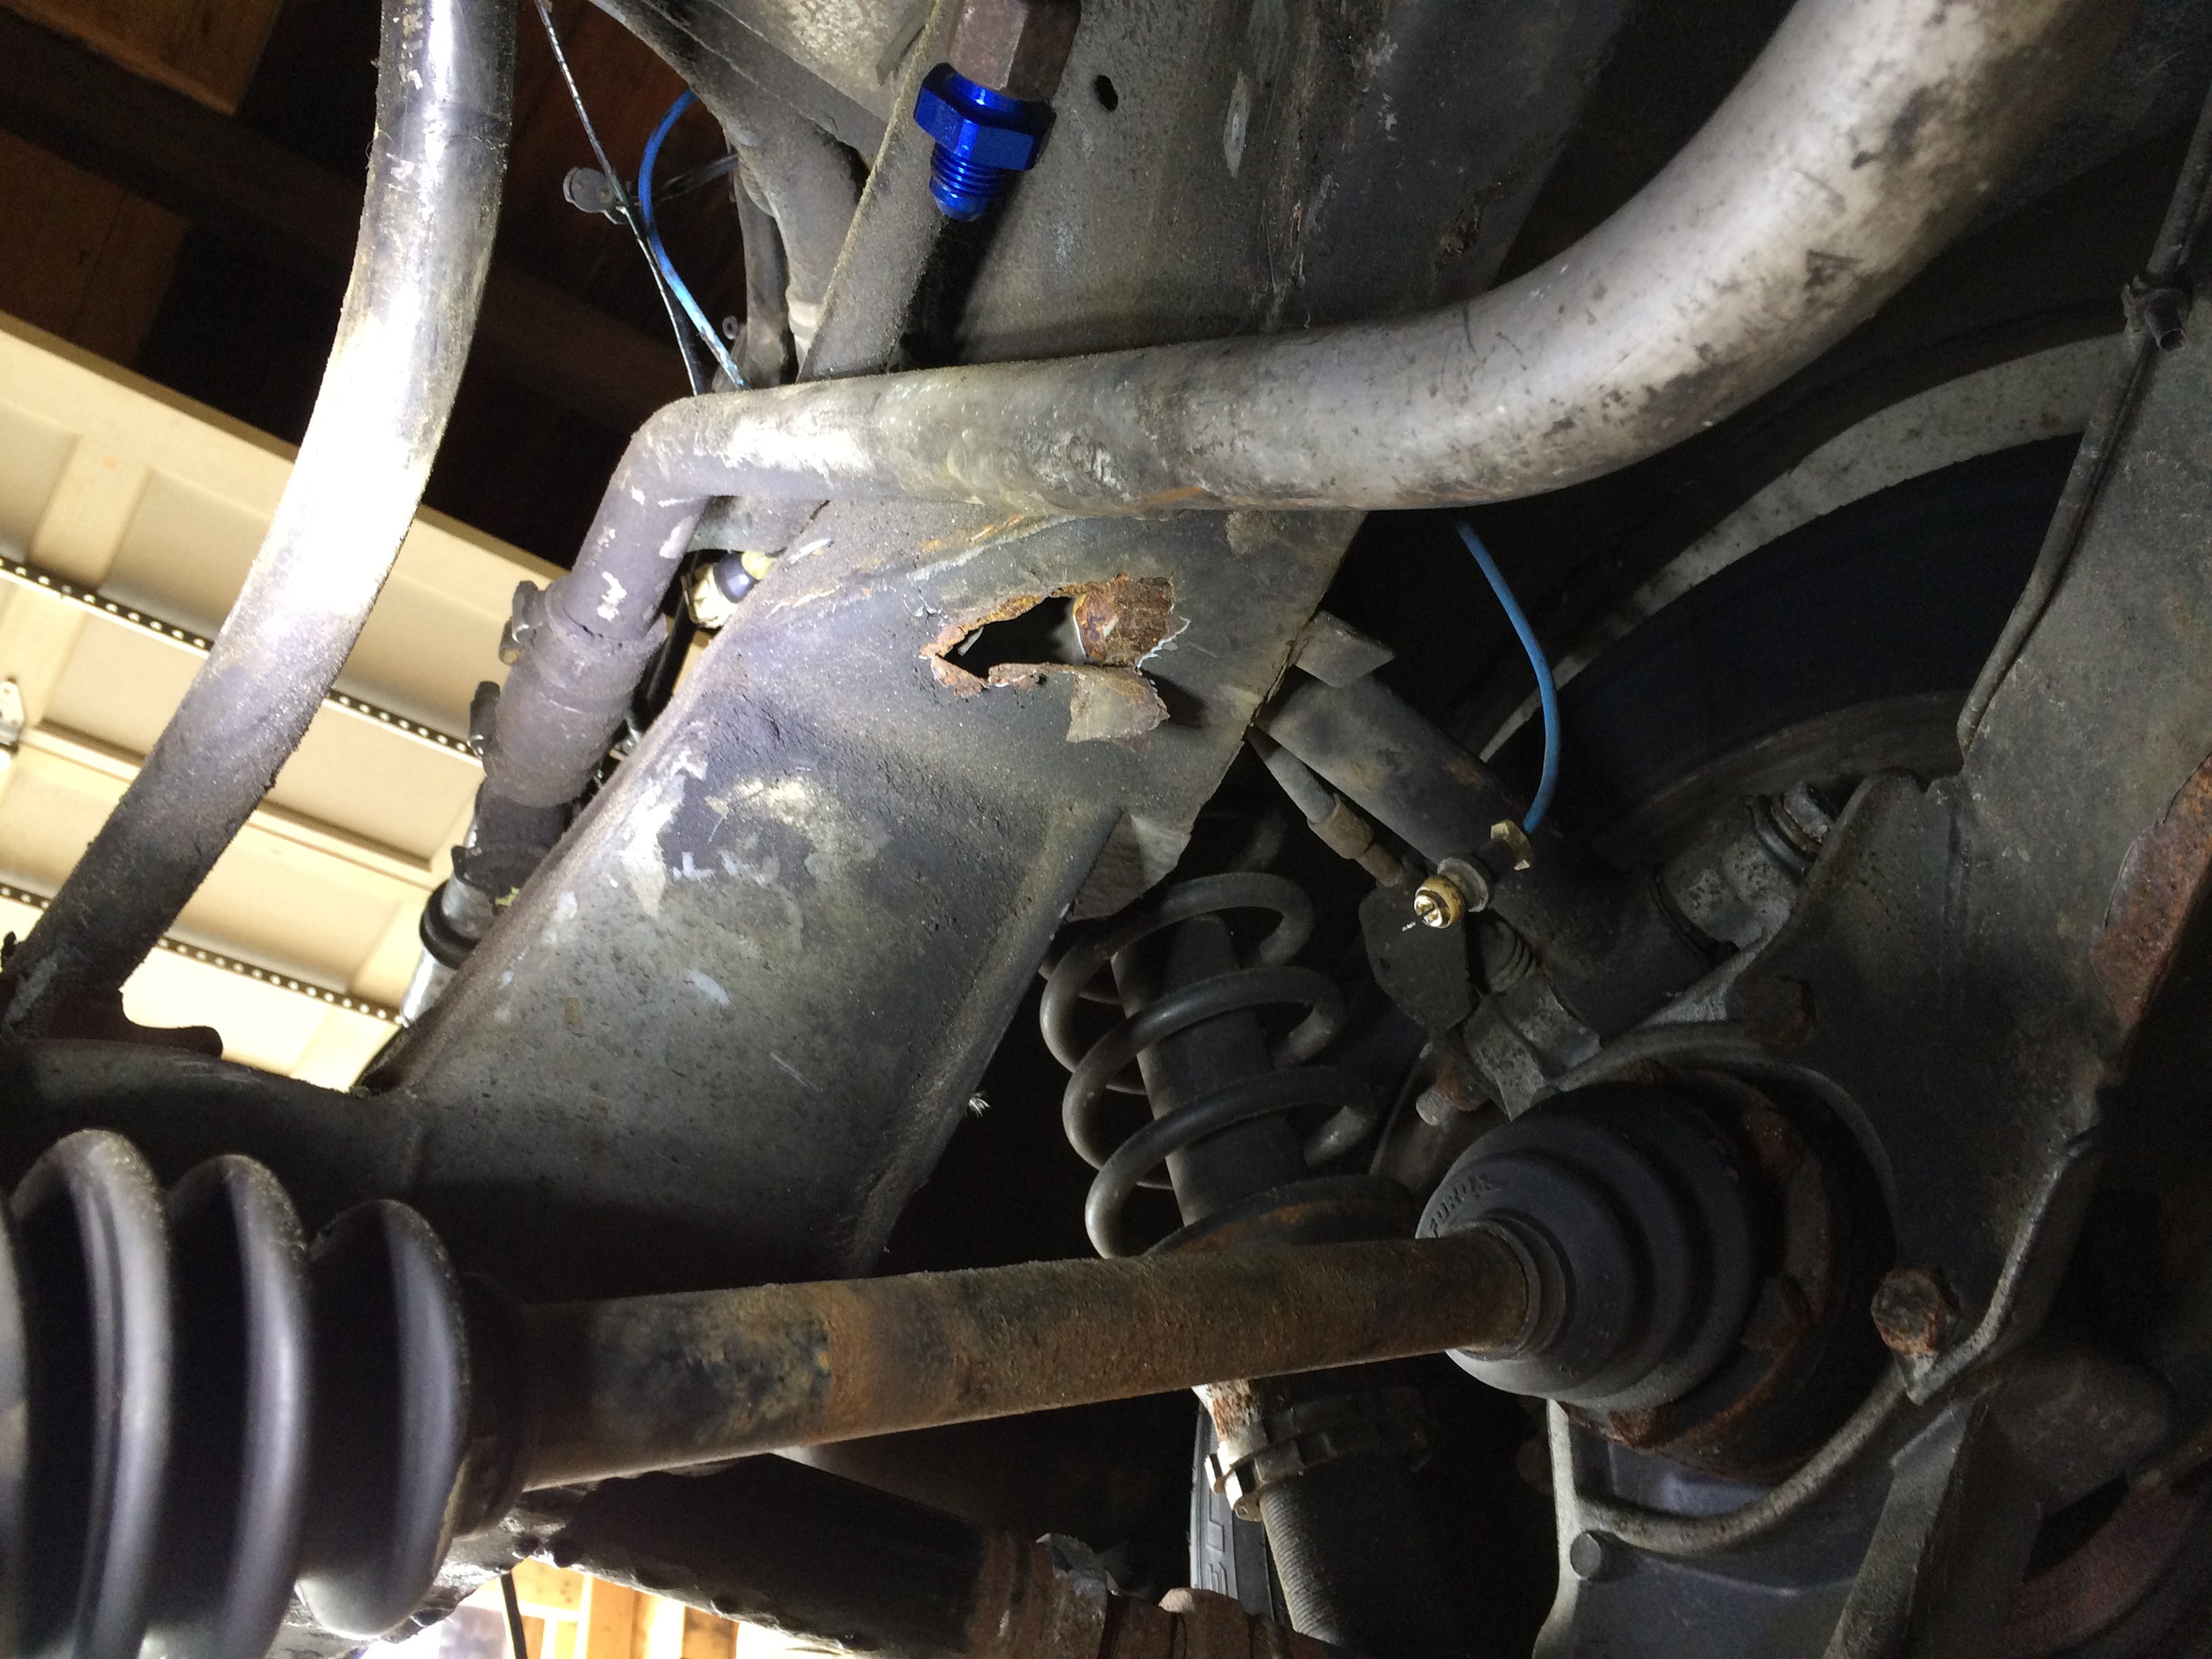
While I was disconnecting the engine and transmission to pull them from the car, I noticed a small bulge through the epoxy under where the passenger side upper link arm bolts to the frame. It was pretty small, but as I poked at it with my finger, more and more epoxy and then rusted metal flaked off. Finally I had a hole over an inch in diameter. I soon found a similar but smaller hole in the same place on the driver's side.
Determining the Extent of the Damage
First I needed to figure out how bad the hole was. This would decide if I could repair the frame or if I'd have to get a new one. It's not enough to get rid of the the flakey bits of rust, as rust often spreads under the paint and epoxy -- all of the rust needs to be removed before anything can be welded and painted. I started with a thread on DMCTalk to get some opinions about how it looked and what I'd need to do.
Some Googling lead me to a needle scaler, a cylindrical air tool with a series of metal pins sticking out the end. The pins jump in and out to chip off rust, paint, etc. I picked up a mini needle scalar and a 10 gallon 6 CFM air compressor from Harbor Freight Tools. They also sell a larger needle scalar, but this requires a 10 CFM air compressor, and that was a bit out of my price range for now. I also wanted to try to keep the noise down, so I got an oiled compressor, although even at 90 CFM the 10 gallon compressor I got can be pretty loud (~90 dB, according to the manual). More powerful compressors were easily four times more expensive (often more so) and many required 240v, which I don't have access to in my garage. I'll get a nicer compressor in the future if I need it.
The mini needle scalar worked pretty well, and quickly made the holes larger by knocking the weak metal away. It also knocked off a lot of the looser rust, but more ingrained rust wasn't really affected, possibly because it was sitting in pitted recesses in the steel. While the needle scaler (at least this one) isn't sufficient to completely clean up the surface, it was good at quickly revealing the extent of the damage. In the end, the holes were closer to 1.5" in size, and even more will need to be cut out to completely remove the rust for repairs.


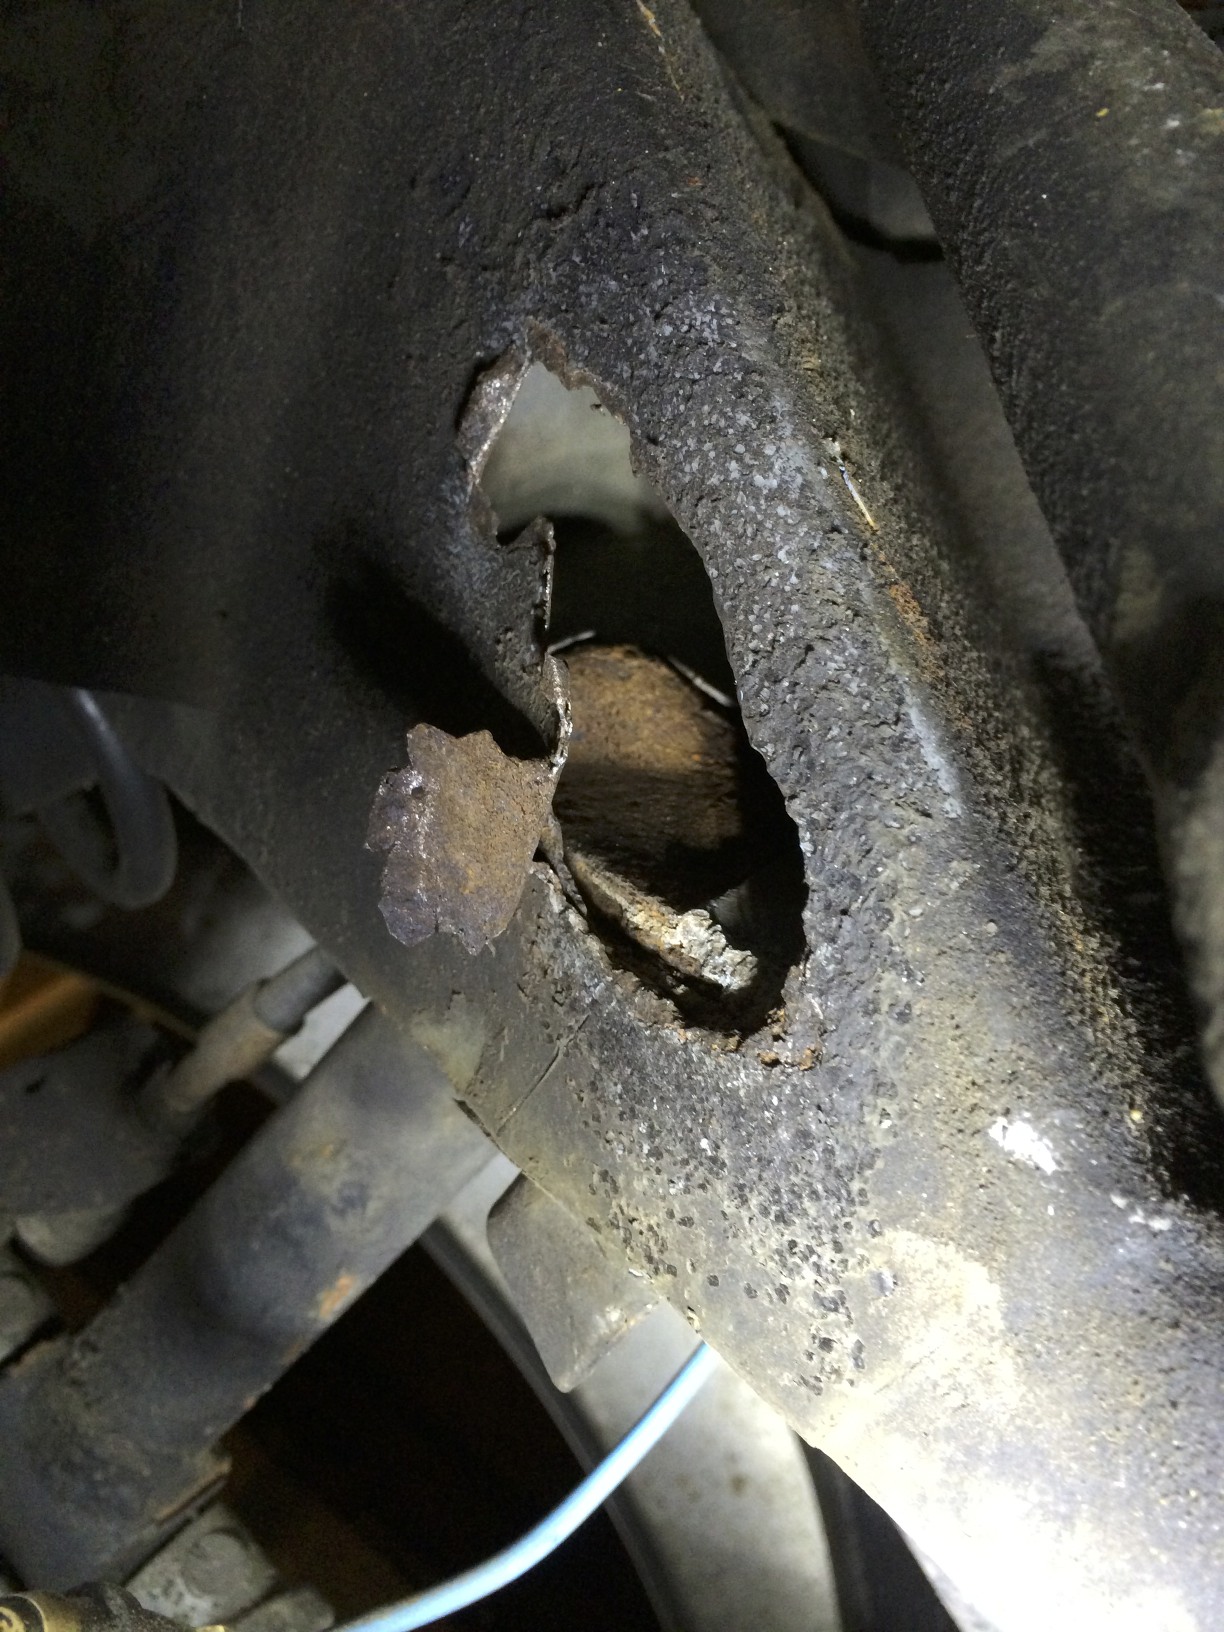

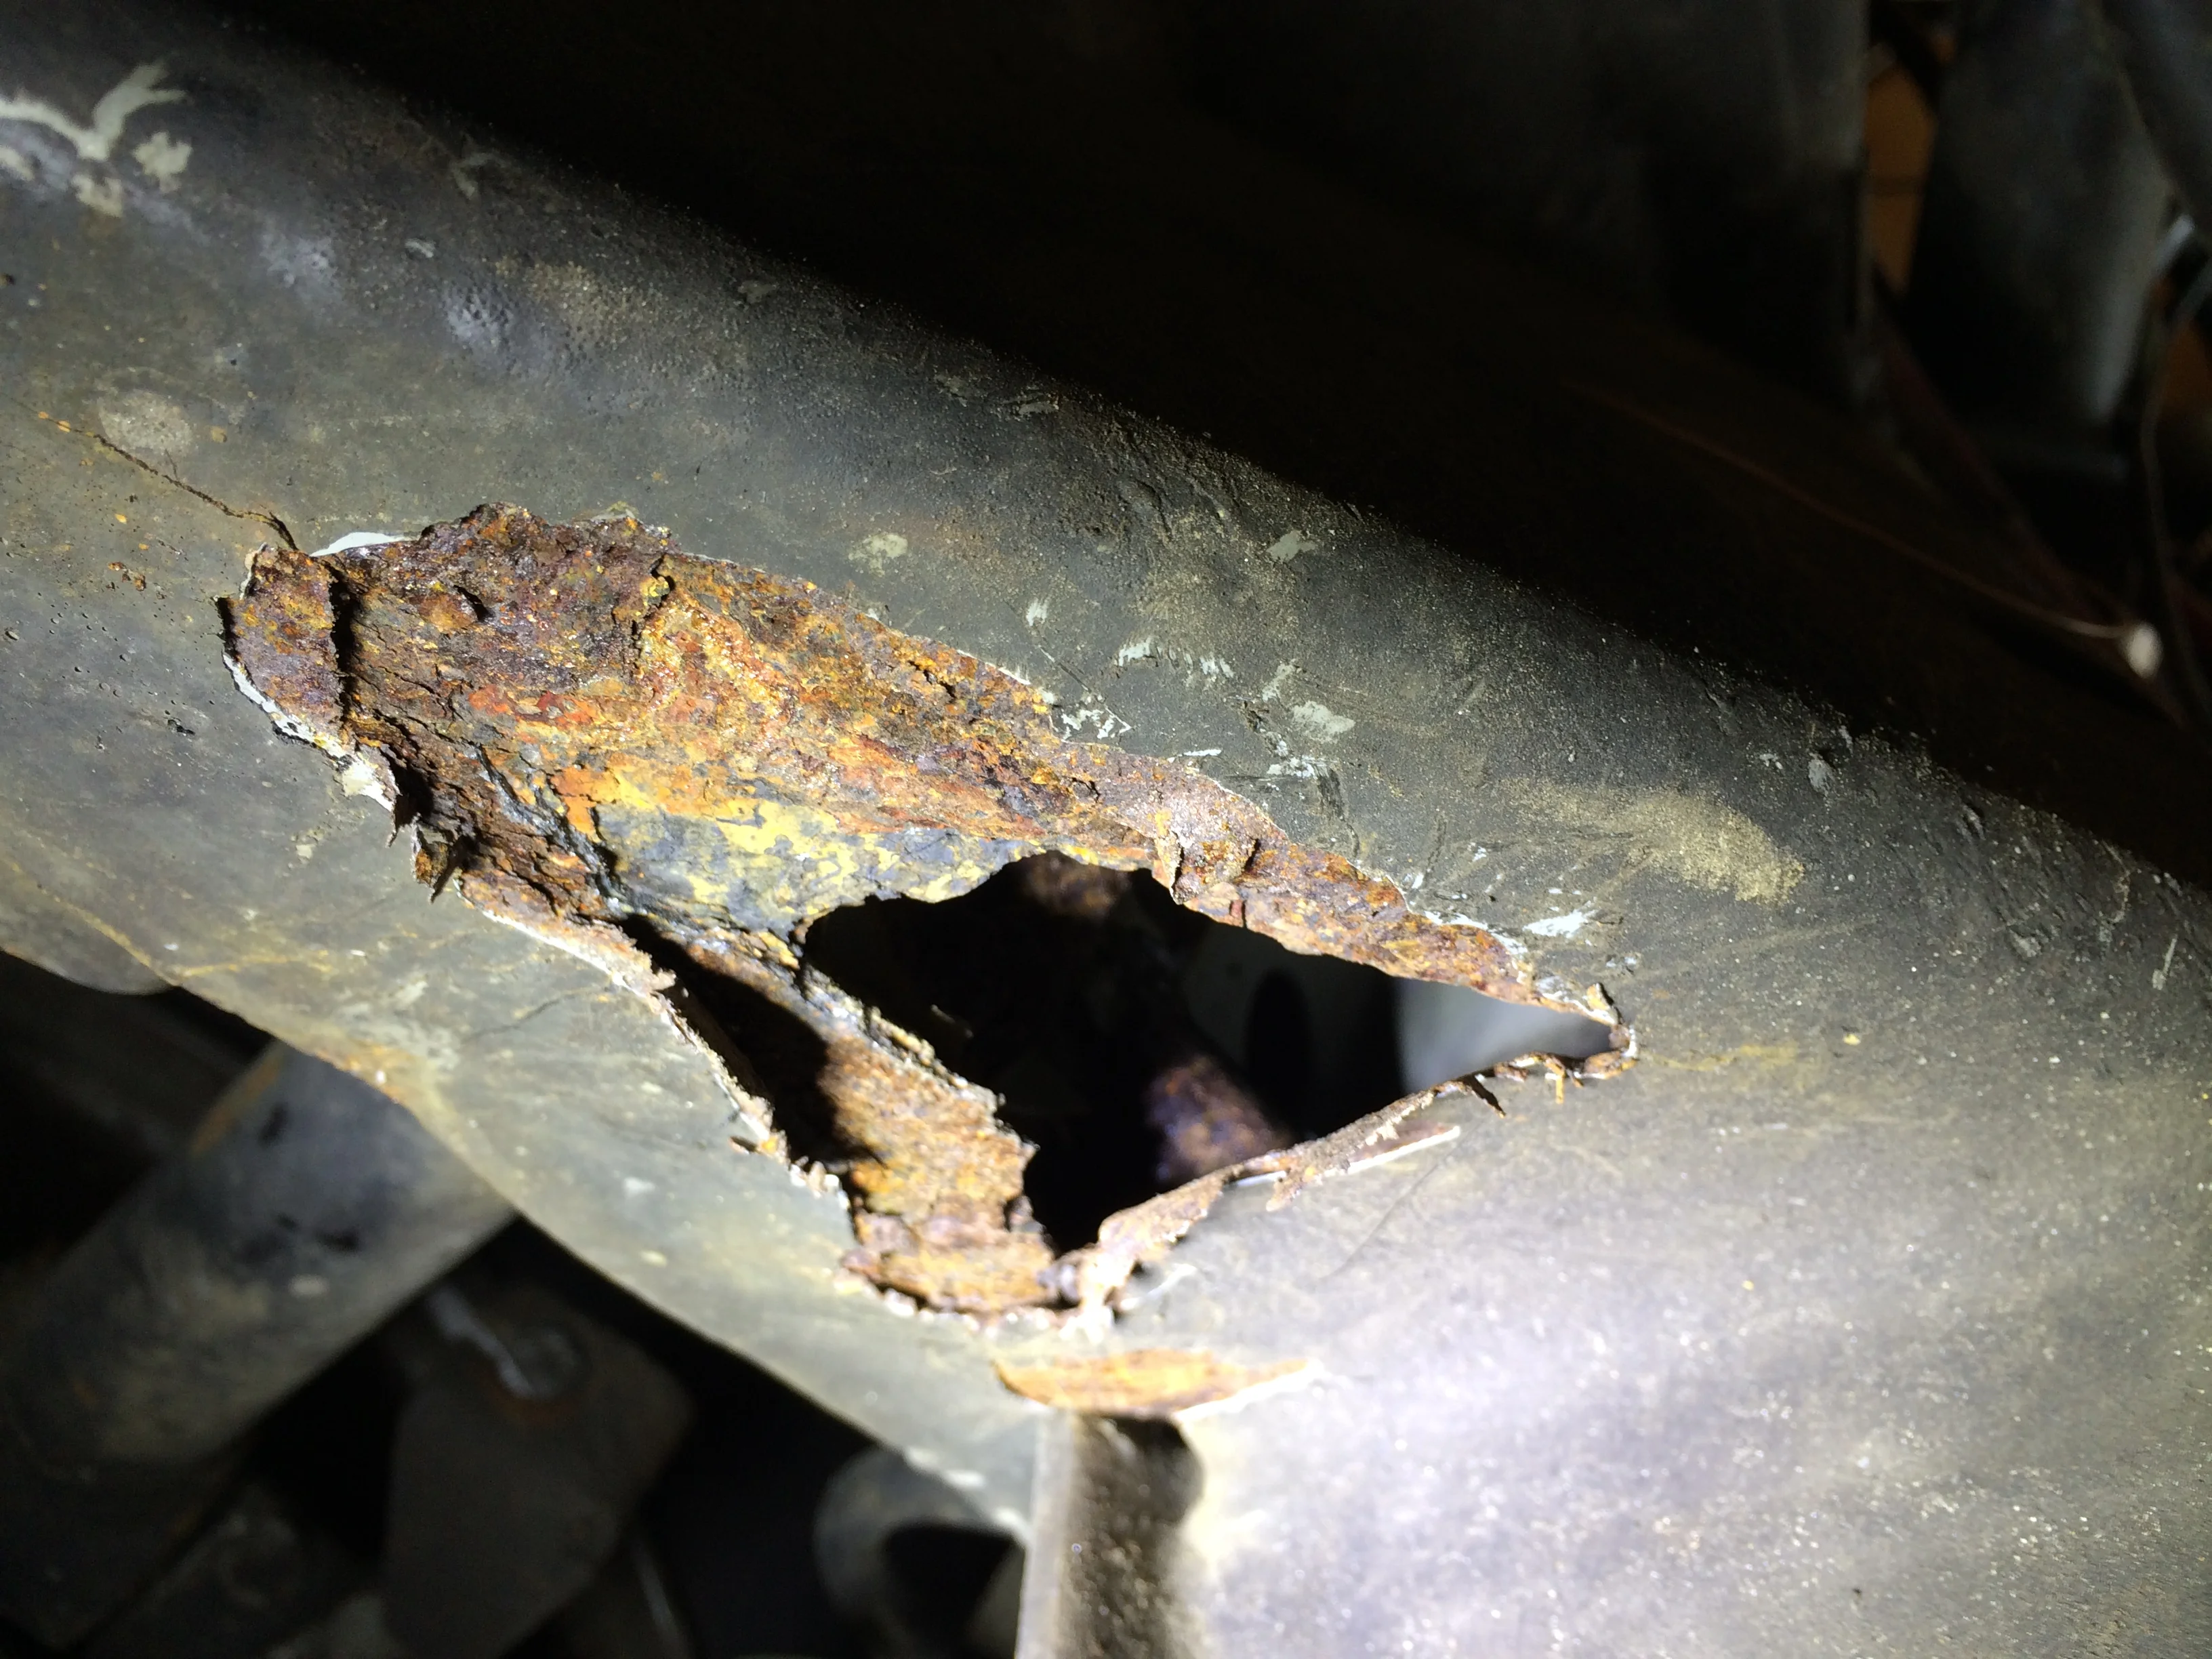
Third Rusted Hole
Vehicle wheel dollies so that I could move the car away from the garage wall and get more space to remove the upper link arm.
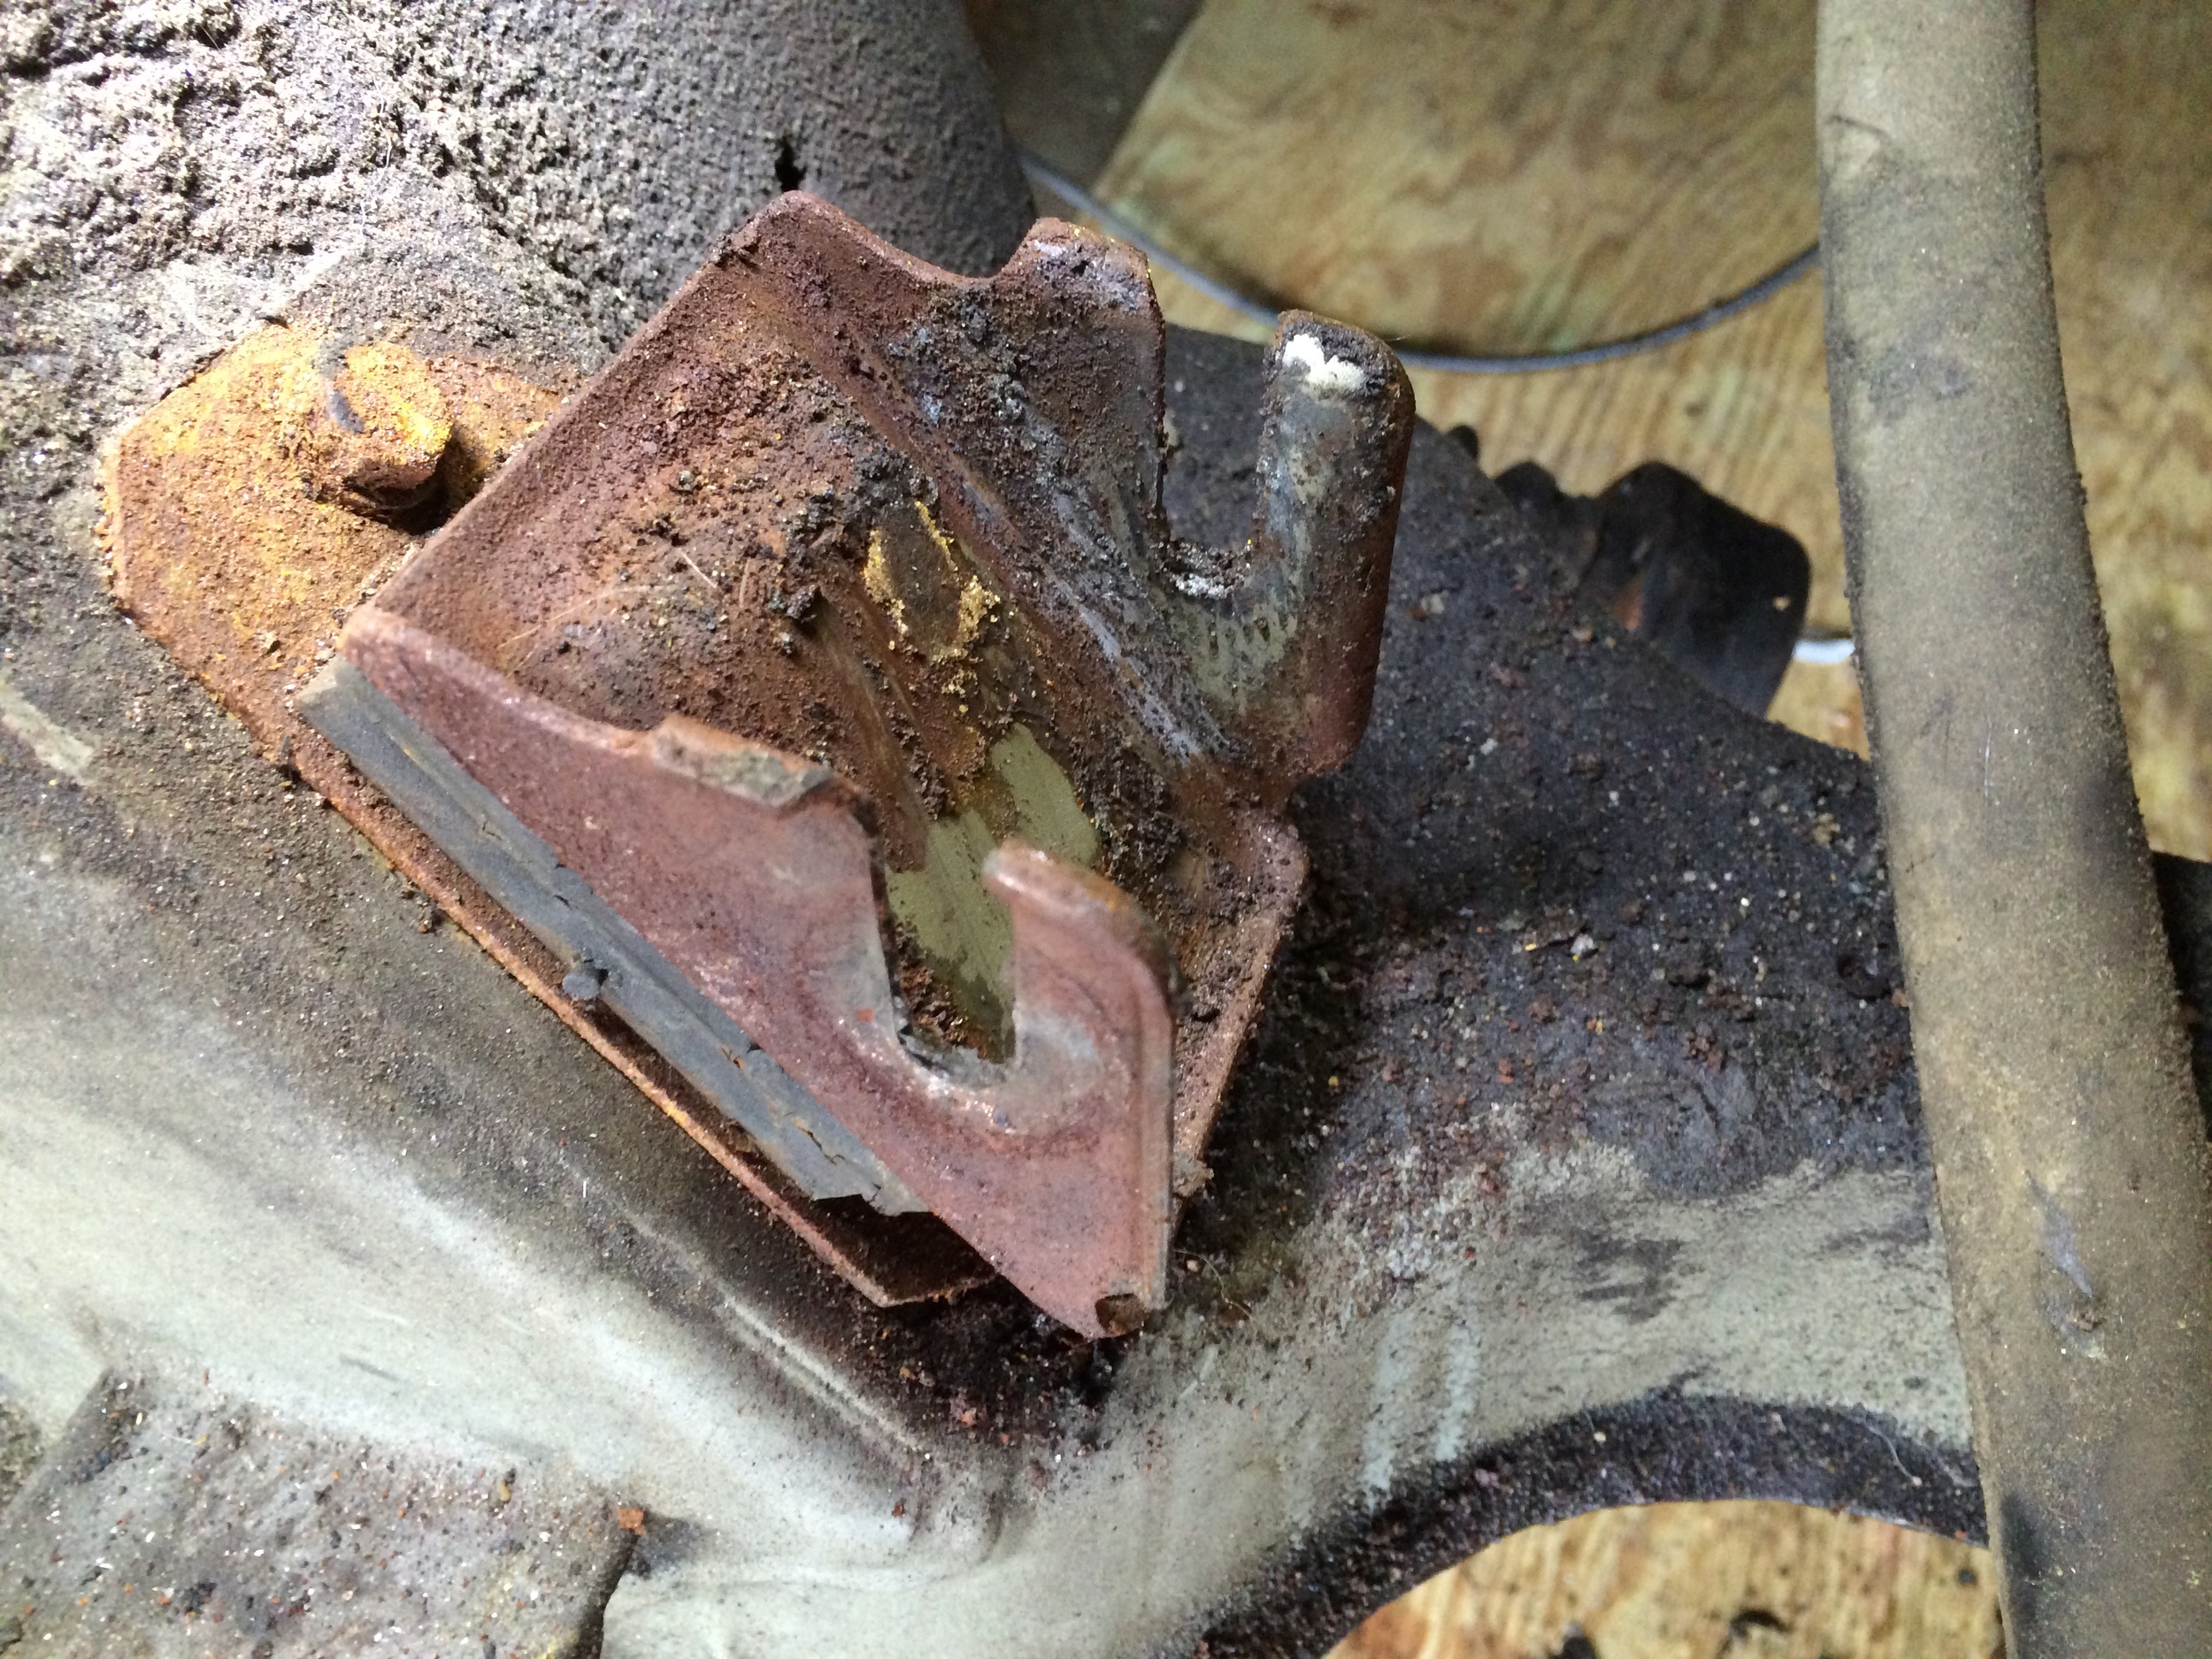
Rust was also visible inside the frame, behind where the link arms attach to the frame. On the passenger side, the needle scalar knocked away enough of it to reveal a gash through the metal. The area was also bowed in, like the link arm had banged against the frame and conformed the frame to the shape of the arm.
To see how bad that was, I needed to take off the upper link arm. The first problem I had was the placement of the car -- it was less than a foot from the wall. Since the engine was out of the car at this point, I couldn't move it under its own power. Also, the layout of my garage didn't provide enough space move it over to the side. The solution was simple enough: a couple of wheel dollies. I placed them under the rear wheels and got some more wood to provide a good rolling surface over my cracked garage floor, and was able to easily push the rear of the car over to get another few feet of space.
After that it was just a matter of jacking up the car, taking off the tire and removing the upper link arm with a 19mm socket and open end wrench. I applied Kroil penetrating oil to the nuts and bolts, but this wound up not really being necessary -- my upper link arm had been previously removed and had anti-seize applied when the bolts were reinstalled, so it was fairly easy to remove it.
With the link arm out, the gash was pretty clear to see. Luckily, the flange that the bolt runs through and the point that it screws into were both in excellent shape, and weren't bent or rusted in any way that I could see. The damage was localized to the area just behind the link arm.


Repairs
The plan at the moment is to use an angle grinder to cut away the rusted parts of the frame, and a die grinder to clean up all the rusted metal that won't be cut out. This will result in every larger holes under the frame. For the area behind the link arm, I'll probably cut out a rectangular section between the flange and the screw-in point for the bolt, and place a patch inside the frame that I weld from the outside. This will give me an extra 1/8th of an inch or so compared to welding the patch on the outside.
There's still the question of how the link arm damaged the frame in the first place. Since the mount doesn't seem to be damaged, all I can think of is that the the bushings had become worn and soft and allowed the link arm to push into the frame, but I was under the impression that bushings hardened over time, not softened.
In any case, the first thing I have to do is learn to weld. While MIG welding is apparently simplest to learn, welding the 16 gauge steel used by the frame will be at the very edge of a 120v MIG rig's capabilities. As such, I'm looking at learning oxyacetylene welding, which I understand is tricky but the best solution for this kind of repair. Since I have a specific goal in mind, I'll just keep practicing on scrap until I have good, strong welds.
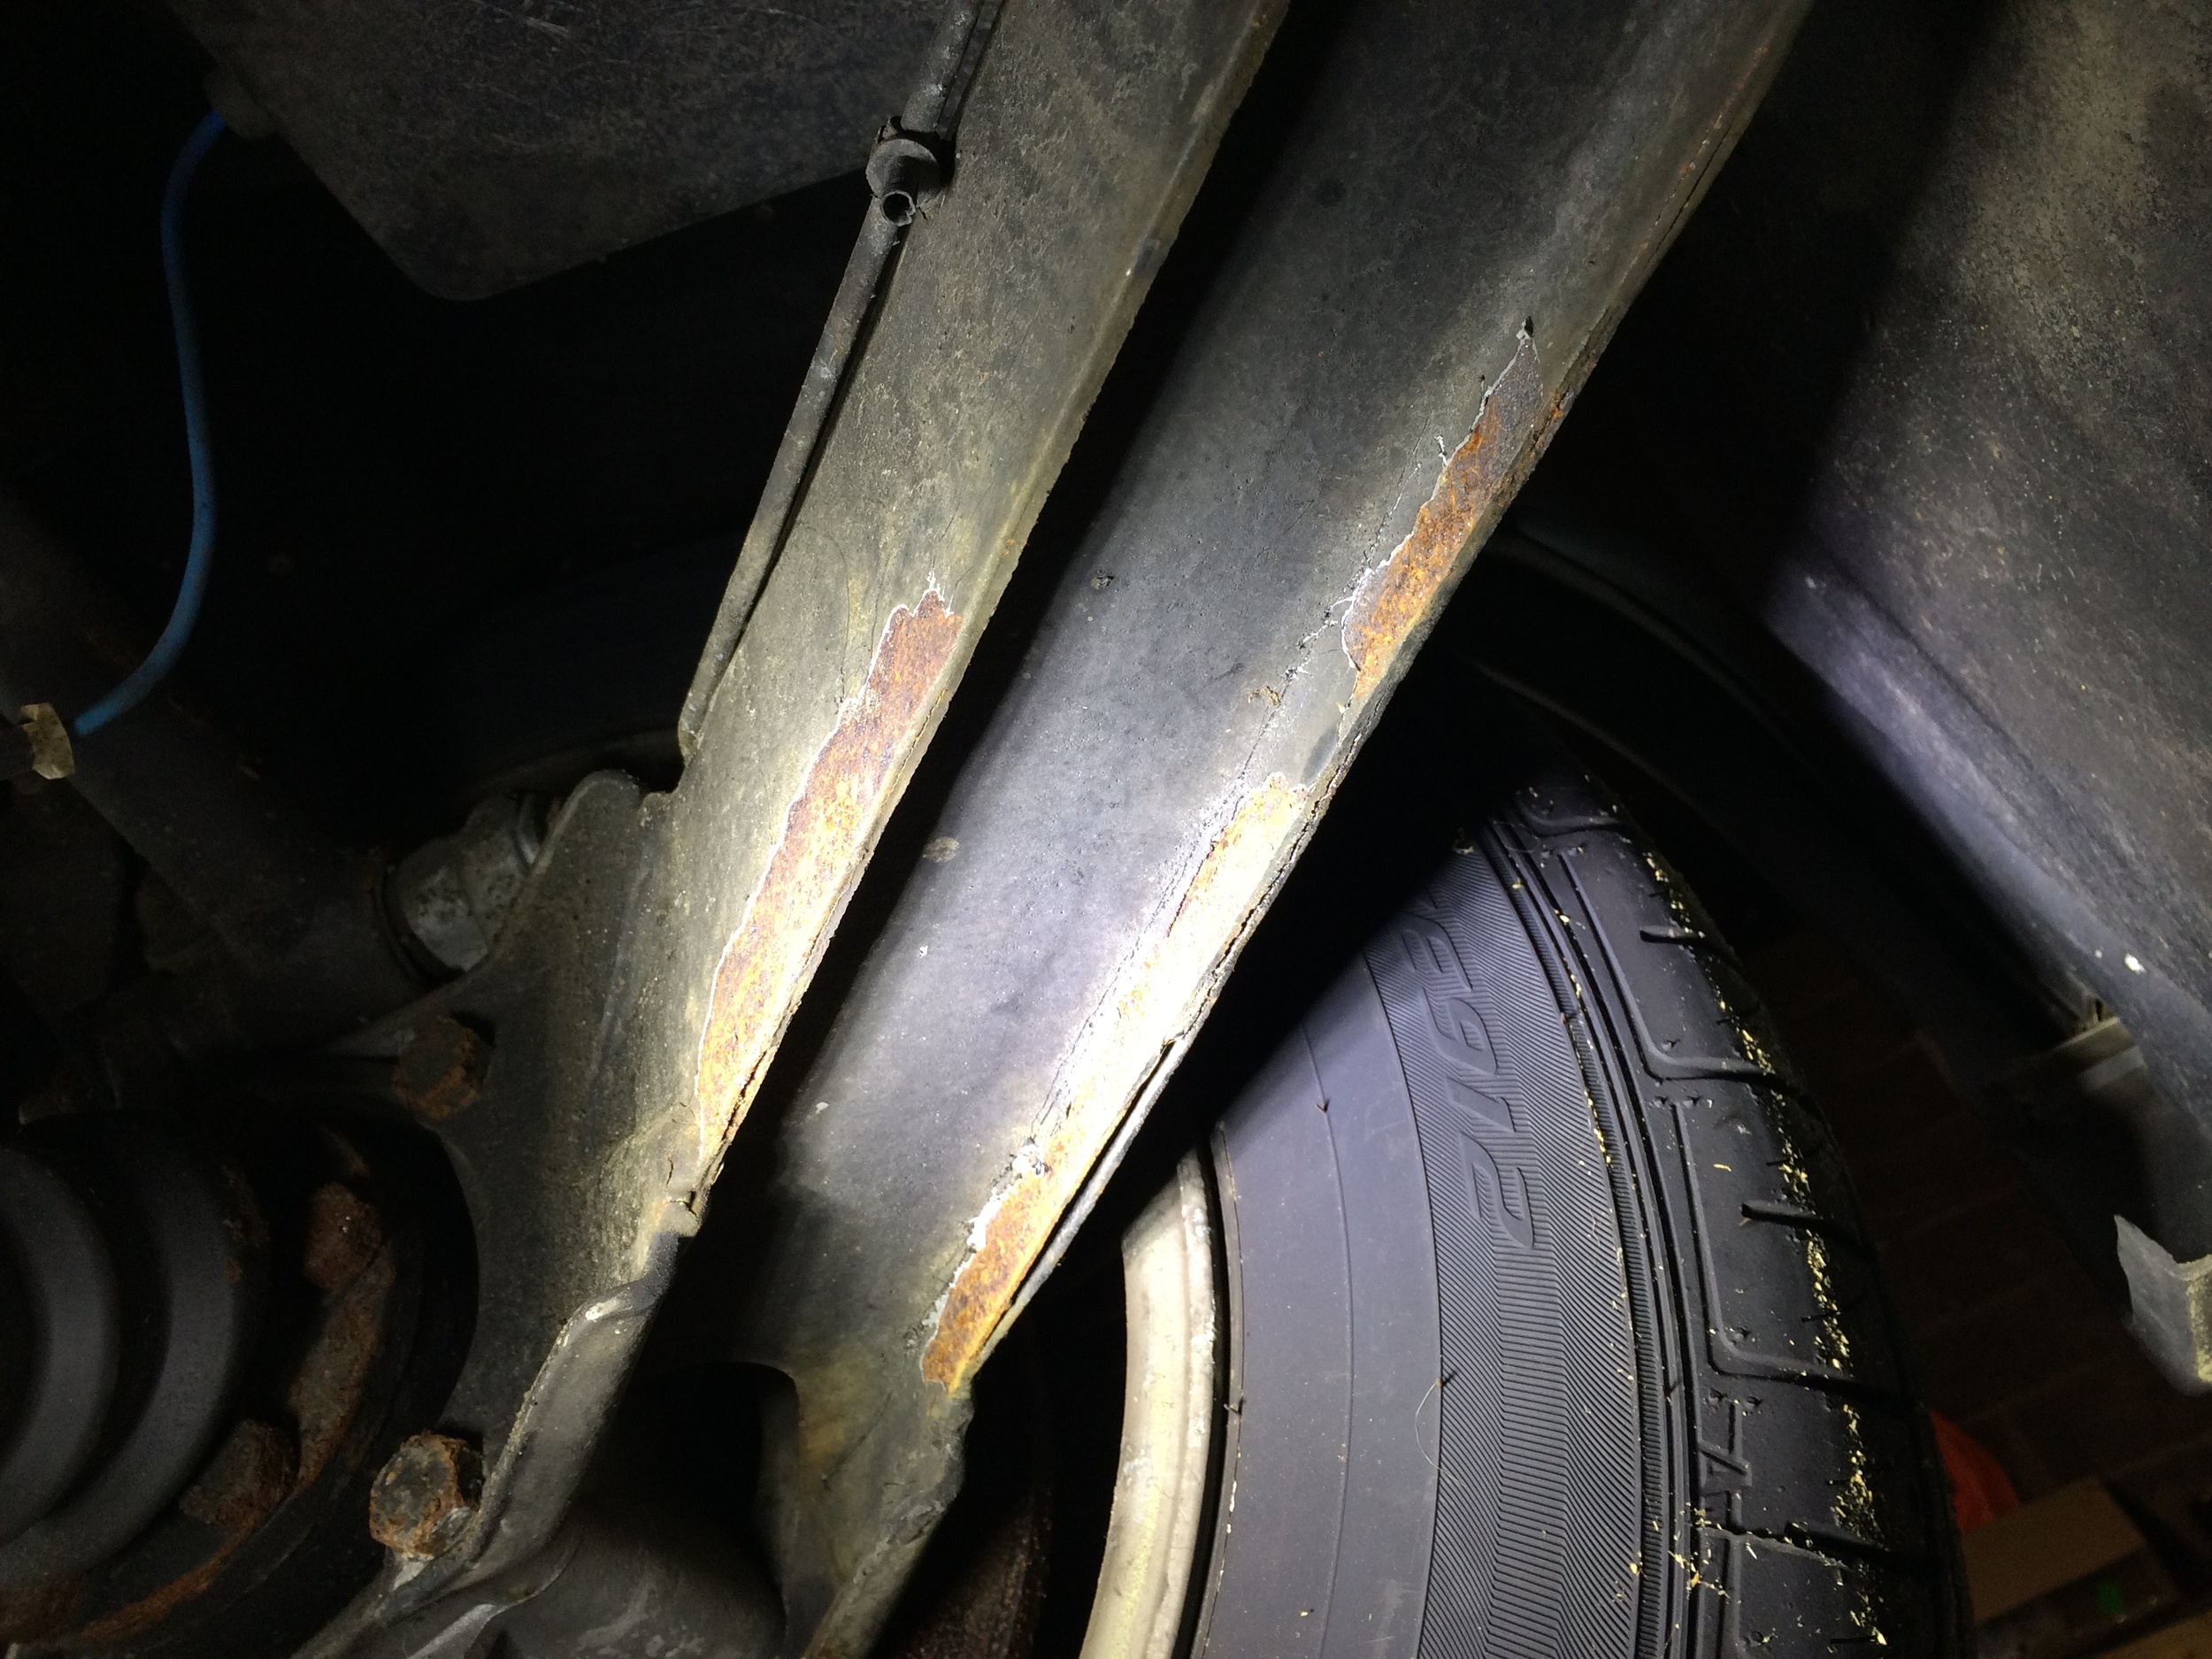
Other Rust
While there is other rust on the frame, none of it is too severe. The edges of the trailing arms are separating a little, but that seems like it should be simple to weld back together after cleaning the rust out. There are also some areas where the epoxy chipped off revealing more surface rust, but again this is minor should be easy to treat. Similarly, some surface rust under the engine cradle shouldn't be a problem to repair. While the engine mounts are a little rusty and the rubber still seems good, they're easy to replace while the engine is out.
All things considered, it looks like I just need to patch those holes and I can keep the frame.