Inline Fuel Check Valve
Joe Angell
Some DeLorean owners have reported that the check valve has failed in Houston's fuel pump/sender combo. This can cause starting problems due to loss of fuel pressure. This in turn led to a discussion on DMCTalk about adding an inline check valve. Although I haven't actually started up my car since I installed the new fuel pump, I thought it wouldn't be a bad idea to install a check valve just to be sure.
A few options were suggested in the DMCTalk. I decided to follow NightFlyer's advice and get a SMC 410 5/16" check valve from US Plastics. He did all the research, settling on this one to resolve a hot-start issue seems to have been caused due to a failed check valve in his new fuel pump. This model valve has a 1 PSI opening pressure and ability to withstand 500 PSI of back pressure.
Installation
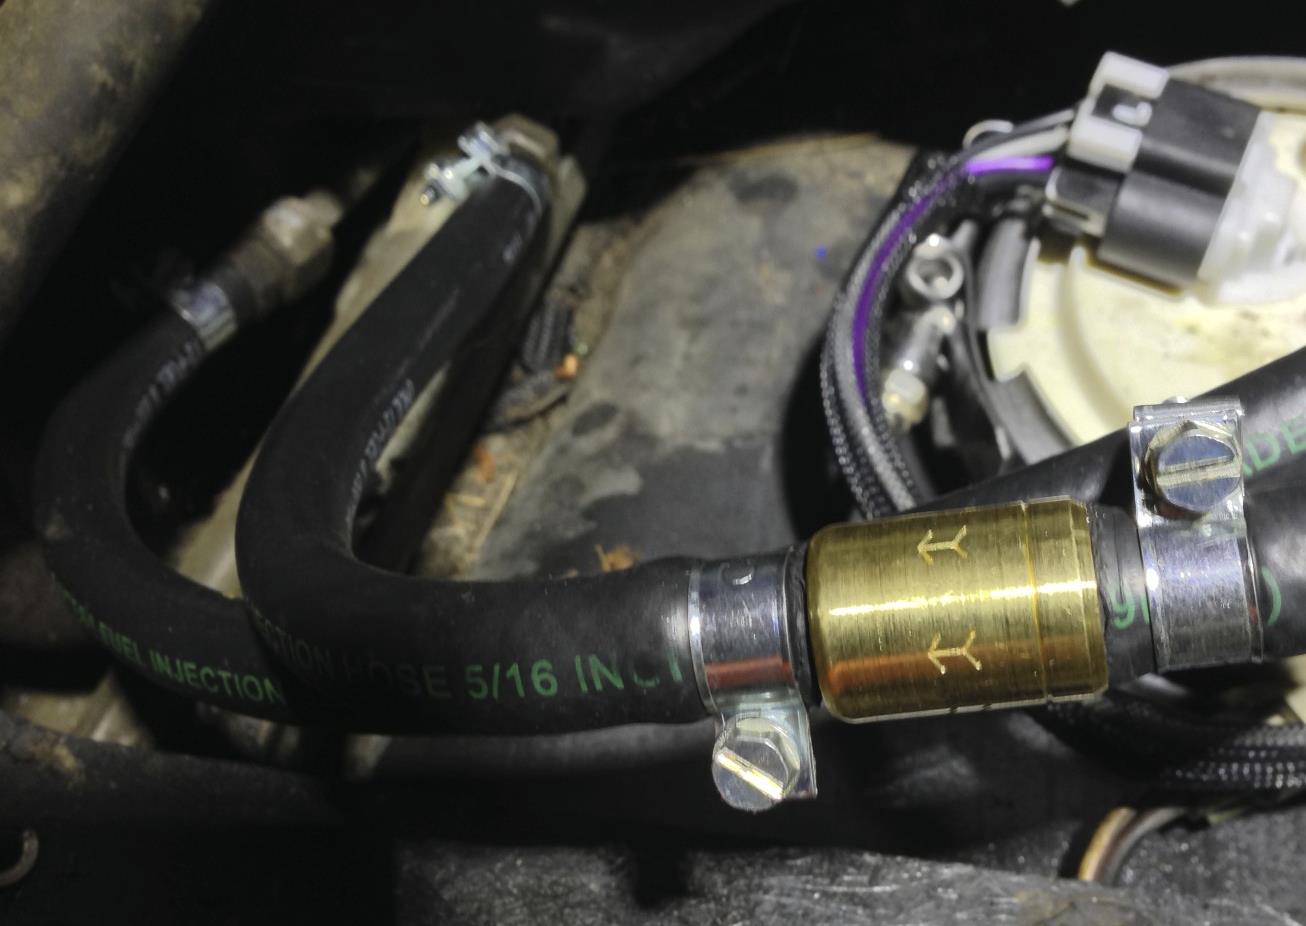
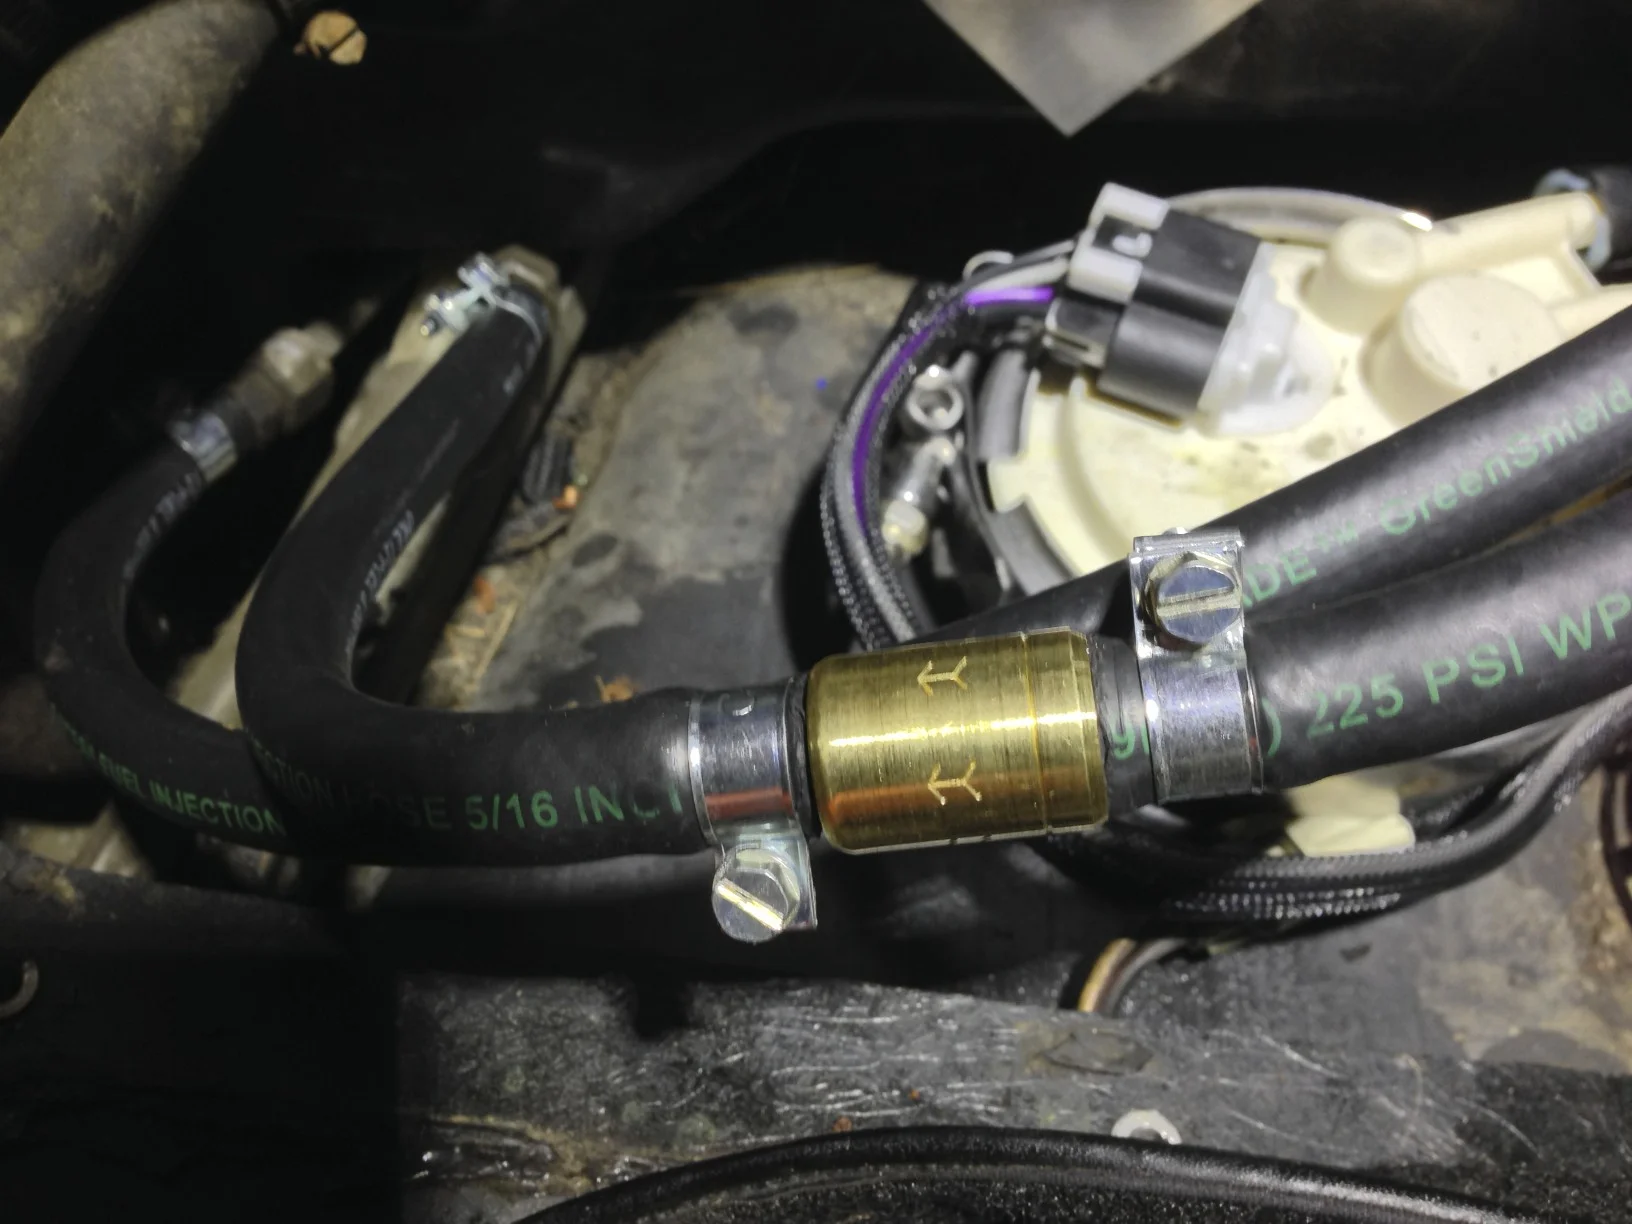
The check valve is installed on the feed line from the fuel pump to the hardline near the frame, with the direction of flow from the pump to the hardline. This is marked with an "F" on Houston's fuel pump/sender combo, with the other end of the hose connecting to the the innermost hardline near the frame. The check valve has an arrow on it indicating the direction of flow; installing it backward will keep the car from operating at all.
- Open the trunk and remove the carpet.
- Remove the access panel to the fuel pump.
- Cut the feed line from the fuel pump to the inner hard line. I cut mine about half way down.
- Slide two fuel system hose clamps onto the fuel line, one on each side of the cut.
- Insert the check valve into the two halves of the fuel line.
- Tighten the hose clamps on the fuel lines to secure the check valve.
That's pretty much it. It'll probably take more time to get to the fuel line than it will to actually install the check valve.
I first tried to cut the line with a sharp utility knife, but wasn't having as easy of a time as I would have liked. I wound up using some larger wire cutters, cut it easily and cleanly. Even though my fuel tank was empty from my recent fuel pump swap, there was still enough fuel in the lines form my brief power-up tests to cause gas to spill into the trunk. Be sure to have some rags handy; chances are your system will be under more pressure when you do this, and will likely spray gas around luggage compartment.
The hose clamps should be 5/16" fuel system style. These are solid band clamps that provide uniform pressure around the line, and are less likely to leak on high-pressure fuel systems or to damage the line as compared to the worm gear style clamps. They are easy enough to find at most auto parts stores.
That's pretty much it. I haven't had a chance to test it yet, as I'm starting on an EFI conversion soon, but I don't expect any trouble. The obvious thing to do is to check for leaks after pressurizing the system, but as long as the claps are tight there should be no problems.


Parts
- SMC 410 Check Valve, 5/16", high-pressure (the fuel system runs at ~80 PSI, so the higher the better), such as from US Plastics.
- Two (2) fuel system style hose clamps
Tools
- Knife or wire/bolt cutters to cut the fuel line.
- Socket wrench or screw driver to tighten the hose clamps.
- Philips screwdriver to remove the fuel pump access cover.