Removing the 3.0L Fuel Rails, Intake Manifold and Water Pump
Joe Angell
Now that my 3.0L engine was right side up again, I thought this was a good time to take apart the top and see what was under there.
Air Intake to Throttles
First on the list was to get the air intake out of the way. This is a hold on with three (3) 4mm hex screws. I screwed them back into the manifold after removing the plastic pipe so I wouldn't lose them. There's a gasket under the pipe, but my 3.0L gasket kit from DPI included a new one, so that won't be a problem when it comes time to reassembly everything.
The air intake hose to the throttles is secured with three hex screws requiring a 4mm hex wrench.
The throttle butterfly is visible once the hose is out of the way. The hex screws were placed back in the original holes so I wouldn't lose them.
Spark Plug Wires and Bracket
I had already removed the other brackets when I took off the valve covers, but there was still one left on top of the water pump. This came off easily by removing the two (2) bolts with an 11mm socket.
The spark plug wires pull straight out of their sockets, just like on the 2.8L engine. The design of the plugs themselves is a bit different, though, with a kind of rigged style to align and secure the in the holes. With the plugs out, I was able to remove them from the engine entirely.
Removing the two bolts holding the bracket in place.
Fuel Rails
The fuel rails had to come off next. Technically, I could have left them on until after I removed the manifold, but I wanted to take them off first, since there's a lot of stuff connected to them.
Rail Mounts
There are four (4) nuts with flathead slots in them at the corners. A more central nut holds the wiring harness to the manifold, and another towards the left side of the engine holding a cylindrical unit with a sensor of some sort. All six of these come of with a 10mm socket.
Harness and Sensors
A harness is attached to the rail, and is plugged into the injectors and a few related sensors. I had the option of unplugging the injectors and removing the harness separatelyl, or taking the harness out with the rail. I couldn't figure out how to get the connectors off the injectors. While they are similar to the ones used on the fuel system into the DeLorean, those were old and worn and pulled right off; these didn't seem to want to release. I decided it would be easier to just remove the harness and rail together.
The harness is connected to four other parts of the engine. Some Googling helped me figure out what some of these were:
- Thermotime Switch
Or at least that's what it's called in the DeLorean. Mounted on the top right side of water pump. - Coolant Temperature Switch
Mounted on the back of the right hand cylinder head. - A connector on a bracket mounted on the head (which I'd previously unmounted).
- Oil Pressure Sensor
I think, since it's in about the same place as on the 2.8L engine. Googling suggested it might be a knock sensor, I the location didn't seem right. Mounted lower down n the block near the timing chains on the left side.
The connector for the sensor on the block was the hardest one to get off. The connector has a clip similar to the ones used on the 2.8L engine, but on mine they had worn out and were easy to remove; the 3.0L was a real pain to get them it off. I wound up using pliers to push the ends of the wire clip out. I'm sure there's an easier way to do this, but I don't know what it is yet.
A 10mm socket removes the six bolts holding the fuel rails to the intake manifold.
The fuel injector electrical connectors are very similar to various connectors used in the DeLorean's fuel system.
Senors that need to be unplugged before the wiring rails can be removed.
Hoses and Injectors
There is a short hose going from the manifold to the vacuum switch (I think that's what it is) mounted to the rail assembly. This was easily pulled off.
Last was to pop the injectors out of the manifold. The were in there quite snuggly. I finally placed a pry bar under the injector body and pried it upward to pop it out. I had to do this to four o f the injectors to release the rail assembly entirely. After that, I could simply lift the rail out and move it to my workbench.
Finally, I screwed ally he bolts back into the manifold so I wouldn't lose them.
Removed fuel rails, injectors and harness.
The intake manifold with the rails removed.
Intake Manifold
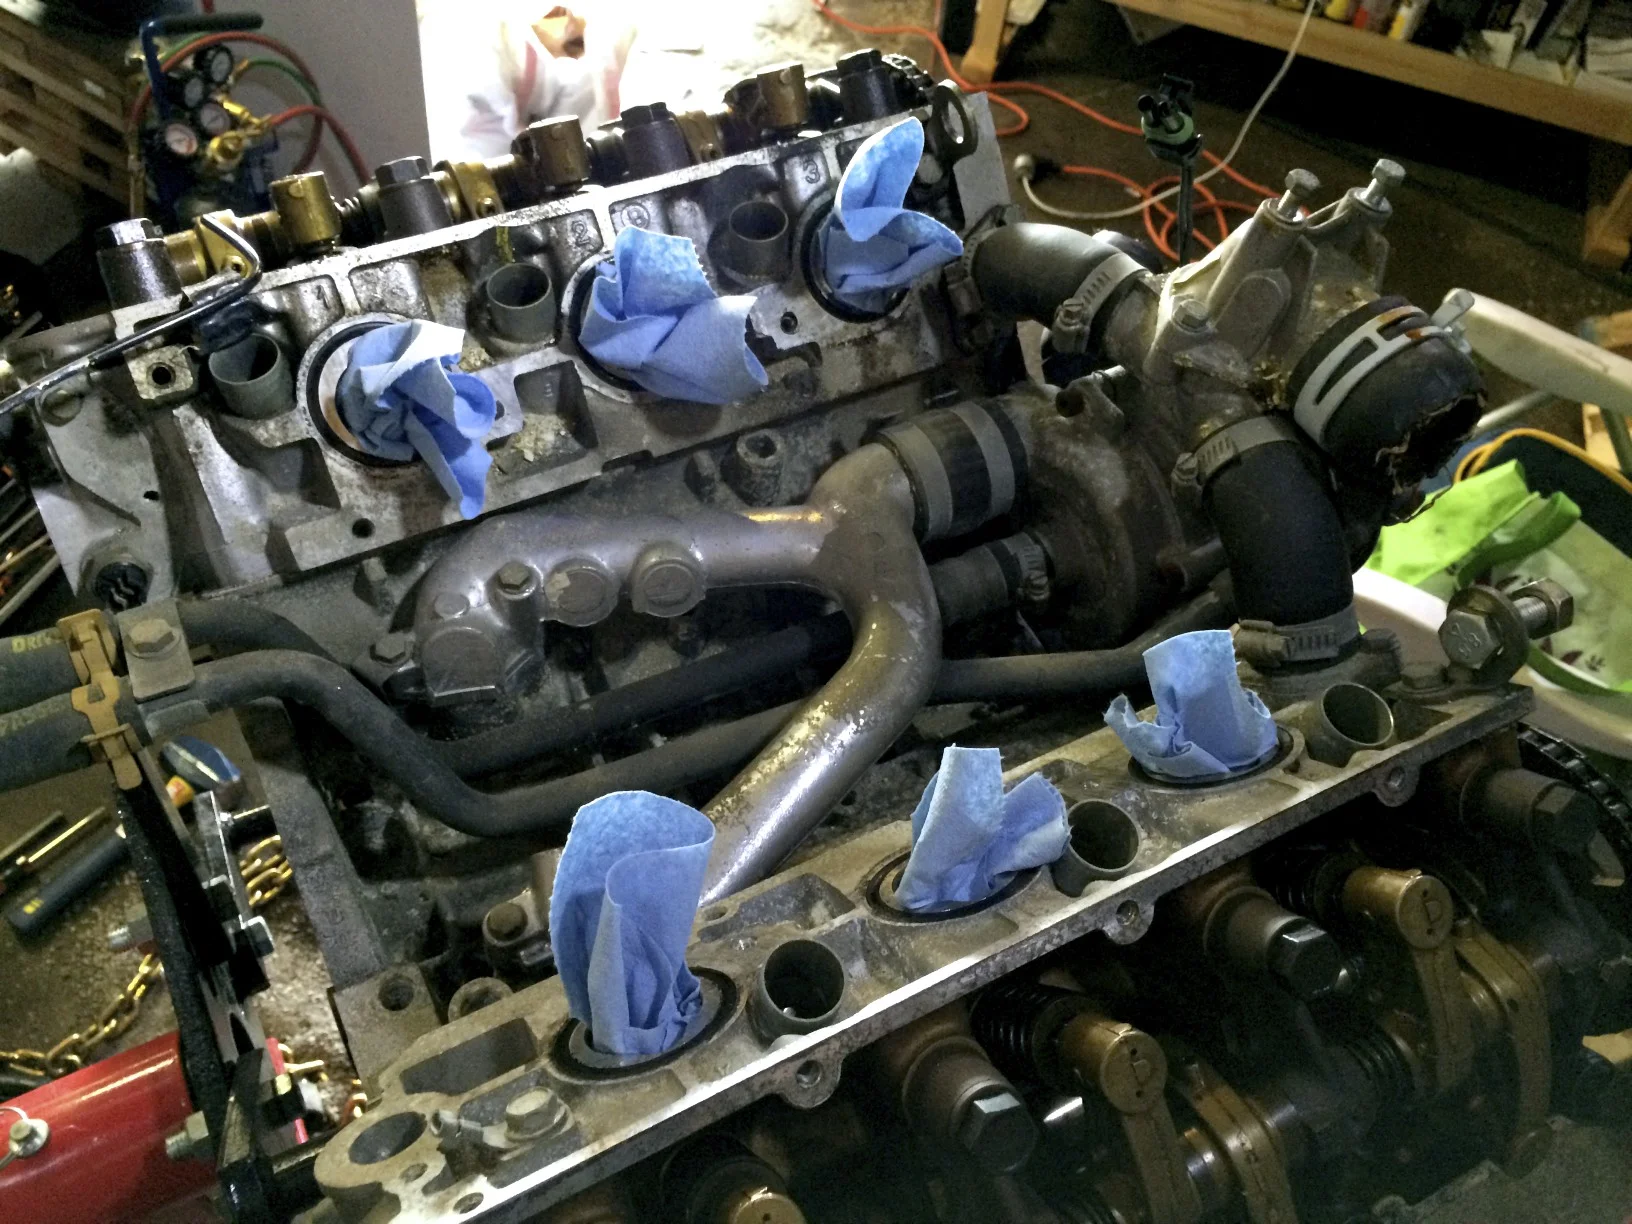
The manifold itself is held on with four (4) bolts, and they are removed with an 11mm socket. I then gently pried the manifold off with a pry bar and set it aside. I screwed the bolts back into the block so I wouldn't lose them. I stuffed the inlets to the heads with paper towels to keep debris from falling in. I then used a mini shop vac to remove any loose debris from the valley.
Removing the intake manifold's bolts with an 11mm socket.
Gently prying the manifold off the heads.
Inside the valley, under the manifold.
Removing the Water Pump, Y Pipe and Heater Lines
To get a good look at the valley, I need to remove the other components in there.
"Y" Pipe
The "Y" pipe is similar to the one in the 2.8L engine, but lacks the sensors. There are four (4) bolts, two long and two short, holding it to the block. These come out with an 11mm socket.
When I got the last bolt lot on the right side, some oil poured out where where the pipe met the block. There was still some oil and coolant in the engine when I flipped it over to replace the lower crankcase, and it seems it found its way into the coolant system. I'd have to take care of that later. In the meantime, I just screwed the bolts back into the block so I'd remember where they were.
Water Pump
Next out is the water pump. The three (3) bolts on the face of the engine are removed with 13mm wrench. One of the bolts is behind the serpentine belt pulley, and needs to be removed with an open end wrench. The bolt is long enough that I couldn't actually get it to clear the pulley, so I just left it was it was. The other two I screwed back into the block after removing the pump.
The short hoses on either side of the water heater need to be removed as well. I had trouble getting them off from the head side, so I did so from the pump side. After loosening the hose clamps, I used picks to pull the hoses away from the pump until they were finally released.
Three bolts hold the water pump to the engine , although one is blocked by the pulley.
Removing the Assembly
With everything detached, I should have just been able to lift out the water pump, "Y{ pipe and heater line assembly as a single unit. This didn't quite work; the "Y" pipe is slightly wider than space between the heads. I loosened the hose clamp on the hose connecting it to the water pump to remove it, and wound up tearing it instead. I did finally manage to twist it enough to pull everything out of the front of the engine.
Other Parts
As long as i was here and had the gaskets, I also removed the two hose mounts on the heads. There are four (4) total, two per head, and they are removed with an 11mm socket. You pretty much need to take the hose off before you can get a wrench on them.
Removing the hose mounts between the water pump and the head with an 11mm socket. Oil from the "Y" pipe can be seen in the background.