
Fuel Filter Replacement
Joe Angell
My next task after replacing the fuel pump was to replace the fuel filter. I vaguely remember doing this a number of years ago, but that's about it. It's theoretically simple -- four nuts in total -- but that assumes that everything isn't rusted in place.
John Spangler has a great article on replacing the fuel filter, which I referenced heavily when doing my own.
The Steps
In principle, the replacing the fuel filter is pretty simple:
- Raise the rear of the car.
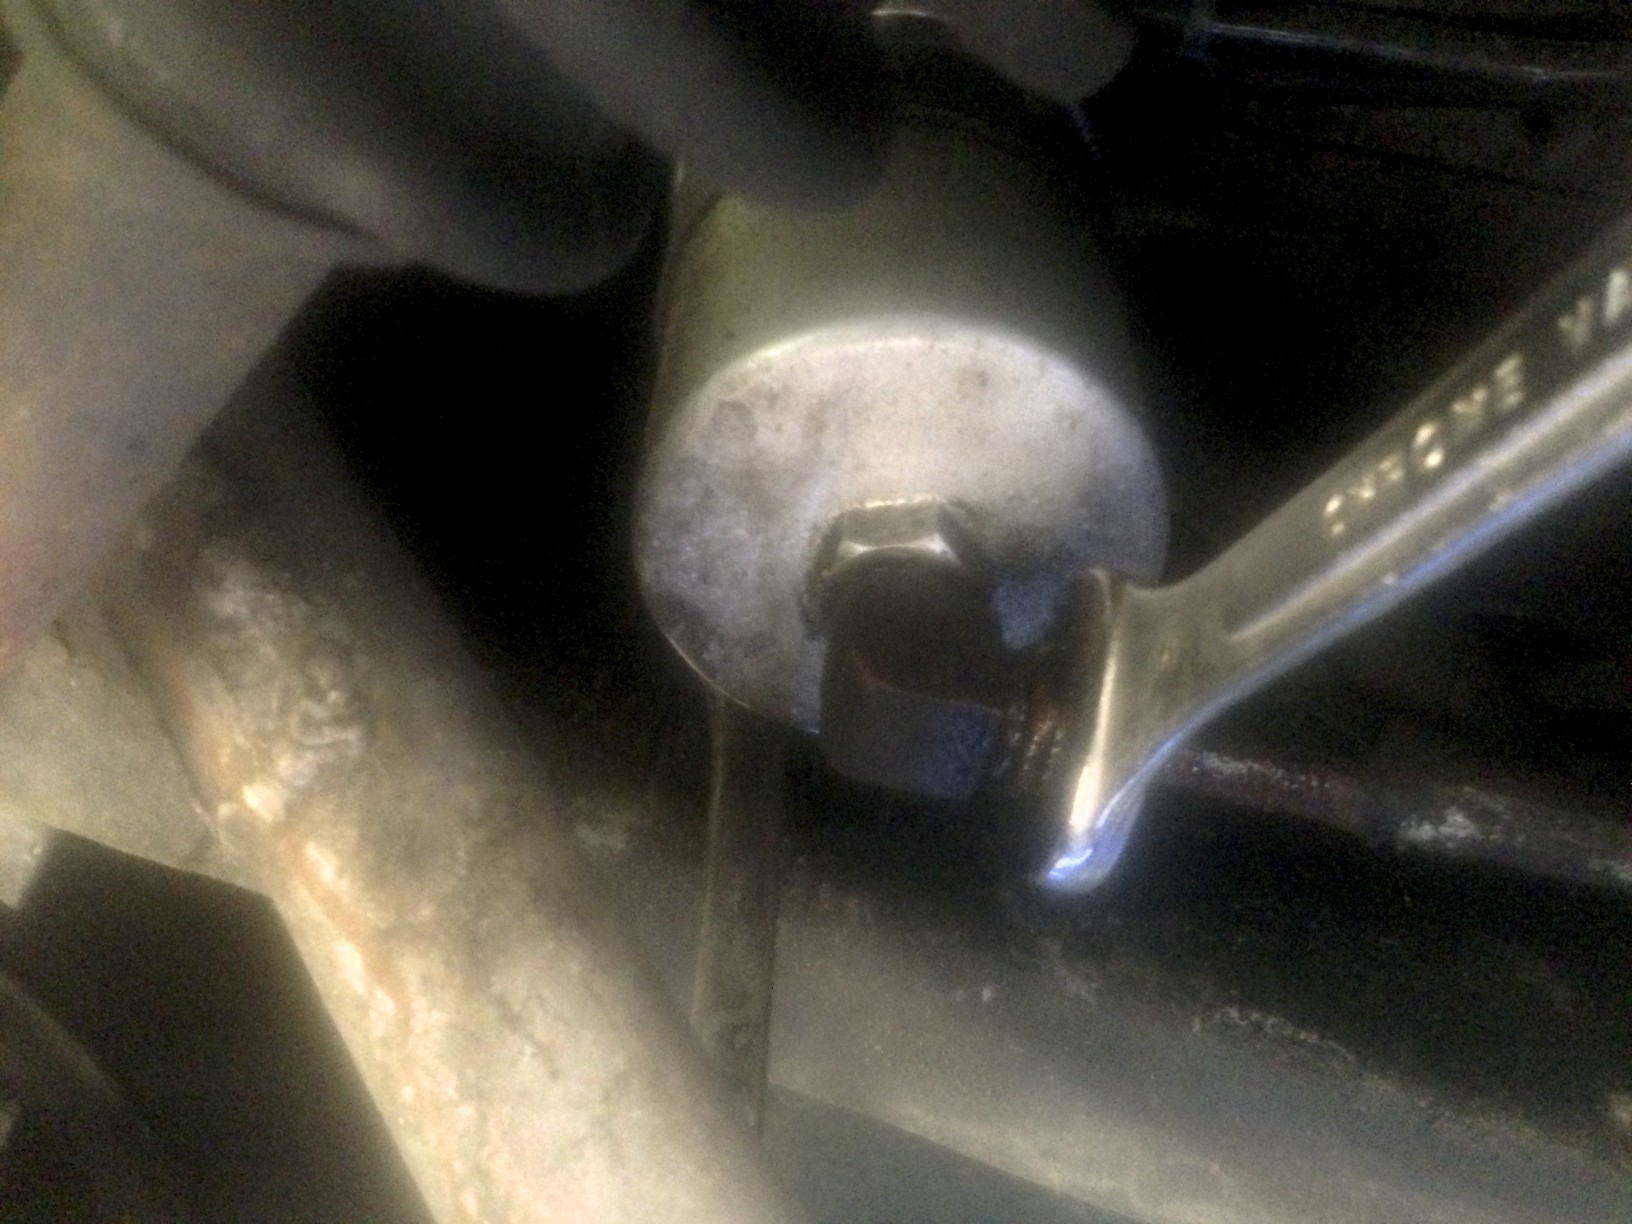
- Use a 19mm flare wrench to disconnect the hard line from the bottom of the fuel filter.
- Use a 10mm socket wrench and another 10mm wrench to remove the two bolts securing the bracket to the frame.
- Use an 18mm socket and a 7/8" wrench to remove the banjo bolt from the top of the fuel filter.
- Unscrew the elbow adaptor from the bottom of the fuel filter.
- Install the new fuel filter by following the steps in the reverse order.
In practice, it's more involved thank that.
Locating the Fuel Filter
The fuel filter is located under the rear of the driver's side rear of the car, on the "Y" part of the frame. Basically you need to get your self under the transmission from the back of the car, then look towards the driver's side, and you'll see the canister tucked up there with a hard fuel line coming off the bottom.
You need to raise the car pretty high to get access to it. I had previously built some pallets (aka "cribbing blocks") to hold the car up by the wheels when I was rebuilding the top of the engine. I got the idea from this site. They're made by simply screwing together cut two-by-fours. They're designed to be stackable, thus allowing me to raise the car to different heights. I like the pallets because they distribute the weight on the car's tires and provide a more stable surface than jack stands, in my opinion. For this, I raised the rear wheels by two pallets each, and left the front wheels on the ground.
To get the car this high up, I have two floor jacks: a low profile jack that fits under the frame to get the car up to the first level, and a higher jack to raise it up to the second level. If I need to go higher than that, I just put the jack on boards or put a piece of wood between the jack and the car. At some point I may buy a racing jack; the inexpensive jacks I use now require quite a few pumps to get the car up to height.
Disconnecting the Hard Line
The are four nuts to remove from the car: The hard line to the fuel system on the bottom of the fuel filter, the banjo bolt on the top that runs to the fuel distributor, and two nuts that secure a bracket to hold the filter to the frame.
The hard line nut was my first problem. It was rusted pretty solid. Actually, the bottom of my car had a lot of surface rust on it, which was surprising since I'd installed and cleaned various bits of that about a year and a half ago.
I used Kano Labs' Kroil, a professional-quality penetrating oil, to break free the rusted nut. I've also heard people have had good luck with PB Blaster, while WD 40 is not good for this sort of thing. I applied Kroil liberally on Sunday, Tuesday and Thursday, along with hitting it with a hammer to introduce vibration to allow the oil to work better and to try to break it free. I only spent a few minutes on it each time, but was finally able to get it free on Thursday morning.
When working on fuel and brake lines, it is very helpful to have a flare wrenches. These are kind of half way between a box wrench and an open wrench, with "teeth" that grip the back of the bolt for a more secure fit, while having a large opening that can fit over the line that the nut is on. These "teeth" keep the wrench from slipping and rounding the nut, which is definitely something you don't want to do on a hard-to-replace line like this. The flare wrenches I bought were also of a much higher quality than the cheap open/box combination wrenches I first tried to use for this.
This particular nut uses a 19mm wrench. Since the bracket holding the filter in place is made of relatively thin metal, you can't just crank down on the nut without twisting the bracket and possibly damaging the fuel line. I was able to fairly easily wedge a pry bar between the fuel filter and the frame to get this leverage and break the nut free.
Unmounting the Bracket
Once again, the bracket's two nuts were rusted into place. The nuts are actually attached to bolts that go through the frame. I again applied Kroil, whacked it with a hammer for a bit, and came back later to try to actually remove them. They came out pretty easily with a pair of 10mm sockets and a long extension for one of nut and bolt, although I wound up using a 10mm box wrench and a socket for the other one when the fuel filter got in the way of my socket extension.
Disconnecting the Hard Line
With the bracket off, I found that the hard line was tightly stuck in the elbow adaptor. I expected it to simply slide out, but I wound up having to grab the adaptor with vice grips and wiggling and pulling it and the line until I got it free, all while trying not to damage the line itself.
Once the hard line was disconnected, the fuel in the filter started draining onto the floor. I put an oil pan under it and went away for a bit while it drained out. My system was empty and depressurized from my recent fuel pump replacement, so I didn't have to worry about a lot of fuel spraying out.
Removing the Banjo Bolt
As with the other hardware, the banjo bolt was rusted to the top of the fuel filter. More Kroil and taps with a hammer helped remove the corrosion, and 18mm wrenches on the bolt and a 7/8" wrench on the filter should have gotten it free.
This time, though, I could not get the bolt to break loose. One problem was just getting leverage on the bolt -- with the bracket removed, the filter was hanging by the line to the fuel distributor. I clamped vice grips to the filter and used an 18mm socket, but couldn't get it to budge, even using a "scissor" like action of holding the handles of the two tools and squeezing them together to get more leverage.
After failing to get enough leverage and being too impatient to let the Kroil work any longer, I went up to the engine bay and used an 18mm socket to disconnected the line at the fuel distributor. I then removed the line and fuel filter from the car as one piece and brought it to the bench. I used vice grips to hold the wrench point on the fuel filter itself, and clamped the vice grips into the vice. I was then able to use a socket and a lot of force to finally brake the banjo bolt free. Banjo bolts are relatively fragile and I could have broken it doing this, but it.
Removing the Bracket
Removing the bracket should be a simple matter of loosening the bolt holding it to the fuel filter. Mine was rusted solid -- I didn't even try to loosen it. Instead, I clamped it in my vice and used the Dremel and a heavy-duty cut-off wheel to cut it in half, and replaced it with a new 2 1/4" long bolt.
Re-installation
A standard re-installation is simply reversing the above steps with the new filter. My kit also came with an adhesive pad that sits between the filter and the bracket to protect it, New M6 bolts, nuts and washers hold it to the frame, and new crush washers (including in the kit) are used with the banjo bolt.
I don't have pictures of this bit because I decided to move my fuel filter to the firewall so that it would be easier to access and less likely to get rusted like the old one did. Details of this setup will be in a future blog post.


Parts and Supplies
- Kano Labs' Kroil or some other penetrating oil like PB Blaster
- Fuel filter (part 100523). Mine came with Houston's fuel pump/sender module kit.
- Replacement 2 1/4" bolt, nut and washers to hold the fuel filter in the bracket.
- Replacement M6 nuts and bolts to secure the bracket to the frame.
Tools
- 19mm flare wrench for the hard line nut.
- 18mm socket and box wrench to remove the banjo bolt.
- 10mm socket and/or box wrench to remove the bracket bolts.
- 7/8" open wrench to hold the fuel filter while removing the banjo bolt.
- Pry bar or similar to wedge between the fuel filter and the frame to get enough leverage to remove the hard line nut.
- Vice grips if you need some extra grip when disconnecting the hard line from the elbow adaptor, or to hold the fuel filter in place of a wrench.
- Oil pan or similar container to catch oil that leaks out of the fuel filter after disconnecting the hard line.